Editing workshop
E N D
Presentation Transcript
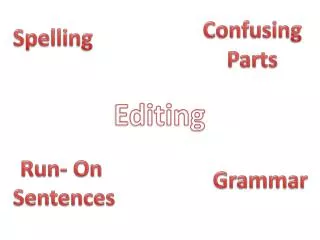
Editing workshop- Matt 18th October When editing a music video, the process of editing isn’t the same as an opening sequence or film. Matt taught us the order of editing during this workshop, telling us the general narrative and performance we want to convey when filming a band. First things first, performance cuts. When shooting on the film day, get the band to run through the entire song and film them at different angles. For example, do an entire shoot of the singer in a close, mid and wide, and do the same for the other band members. After obtaining enough footage, start filming the narrative cuts. Narrative cuts are just little bits of footage that add to the story of the band. Some of the narrative cuts we will likely film to break up the performance of the band will be things such as sitting on the sofa playing games, drinking or smoking, laughing with each other on set. After we have the clips saved to the cameras memory card and they have been moved onto the editing mac, we go through them and name them ‘Close up of guitarist right hand’ or ‘drummers top drums mid shot’ etc… This is to make editing easier as when we visualise the video, we are able to locate the exact thing we want and insert it into the video. On the shoot day, we will have an iPad that acts as a clapperboard. Clapperboards show the time and take if the video e.g. ‘take 5- 00:05:16.18’.
The Second thing to do when editing is sync the shoot footage with the time of the clapperboard. Matt told us to pick a random number after the clapperboard starts running so we can an exact match of numbers (if we start from 00:05:00 we might have to wait a second until the clapperboard starts running, so its easier to pick a random number). After the numbers on the footage on the left side of Adobe Premiere pro match the number of the clapperboard, we drag the footage onto the editing timeline beneath the two screens. Then we can right click the footage and rename it to whatever suits the footage best. If for some reason we cant see the number on the clapperboard clearly, we instead sync the audio of the song to the footage. To do this, we listen to the audio tracks high-hats or for the snare drum so smack, then press ‘i’ to clip the footage. We then do the same for the video on the right screen of Adobe Premiere pro, finding where the high- hat or drum is struck, and clip it. We then move the audio over the footage onto the editing timeline. However, this process takes much longer than the previous method. Matt’s number 1 pet-peeve was to be neat when organising clips into the bins as we edit. It makes it easier for us and other group members to locate certain shots or rough edits. Furthermore, bunch all of the same types of shots e.g. singer shots, guitarist shots etc, together because we can then pile them up and cut them more easily when editing on the timeline. Matt’s rules to editing: 1-Listen to the music and illustrate what you hear. Select all the clips you want and then cut back as it is quicker to remove things then search for something and add it in when slowing down editing. 2-Group shots together. One shot of guitar means you need a second shot of guitar afterwards to stop the video from looking random. Groups shots and cut quickly. Cutting quickly to begin with is easier to then slow down and edit the video. 3-Third and final rule is to follow movements of the band. For example, if the base guitarist looks down to the left, cut the next shot to the guitar neck.