Download
1 / 43
440 likes | 689 Views
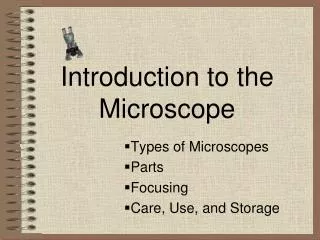
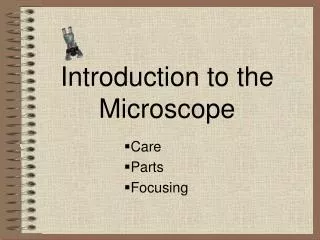
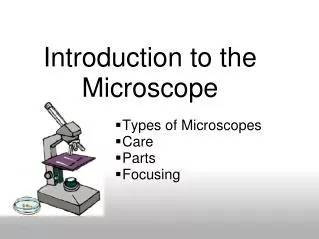
1. Introduction 2. The Optical Microscope. Jeffrey B. Bindell October 17, 2008. Some material taken from:http://www.me.ust.hk/~mejswu/MECH343/343om-01principles.pdf . An Overview of Microscopy. What’s Happening. MORNING SESSION WELCOME, 8:30 – 9:00 a.m.

E N D
1. Introduction2. The Optical Microscope Jeffrey B. Bindell October 17, 2008 Some material taken from:http://www.me.ust.hk/~mejswu/MECH343/343om-01principles.pdf
What’s Happening • MORNING SESSION • WELCOME, 8:30 – 9:00 a.m. • Dr. Jeffrey Bindell, University of Central Florida and • Florida High Tech Corridor Council (FHTCC) • Dean John Wiencek • University of South Florida, College of Engineering • The Optical Microscope, 9:00 – 9:30 a.m. • Dr. Jeffrey Bindell, University of Central Florida & FHTCC • The Scanning Electron Microscope, 9:30 – 10:00 a.m. • Kerry N. Siebein, University of Florida
COFFEE BREAK, 10:00 – 10:15 a.m. TEM - 10:15 – 11:00 a.m. Dr. Brenda Prenitzer, NanoSpective, Inc Internet Topics – 11:00 a.m. – 11:30 a.m. Dr. Jeffrey B. Bindell LUNCH, 11:30 a.m. – 12:15 p.m.
AFTERNOON ROTATION SCHEDULE12:30 p.m. – 3:00 p.m. Sessions 45 Minutes Each An Introduction to Vacuum and Vacuum Coatings Mr. Robert Tufts & Mr. Richard Everly, University Of South Florida Nanomaterials and Nanomanufacturing Research Center (NNRC) Hands-On Exposure to the Scanning Electron Microscope, Mr. Joshua Schumacher, University of South Florida (NNRC) TEM Internet Demo Dr. Yusuf Emirov, University of South Florida (NNRC) WRAP UP 3:00 – 3:30 p.m.
Introductory Comments on the Optical Microscope Jeff Bindell http://www.microscopeworld.com/MSWorld/parts.aspx
What we do with light and now electrons VOTE TWICE VOTE FOR BOTH!! • We look to the outer limits of the universe.. • We look at microbes • We look at Virus particles • We look at atoms • We look at POLITICIANS Obama McCain
We use .. OPTICAL MICROSCOPES SCANNING ELECTRON MICROSCOPES And ..
We can do all of this imaging because • We can bend light with transparent materials • And we can bend electrons with magnetic fields Both allow for imaging
The Lens Incident Ray Parallel Refracted Ray Notice that if the slab of glass is this, the incident and transmitted rays are almost the continuation of each other. Transmitted ray
Some Rays … Stronger bending toward the outside of the lens. Stronger bending toward the outside of the lens. Focus Focus Kirkpatrick/Francis – “Physics; A World View”
Simple Lens SPHERICAL SURFACE Kirkpatrick/Francis – “Physics; A World View”
Optics Reviewed How does the eye create an image for the brain to understand? The man on the bicycle appears upside down due to lenses, because lenses invert the image.
Optics(Continued) The diagram to the right illustrates how the microscope creates an image that the eye can process. A compound microscope uses a very short focal length objective lens to form a greatly enlarged image.
The Following Slides have been stolen, without apology, from Dr. Dempere - UF
If the ocular (eyepiece) lens has a magnification of 10x and the objective lens being used is 100x, the total magnification would be 1,000 x Total Magnification Example:
Images viewed through the eyepiece of compound microscopes will appear upside-down and backwards. Slide with the letter “F” F The letter “F” as it appears when viewed through the eyepiece Optics(Continued)
Ocular lens or eyepiece is used for viewing. • Revolving nosepiece contains objective lenses that are used to magnify the image in combination with the ocular lens. Important Microscope parts include :
Total Magnification: • The total magnification of the specimen being viewed is calculated using the ocular lens multiplied by the objective lens. • For example, if the ocular lens is 10x and the ocular lens is 45x then the total magnification would be 450x.
Other important microscope parts: • Stage- the location of the specimen to be viewed • Clips- utilized in holding the specimen in place • Lamp- typically a light source underneath the stage • Diaphragm- controls the amount of light allowed to pass through the specimen
Focus and Resolution Parts • Course-adjustment knob- is the larger of the two knobs. It is used in bringing the object into quick focus. • Fine-adjustment knob- is used for improving the clarity of the image, especially when viewing under high power.
Factors that influence the quality and size of image: • Focal Length • Size of sample • Type of sample • Quality of Microscope and lenses • Amount of light on the sample • Quality of sample
Depth of Field • "Depth of field" refers to the thickness of the plane of focus. • It is the vertical distance (from above to below the focal plane) that yields a useful image.
With a large depth of field, all of the threads can be in focused at the same time. • With a smaller or narrower depth of field, only one thread or a part of one thread can be focused, everything else will be out of focus. Depth of Field (continued)
Depth of Field Example: The series of images show how the depth of field can influence the appearance of an image. With narrow depth of field, only part of the image is in focus at the same time. With a large depth of field, the entire image is in focus at the same time.
Resolution • The amount of detail you can see in an image. • You can enlarge a photograph indefinitely using more powerful lenses, but the image will blur together and be unreadable.
Higher resolution Lower resolution Resolution
OBSERVATION MODES (A) STAINING Cell staining is a technique that can be used to better visualize cells and cell components under a microscope. By using different stains, one can preferentially stain certain cell components, such as a nucleus or a cell wall, or the entire cell.
Observation Modes (B) • Phase Contrast-is a type of light microscopy that enhances contrasts of transparent and colorless objects by influencing the optical path of light. • ThePhase Contrastmicroscope is able to show components in a cell or bacteria, which would be very difficult to see in an ordinary light microscope. Normal Microscope Phase Contrast
Observation Modes (C) Ibuprofen • Polarization- uses two polarizers, one on either side of the specimen, positioned perpendicular to each other so that only light that passes through the specimen reaches the eyepiece. Estradiol
Observation Modes (D) Mitosis in hamster • Fluorescence-this technique is used to study specimens, which can be made to fluoresce. Endothelium Cells
Advantages of Using Optical Microscopes • Inexpensive • Easy to learn and operate • Magnification acceptable up to 2,000 times • Very sharp plane of focus • Small and portable
Expensive Cheap** ** If you can find one.
What can you do with it?? • Standard Imaging • Get some high detail images of things of interest – like bugs, microbes (the bigger ones) and pond scum creatures.
This is on your disk AMAZINGMICROLIFE Created by Shari Waters for The Orlando Science Center
GREEN PROTISTS Cosmarium
ROTIFERS Testudinella MOVIE
ON THE DISK Classroom Activities Experiments Ideas MICROSCOPY Presented By The Florida High Tech Corridor Council and techPATH Education Consortium ~ This Module was Prepared by Carmen S. Austin Science Teacher School District of Hillsborough County Tampa, Florida