Download

1 / 18
180 likes | 379 Views
“The important thing is not the camera but the eye.” – Alfred Eisenstaedt. Exposure. ISO, Aperture, and Shutter Speed The Exposure Triangle. Exposure Triangle. ISO. Sets your camera’s sensitivity to light Lower ISO (50, 64,100,200) are less sensitive to light

E N D
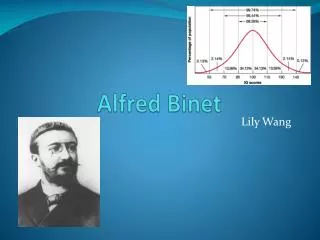
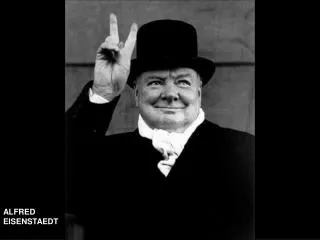
“The important thing is not the camera but the eye.” • – Alfred Eisenstaedt
Exposure ISO, Aperture, and Shutter Speed The Exposure Triangle
ISO • Sets your camera’s sensitivity to light • Lower ISO (50, 64,100,200) are less sensitive to light • Higher ISO (400,800,1600,3200) are more sensitive to light • Your ISO setting determines which aperture and shutter speed settings are available for you to use
ISO • Stands for International Standards Organization. This refers to a film’s sensitivity to light. • Light sensitivity is referred to as film speed. Common speeds are: • ISO 50, 64, 100, 200, 400, 800, 1600, 3200. • ISO 800 and higher are better for low-light situations • ISO 200, 400 are better for cloudy or indoors • ISO 100 & 200 can be used indoors with bright lighting
Smaller ISO numbers indicate a lower sensitivity to light and requires more light for successful exposure, larger ISO indicates a higher sensitivity to light and requires less light for exposure
Higher ISO (400,800,1600,3200) are more sensitive to light ISO 800,1600, 3200 will show a lot of noise/grain in your photos. So you want to make a choice on whether you want to capture that photo and sacrifice quality or if you have a tripod available you can shoot on ISO 200 and use a slower shutter speed with getting the grain.
Activity • 1. Pick a partner in class. You will then take a headshot of your partner both outside and inside (in front of a window). You will take a total of 12 photos. (you will have 20 minutes max) • 2. Take your first photo of your partner with your ISO set to auto. Then change your ISO to the next setting and take another picture. You will continue to change the settings and take a photo for each one until you have taken a photo at each ISO setting. • 3. Upload the photos to your folder in the O:drive. Rename each photo with the ISO setting you used. • 4. Then in Adobe Bridge, put each of the photos into a contact sheet. Save the contact sheet into your folder in the O:drive and copy an paste into the turn-in folder with your name on it.
ISO: How does it relate to aperture and shutter speed? • Each jump in ISO results in doubling the sensitivity to light. So ISO 400 is 8 times as sensitive to light as ISO 50! • You’ll also notice that ISO numbers are doubled. For instance, 50, 100, 200, 400, 800, etc. • Since ISO is the sensitivity of your sensor to light, then choosing the correct ISO for the situation is crucial. • If you’re in a dimly lit location, you would want to choose a higher ISO (800-1600) so that your shutter speed wouldn’t be too slow. This is especially important if you don’t have, or can’t use, a tripod. • By sacrificing a little image quality, you can now take an image you normally wouldn’t be able to without camera blur due to movement.
Aperture • What is it? Definition: Aperture is a hole or an opening through which light travels • Aperture serves two purposes: controls the amount of light coming through the camera and controls the depth of field. • The main function of a camera lens is to collect light. The aperture of a lens is the diameter of the lens opening and is usually controlled by an iris. The larger the diameter of the aperture, the more light reaches the film / image sensor • Your lens aperture is like the “eye of the camera,” or more precisely, your pupil. • When you go outside your pupils contract blocking out more light. On the other hand, when you go indoors, your pupils must dilate to allow more light to enter your eye. • The lens aperture isn’t automatic like your eyes. You need to tell the lens, through your camera settings, to allow more light in or to block more light.
Aperture (“F-stops)” • The aperture of your lens is just one of three elements to the “Exposure Triangle” • Adjusting your aperture also determines your depth of field • here’s the easiest way to remember f stops: The smaller the number, the less of your photo will be in focus. The bigger the number, the more of your photo will be in focus. • More depth of field (Landscape images) = Large aperture number f/8, f/11, f/22, f/32, etc. • Less depth of field (Bring more focus to your subject and blurring the background) = Small aperture number f/1.4, f/2.8, f/5.6, etc. • If you need more light, choose a smaller f number. “Stopping up” the aperture, or opening the aperture, will allow more light into the camera. (Smaller f/stop number). • if you need less light, choose a larger f number. “Stopping down” the aperture, or closing the opening, will block more light from entering the camera. (Larger f/stop number).
Aperture and Depth of field F/ 2.8 F/22
Shutter Speed • “In photography, a shutter is a device that allows light to pass for a determined period of time, for the purpose of exposing photographic film or a light-sensitive electronic sensor to light to capture a permanent image of a scene.” • The camera’s shutter is always closed until you press the shutter release. This prevents light from entering the camera and hitting the sensor until you’re ready to capture an image. • An open shutter allows light to hit the sensor, creating an image. Therefore, the longer the shutter is left open, the more light enters the camera. The less time the shutter is open, the less light enters • How is shutter speed measured? • If you’re taking pictures outdoors on a nice sunny day, you want a faster shutter speed. This will allow less light in giving you the correct exposure. • On the other hand, if you’re taking pictures indoors, or outdoors with less light, you need a slower shutter speed to allow more light to enter the camera. • Shutter speeds are represented by fractions of a second; 1/30, 1/60, 1/80, 1/100, etc. This is usually shown by just the second number. For example, “500″ means 1/500th of a second. Shutter speeds of 1 second or longer are represented with a ” after the number. For example, 30″ represents a 30-second exposure. • There’s one more symbol you might see relating to shutter speed, “B”. This is the “Bulb” setting, which allows you to keep the shutter open as long as the shutter button is pressed. • How do you adjust the shutter speed? • On digital cameras you can adjust the shutter speed by using the cameras menu system and dials
Go to www.photonhead.com/simcam • Click on the shutter and aperture link • Experiment with different shutter and aperture settings to get a correct exposure in at least 3 different combinations