Download
1 / 7
70 likes | 258 Views
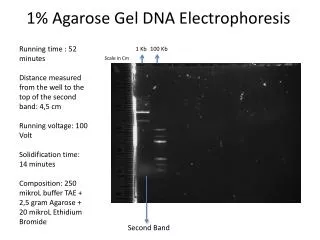
DNA Fingerprinting Agarose Gel Electrophoresis Student Instructions. Agarose Gel Electrophoresis Step 1. Use the pipettor to add 4 µl of migration dye from tube "D." Make sure to change tips after each use. DNA Fingerprinting Student Instructions. Agarose Gel Electrophoresis Step 2.

E N D
DNA FingerprintingAgarose Gel ElectrophoresisStudent Instructions
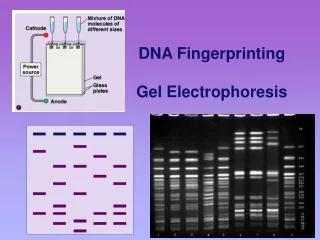
Agarose Gel Electrophoresis Step 1 • Use the pipettor to add 4 µl of migration dye from tube "D." • Make sure to change tips after each use. DNA Fingerprinting Student Instructions
Agarose Gel Electrophoresis Step 2 • Using a pipettor set at 20 µl, transfer the sample into the appropriate lanes of the gel. • Make sure to change tips after each use. DNA Fingerprinting Student Instructions
Agarose Gel Electrophoresis Step 3 • After the samples are loaded, slowly fill the gel box with the 1X TBE buffer. Make sure the gel is completely covered. • If there is not enough buffer, add distilled water to finish covering the gel. DNA Fingerprinting Student Instructions
Agarose Gel Electrophoresis Step 4 • Turn the switch on the power supply to "Off" before connecting the electrophoresis chamber. • Place the lid tightly on the chamber and plug the electrical leads into the recessed output jacks of the power supply. • Plug the red (+) lead into the red jack, and the black (-) lead into the black jack. DNA Fingerprinting Student Instructions
Agarose Gel Electrophoresis Step 5 • Select the desired voltage on the power supply. A voltage of 150 will permit the electrophoresis run to be completed in about an hour. DNA Fingerprinting Student Instructions
Agarose Gel Electrophoresis Step 6 • Turn the power supply switch "ON." The blue migration dye should move toward the positive electrode (red). If it is migrating toward the negative electrode (black), turn off the power supply, remove the lid, turn the gel tray 180o, replace the lid, and turn the power supply "ON." DNA Fingerprinting Student Instructions