Download

1 / 78
780 likes | 810 Views
Step-by-step instructions on setting up a corporate web application on a live server including software installation, database setup, and configuration details. Learn how to install JDK, Tomcat, and configure the necessary files for a successful deployment.

E N D
Machine Configuration for Live Server • Operating System for installing Live Application should be Windows XP or Windows 2003 Server . • Internet Connection must be there. • Static IP address required for outside office login and this address should be configured on firewall. • Port should be open either 8085 or 1467 • Check JAVA application is installed or not. ( e.g. Go to Start >> Settings >> Control Panel >> Add/Remove Program >> search J2SE Development Kit or J2SE Runtime Environment ) • If this is installed, then removed it .
Corporate web installation steps: Part 1: Installation on live Server System. Part 2: Installation of Parent Database (e.g Webdata) at Database Server.
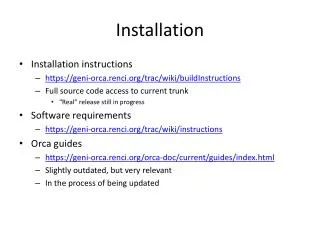
Part 1: Installation on Live Server Machine • Step1 : Download corporate.zip and setup.exe from http://www.shilpisoft.com under download option on the desktop and extract there . • Download setup_full.zip form www.shilpisoft.com\sunil\setup_full.zipon the desktop and extract it. Extracted files from Corporate.zip
Run jdk.exe. • For running JDK , Following steps have to follow : Tick here
Change the path here as C:\jdk1.5.0_09 Click here to change the path
Changed path Click on Next
For Setting the path of J2SE Runtime Environment ; path change To as C:\jre1.5.0_09 Default Path Click here to change the path Changed Path Click on Next
To Complete the Installation Process of JDK Setup , Click on finish. Click on Finish
Run Tomcat.exe from corporate folder , following steps have to do : (here you have to uncheck the Documentation ). Un-Tick Documentation Click on next
Destination folder path should be C:\Tomcat 5.5 Click on Next Change this path as c:\tomcat 5.5 Changed path
To Configure the Apache Tomcat , give the port no: 8085 or 1467 User Name : admin Password : 12345 (optional) Enter port Enter user name Password Click on next NOTE : While installing tomcat, enter the port 8085 or 1467.
Here, the path of JREL.5.0_09, which has already installed in the system, should come automatically as : C :\jre1.5.0_09. If this path is showing , click on Install otherwise browse the location of jre1.5.0_09 folder: Click on Install
Click on Finish to complete the Process. Click on finish
Step6 : Run setup.exe which is extracted from setup_full.zip then a folder named capexweb will be created in C: Drive. 1. Run setup
Step7: Now run setup.exe, which was downloaded from website . 1. Click on run
Click here to change the path if installing on other drive (other than c drive) and copy capexweb folder from c drive to d 3. Click on next
After Successfully Installation of Jdk & Tomcat , 3 Folders i.e. jre1.5.0_09, jdk1.5.0_09 And Tomcat 5.5 will be created in C: Drive. • Copy web.xml file in c:\tomcat5.5\conf \ and capexweb.xml file in c:\tomcat5.5\conf\Catalina\localhost, from xml folder which was extracted from corporate.zip .
Change some entry in C:\capexweb\capexweb\capexmain_middle.htm. Open this file with notepad >> <tr><td style=color:#114171>Shilpi Computers Limited</td></tr> <tr><td style="font-size:7pt; color:#6E99D4">502 Prakashdeep Building 7 Tolstoy Marg New Delhi - 110 001 Ph Nos : 91-11-43500600 eMail : shilpitech@vsnl.com</td></tr> <input type="hidden" value=“SHILPI" name="dfcode"> <input type="hidden" name="dfparentdb" value="WEBDATA"> <input type="hidden" name="dfparentip" value="111.111.111.100"> • Change this values according to your company name address and contact details. • Here, in place of dfcode value i.e. “SHILPI” give the Comp. ID given in license file . • In place of dfparentdb value i.e. “WEBDATA” give the database name which is created as parent type in Database Server . • And in place of IP : Put IP address of Database Server in which Parent DataBase has been configured. • Inform to license Dept. to get License File of configured Database with Order No, Company Name and Database Name. • Copy License file c:\capexweb I.e shilpi_capexweb.lic which will be give by the license department.
Part 2: Installation of Parent Database(e.g Webdata) at Database Server . • Step1: Create a Parent Database • Case 1: If there is a single database at server then no need to create webdata , use existing database as a parent e.g NSE9798: • Step1:Configure exiting database as parent database as system utilities >> web live setup >> database configuration.
Step 2: Connect parent database as: system utilities >> web live setup >> database attach (Parent). Here Connect and add.
Step 3: Create a Branch as “Admin” in Master >> Branch Maintenance and active that branch.
Step 4: Now update branch in Parent Database as: utilities >> system utilities >> weblivesetup >> Auto update common user (For branch ,Sub Branch, client & RM/TL). • Select branch and Database name then Proceed. Select Branch Select database name Click on Proceed
Step 5: Start tomcat services and login web live application to ADMIN (for Example : http://131.108.2.100:8085/capexweb/capexweb/) Enter user id (i.e. admin) Enter password Default( 12345) Click on login
Step 6:Run 'DbMaintenance' as shown below: 1. Click on admin 2. Click on DB-Maintenance
Case2: If more than one databases exist : • Create a new database i.e. Webdata. • Follow the following Steps to create “webdata” as a parent database at Database Server. • Step1:To create parent database "webdata“, follow the following steps: • Go to start. • Select Program. • Select Oracle-OraHome92. • Select Configuration and Migration Tool. • Select Database Configuration Assistant.
Following window will open: 1. Click on Next.
1. Tick on Create a Database 2. Click on next
3. Select General Purpose. 4. Click on Next.
5. Enter Database name(i.e. Webdata). 6. Click on Next.
7. Select Share Server Mode. 8. Click on Next
11. Enter same password in each field (e.g. s). It is mandatory. 12. Click on Exit .
STEP2: IMPORT BLANK DATABASE • Open liceclient .exe . Click on Download to download Blank database. For it, follow the following steps 1. Click on Downloads
2. Select Product id 3. Tick on Blank Database 4. Click on Download Now 5. This message will display. Click on Ok
Now, extract downloaded file(capdat.zip) from D:\capex10. We will get two file capdat.log and capdat.dat. Downloaded file Extracted Files


![[Worldwide] Live Demo 1.0 Installation via USB SOP for A80](https://cdn1.slideserve.com/2921002/worldwide-live-demo-1-0-installation-via-usb-sop-for-a80-dt.jpg)