Exploring Cell Structures and Functions Through Practical Experiments
380 likes | 503 Views
In this hands-on series of practical lessons, students will investigate the similarities and differences between animal, plant, and microbial cells. They will learn to identify key cell structures, such as the nucleus, cytoplasm, cell membrane, cell wall, chloroplasts, and vacuoles using microscopes and stains. Additionally, students will explore the role of yeast in fermentation, its application in alcohol production and bread making, as well as antibiotic production. Through these experiments, students will grasp essential concepts in cell biology and understand various real-world applications.

Exploring Cell Structures and Functions Through Practical Experiments
E N D
Presentation Transcript
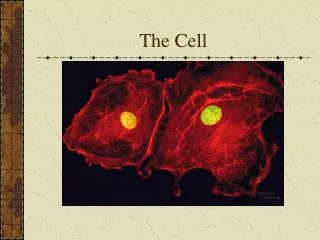
Unit 1 Topic 1: Cells Practical’s
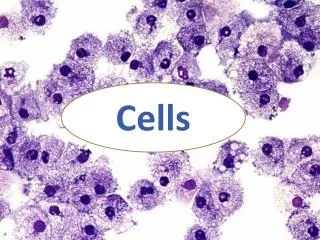
Looking at cells Practical 1
Learning objectives: • By the end of the lesson you should be able to • State the similarities and differences between animal, plant and microbial cells. • Describe the function of cell structures namely the nucleus, cytoplasm, cell membrane, cell wall , chloroplast and vacuole.
Introduction 0.1 mm Stains • Cells are usually less than _______ in size and so are too small to see without a microscope._________ can also be used to show up the cell structures more clearly. Aim • To look at a variety of cells in order to identify cell structures
Method • Your teacher will show you how to present wet slides of a variety of plant and animal specimens using different stains as appropriate. These will include: • Cheek Epithelium • Elodea • Onion Epidermis • Rhubarb Epidermis • Look at each specimen down the microscope and use high magnification to see detail of structures in each cell. • Complete a results grid for each specimen observed
Cell wall Vacuole
How are the structures in some cells made easier to see? Which structures can be identified in the various cells? Conclusion Evaluation • The cell wall, • Cell membrane • Cytoplasm • Nucleus • Chloroplast and Vacuole • Using stains and high magnification
Fermentation Practical 2
Learning objective • By the end of the lesson you should be able to: • Describe the commercial and industrial uses of cells in: • Alcohol production
Introduction • Yeast can use sugar as a food source in anaerobic conditions. Under these conditions it will carry out fermentation. Aim • To demonstrate the changes that take place in a fermenter.
Method • Your teacher will set up a fermenter containing sugar and yeast solution. Any gas produced will bubble through lime water. • Measure and record the temperature and pH of the sugar and yeast solution. Smell the contents of the fermenter and note the appearance of the lime water. Record this information in the results table. • After 24 hours, measure and record the temperature and pH again. Smell the contents of the fermenter and examine the lime water. • Record the results in the results table.
ConclusionWhat is produced during fermentation as shown by the tests? Ethanol/Alcohol What does this evidence support? The equation for alcoholic fermentation cloudy Carbon dioxide Carbon dioxide increased Heat energy
Evaluation • How can this experiment be improved? • By including a control ( a fermenter set up without yeast), to show that it is the yeast which is causing the changes.
Rising Dough Practical 3
Learning Objectives • By the end of the lesson you should be able to: • Describe the commercial and industrial uses of cells in Bread making
Introduction • Yeast can use sugar as a food source in anaerobic conditions. Under these conditions it will carry out fermentation. • Yeast is used in bread making __________________________________________________ To produce the carbon dioxide which makes dough rise
Aim • To show the effect of yeast on dough
Method • Weigh out 20g of the flour/sugar mixture onto each of 2 small pieces of paper. • Measure out 20cm3 of water into 1 beaker and 20cm3 of yeast suspension into another beaker. • Add one portion of flour to the water and the other to the yeast suspension and stir with stirring rods. • Pour the dough into 2 labelled plastic beakers. Record the volume and put the cylinders into a water bath set at 30oC. START THE STOPCLOCK. • Record the volume of the dough at 5minute intervals for 30mins
Analysis • Draw one line graph to show both sets of results Height of dough (mm) Time (Minutes)
Conclusion • What conclusion can be drawn from the results? • Yeast causes the dough to rise • What is varied in this experiment? Only the presence of yeast
Evaluation Same mass of flour and sugar Same volume of liquid Kept at the same temperature Left for the same time • What steps are taken to make this experiment Reliable, Accurate and Valid?
Antibiotics Practical 4
Learning objective • By the end of the lesson you should be able to: • Describe the commercial and industrial uses of cells in: • Antibiotic production
Introduction Prevent the growth or kill bacteria • Antibiotics are chemicals which can ______________ ____________________ • Many antibiotics are produced by fungi. • Discs of paper can be soaked in different antibiotics and different strengths (concentrations of antibiotics) • Bacteria can be grown on _________________________ Agar is a jelly made of seaweed which has food added to it that bacteria can use. • Cloudy areas on the agar show where bacteria are growing. • Sterile technique must be used to prevent contamination by disease causing bacteria and to prevent the spread of the bacteria that are being grown. Nutrient agar in a petri dish
Aim • To show the effect of different antibiotics on the growth of a bacterium
Method 1. Your teacher will spread bacteria from the culture onto a nutrient agar plate using sterile technique. 2. Discs of Streptomycin and Penicillin are placed onto the surface of the plate as shown in the diagram. 3. The plate is taped up, labelled and incubated at 37 oC for 48 hours. 4. Examine the plate and draw its appearance
Results • Conclusion • What does the clear agar show? • That the antibiotic has prevented the growth of the bacterium. • What is the effect of the penicillin on the growth of the bacterium? • Penicillin _____________ the growth of the bacterium. • What is the effect of streptomycin on the bacterium? • Streptomycin ___________ the growth of the bacterium has no effect on INHIBITS
Evaluation • What control should be set up in this experiment? A plate containing the bacterium and discs without any antibiotics
Bacteria and Milk Practical 5
Learning objectives: • By the end of the lesson you should be able to: • Describe the commercial and industrial uses of cells in: • Yoghurt production
Introduction Bacteria will start to grow “sour” • When milk is kept at a warm temperature ___________________________ and turn it _________ _______________________ • Some types of bacteria will do this and ___________________________________ • UHT milk has been _____________________________ __________ it is sterile Because of acid production Turn the milk into yoghurt Heated to high temperatures to kill all the Bacteria,
Aim • To show acid production by the action of yoghurt bacteria on milk
Method • Add 10cm3 of UHT milk into each of two clean test tubes labelled A and B • Add 1cm3 of yoghurt bacteria to tube A and 1cm3 of sterile water to tube B • Incubate the tubes at 30oc for 24 hours • Examine the tubes and record the appearance in your results table • Test the pH of each tube with universal indicator and record your result.
Conclusion • The bacteria cause the pH to fall, become more acid • What is the effect of the bacteria on the pH of the milk?
Evaluation • How could this apparatus be used to show how temperature affects the process? • Set up identical test tubes with milk and yoghurt bacteria • Incubate at different temperatures • Compare appearance and pH