Download

1 / 13
130 likes | 152 Views
Learn from Oklahoma State University expert Jeff Edwards on how to accurately assess wheat freeze injury in your fields using simple tools and techniques. Discover how to identify damaged wheat heads, assess the extent of the damage, and determine potential yields. Ensure you check every field carefully to account for factors like variety, planting date, and management practices that can influence the impact of freeze injury on your wheat crop.

E N D
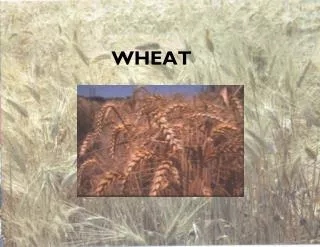
Assessing Wheat Freeze Injury Jeff Edwards Oklahoma State University
Tools you will need • Publication C646 Spring Freeze Injury to Kansas Wheat • http://www.oznet.ksu.edu/library/crpsl2/C646.PDF • OR Google the phrase “spring freeze injury to kansas wheat” • Utility knife or box cutter • Magnifying glass
Looking at smaller wheat • Generally the head is dead or fine – no in between • Also important to look at the nodes to see if they are split or brown-colored • A damaged node now will likely mean lodging later on
Start by splitting stems • Select 10 – 20 tillers at random locations • Don’t just split the big tillers • Secondary tillers might still be viable even if main tillers are dead
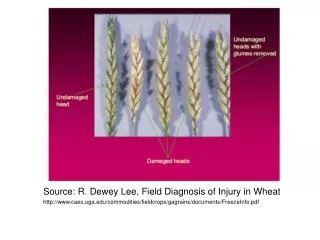
Damaged wheat head - Notice white-colored glumes and awns - This head is a complete loss Healthy wheat head
Healthy wheat head Damaged wheat head - Notice white-colored glumes and awns - This head is a complete loss
Larger wheat Large wheat/tillers can have partial head sterility or complete losses The heads to the right are only injured on the tip and will fill grain in the remainder of the wheat head Depending on the amount of time that has passed, you may have to look at the anthers to determine the extent of damage
Examining anthers Florets in the center of the head should be the most advanced, so examine these first Peel back the glumes until you find the anthers at the base of the floret. This can be tricky and you will likely need a hand lens. Healthy anthers (as shown in the picture on the right) should be green in color and turgidDamaged anthers will be yellow and shriveled and will not pollinate.
Healthy anthers Injured anthers
Healthy anthers Injured anthers
Healthy anthers Injured anthers
Check every field!! • Variety, planting date, and management will all affect maturity • More advanced wheat will have more damage (e.g. Overley below) • Some wheat may have only partial damage (e.g. Fuller below) • A few days difference in maturity can have a huge impact on freeze injury
Check every field!! • In some cases, secondary tillers may still be viable • If favorable weather occurs, these can still produce some yield