Download
1 / 53
530 likes | 573 Views
Learn to manage, create, and utilize interactive resources for engaging classroom activities with interactive whiteboards. Explore various existing resources and tools to enhance student learning experiences.

E N D
Creative Use of Interactive Whiteboards Brendan Routledge Suffolk Education Consultants brendan@suffolkeducationconsultants.net
In this course we will… • know how to manage and configure your board • be able to create interactive resources for use in the classroom • explore existing and ready-made resources available to teachers • provide ideas which your school needs to create engaging classroom activities
“The fulcrums for learning are the mouth, ears, hands and eyes. Yet up till now investment in ICT as given us a silence, a strange spatially challenging interface using a mouse and some text. Around school networks – which have cost up to £100,000 – runs text, served mainly in silence, to many learners. We know that many pupils learn best through an interplay of image, sound, activity and movement. Pupils interact with up to five hours of visual media each day and are experts at decoding multimedia information rapidly…… ….Certain learners who are ‘good with text’ have the keys to most learning opportunities with the old and the new tools. But what price is paid and what unfairness is present for those who prefer to learn in a more diverse and creative way?” New Tools for Learning – John Davitt
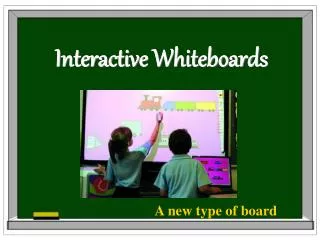
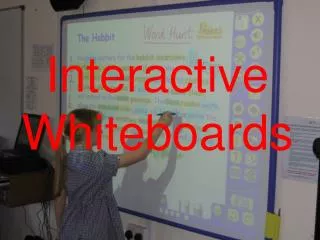
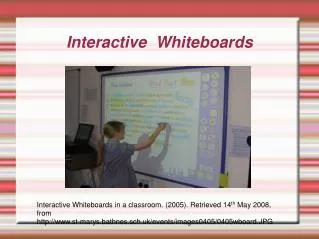
What is an interactive whiteboard? • An interactive whiteboard is a large touch-sensitive board connected to a digital projector and a computer. • The projector displays the image from the computer on to the board. • The computer can then be controlled by touching the board either with the finger or with a special pen. • There are many different makes of IWB on the market and they all operate slightly differently from one another.
What is an interactive whiteboard? • The IWB will have a design area to create teaching materials which can be prepared before the lesson and which can include text, images, video, audio. You can move through these materials at your own pace. • Pens and highlighters will be available to allow you to write on the board (some boards let you write with your finger). • IWB software will include interactive activities where pupils can e.g. ’drag and drop’ text and pictures for sorting, sequencing or classifying activities. • Many boards have useful templates too – graph paper, musical stave, brainstorm templates etc
What is an interactive whiteboard? • Many boards include additional tools such as a ruler, protractor which can be manipulated and moved. • Work can be prepared in advance and shared with other colleagues around the school and beyond. Complex demonstrations can be prepared and tested without the pressure of being in front of the class, and can be saved for future sessions. • Early evidence suggests that pupils enjoy using this technology and quickly become familiar with it – it fits in to their world and they are comfortable with it.
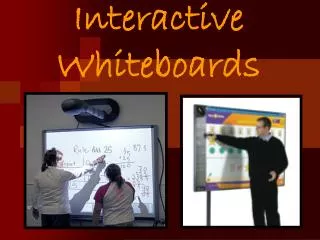
Benefits of Interactive Whiteboards • Very easy to teach essential skills to a large group of children e.g. teaching them to use copy and paste functions. • Much easier to showcase pupils’ work on the large screen than by crowding around one PC. • Children can demonstrate what they have just learned to the rest of the group • Easy to use a wide range of materials such as websites, video clips, interactive texts, digital flipcharts, electronic microscopes, digital cameras, scanners etc • Supports a wide variety of teaching styles including visual, auditory and kinaesthetic learning.
Traditional solitary computer/tablet use Whole class teaching using an Interactive Whiteboard
Effect on Pupils? • Raises attainment • Willing to come out and show what they can do • Attracts pupil interest • Better communication between children in class • Improved behaviour • Motivates the less able • Distracted pupils attention span improves • Pupils more enthusiastic • Greater level of pupil engagement
How teachers use IWBs Stage 1 – used as a fancy blackboard Stage 2 – used as a high-powered Overhead Projector Stage 3 – interactivity – eg animated diagrams etc “The majority of teachers have been stuck at stage 1 since their board first arrived, because of a lack of training.” Richard Lawson, Telford LA
It’s not about being ‘state of the art’ “Other schools might have wall-to-wall Interactive whiteboards and ICT learning centres while your school may still be trying to get aspects of basic provision right. The advice here is to hold your horses, for each individual school’s chosen path doesn’t have to be state of the art. What we really want is to be art of the state. That is, to use a variety of teaching approaches and ICT props to manage the state of optimum learning for students with a variety of leaning styles and needs.” New Tools for Learning – John Davitt
Promethean – Connections and Basic Tools • Connections – there are three: • VGA cable – connects your computer to the projector to provide the image • USB cable – connects the board to your computer to provide interactivity • Audio jack – connects the board to your computer to provide sound • Newer boards (LED screens) may only need one connection – HDMI provides image, • interactivity and sound all in one
Promethean – Connections and Basic Tools Calibrating your board – something you should have to do very rarely but….. Just in case you have to do it there are 2 main ways to do it. Method 1: Hover pen over the Promethean icon – top left corner of the board and wait for calibration to begin, then follow the instructions Method 2: From the system tray (bottom-right of the screen), find the Promethean icon, click it and from the pop-up menu select ‘Calibration’. You can then select a quick or full calibration.
Promethean – Connections and Basic Tools • There are two modes for using your ActivInspire software: • In Flipchart mode – this means using the ActivInspire software to create and deliver • presentations using the Promethean software – very much like you would use • PowerPoint to deliver presentations. • 2. In Desktop mode – this means using a set of tools made available to you in order to • work interactively in other desktop software e.g. on the internet or within a document
Promethean – Connections and Basic Tools It is possible to work with ActivInspire in two different formats– the one you choose is most likely to depend on the age of pupils you are working with. When you open ActivInspire you can select which style you prefer: Primary Studio You can change styles easily by selecting the ‘Configure’ option on the dashboard
Promethean – Connections and Basic Tools Navigating around ActivInspire • Dashboard – choices and shortcuts to existing flipcharts • Browser Window – resources, slides etc • Menus • Flipchart tabs – having more than one flipchart open at a time • Page info – number of slides and which one you are on • Main Toolbox – essential tools • Trash can • Pinning toolbox and browser windows and toolbox options
Promethean – Basic Tools and Activities • Pen – changing pen width and colours • Highlighters – use highlighters to ask pupils to highlight key points, features etc • Eraser • Undo/Redo – the most important tools in any software • Reset page – very useful when you are teaching same lesson more than once • Fill Tool – use to identify e.g. parts of speech, keywords • You could use these tools to add some interactivity to an existing resource e.g. an • already labelled diagram e.g. compass points
Handwriting and Shape Recognition • To make ActivInspire recognise your handwriting and convert it to text: • Either • From your toolbox select the Tools icon and then from the menu select ‘Handwriting Recognition’ or • From the Tools menu select ‘Handwriting Recognition’ • When you write on the board, ActivInspire will try to understand your writing and convert it to text • If it is incorrect use the drop-down list of suggestions to correct it • To make ActivInspire recognise shapes which you have roughly drawn: • Either • From your toolbox select the Tools icon and then from the menu select ‘Shape Recognition’ or • From the Tools menu select ‘Shape Recognition’ • When you write on the board, ActivInspire will try to recognise the shape
Task 1 - Using Basic Tools Select a labelled diagram from the Resource Browser, find one on the internet or quickly create one yourself – use one of the images in the Resource Browser. Use pens and eraser to hide labels and then make them appear by erasing the invisible colour Use the Fill Tool to highlight keywords on your diagram. Use the Reset Page tool to return the page to its original setting as if you were starting the lesson again.
Promethean – Basic Tools and Activities Using the basic tools, plus one more, to create a more interactive learning experience. Let’s get to know the ‘Magic ink’ pen – this is a great tool for making things disappear. You can cover up items and then, with a click, make them vanish and reveal what is below e.g. a labelled diagram with the labels concealed until they are clicked. Can be used in so many different ways.
Task 2 - Using Magic Ink Select another labelled diagram from the Resource Browser or quickly create one yourself or search for one on the internet. Create an invisible shape to cover one of the labels – create a shape and set the outline and fill options to the background colour of the page. Make sure that the diagram and its labels are on the Bottom Layer and ensure that the invisible shapes are on the Top Layer Once all of your labels are hidden, use the Magic Ink tool to make the labels appear.
The Object Edit toolbar When you place an object - shape, image, sound etc – on the page, you may wish to edit it in certain ways This is done through the Object Edit toolbar When an object is selected, relevant tools will appear above the object for you to use The available tools allow you to change object size, rotate, re-order, duplicate and select the object’s property browser for more tools
Using Object properties to make a Magic Box Make a props box for an activity related to a text or a topic and fill it with objects related to that area of study. The box is made out of simple shapes joined together using an additional tool. Once made the box is locked in place so that it does not move and then objects can be placed ‘inside’ it. The secret to this activity and others like it is ‘Layers’. There are 4 layers on every page – Top, Middle, Bottom and Background Layers – think of them as overlay sheets on top of the page. Here is how to make the box.
Task 3 – Use Object properties to make a Magic Box Start by dragging out a simple coloured square or rectangle, then duplicate it – these will be the front and back of the box. 2. Now use the Line-Chain shape tool to join the corners of the box together to form a third side. Duplicate the third side and move it to become the fourth side. 3. Now move the back and the 4th side to the Bottom Layer 4. Group these 2 sides together so that they move as one object 5. Repeat that for the front and 3rd side but move them to the Top Layer 6. Lock the box in place by locking both groups of objects 7. Now choose the objects to place in it – text items, objects from the Resource Browser, objects copied from the internet. 8. By default they should all be on the Middle Layer but if not put them there. 9. Check your layers in the Object Browser 10. The order of objects on the Middle Layer is the order they will emerge from the box.
Using ‘Actions’ to Create Interactivity • The ‘Actions’ browser allows you to select what happens to an object when e.g. • you click on it. • There are man different actions which can make objects appear, disappear, play a • sound, move to another page, change size, clear the page, zoom the page etc • Here is an example: • Place some text on the page • Right-click and ensure it is on the Middle Layer • Create a shape object to fit over the text and set it to be on Top Layer • Place shape over the text and right-click it • Select ‘Action Browser’ - it will open on the left of the screen • Select the action called ‘To Bottom Layer’ and click ‘Apply Changes’ • Now test it – when you click on the shape the text should appear • Try out some other Actions
Task 4 - Using Actions Place an object (image, sound, shape etc) on the page and select it. Right-click the object and select the Action Browser – the browser will open on the left side of the page. From the extensive list of Actions select what you want to happen – changing page, screen capture, open calculator, duplicate the object, open a file etc Having selected the Action select Apply changes at the bottom of the Action Browser. Test whether the action happens when you click on the object. Try some other actions.
Using Containers • To use ‘containers’ which will accept and reject objects as necessary: • On a blank page, add a suitable background from the resources library • Insert some images as required - e.g. 3 different animals • Position and resize them as needed • Create 3 containers by dragging out 3 shapes e.g. 3 rectangles and position/size • Create text objects which are the names of the animals • Now convert the shapes to containers – right-click on a shape and select the Property Browser • Scroll down to ‘Container’ section • Make ‘Can contain’ = ‘specific object’ • In ‘Contain object’ select the object which it is allowed to contain • Change the text object property for ‘Return if not Contained’ to True • Add a sound if desired
Task 5 - Making a Keyword Container • Try to make an activity related to an aspect of your subject teaching which uses • containers to receive and reject objects. This might be: • A phonics activity where the correct initial letter sound is accepted • A maths activity where the correct solution to an equation is accepted • An activity where a process is sorted into the correct order of events • See these video clips for an idea on how to make it work • https://www.youtube.com/watch?v=gsLlGXfIx40 • https://www.youtube.com/watch?v=9UV_Jx2TwMg • https://www.youtube.com/watch?v=KoYBh8oGj4k
Some other essential tools • Like most makes of Interactive Whiteboards, Promethean boards come with a set • of very useful teaching tools including: • The Revealer – allows you to hide part or all of the screen and then reveal it • as and when you are ready • The Spotlight – fantastic tool to help pupils focus on very specific parts of the • screen - a part of an image, a verse of a poem, a paragraph of text etc • Maths Tools – Ruler, Protractor, Set Square, Compasses, Calculator, Dice etc • On-screen keyboard • TickerTape – Allows you to set up messages which scroll slowly across screen
Using the available resources ActivInspire comes with a range of ready-to-use resources which can be found in the ‘Resources’ Browser. If you do not have many resources in there, you can download the ‘ActivInspire Resource Pack’ from: https://support.prometheanworld.com/article/?kb=1052 You must then open ActivInspire and import the resource pack by going to: File – Import - Import Resource Pack to My Resources You should then have a large collection of useful classroom resources. You can then make use of Resources from both the ‘My Resources’ and ‘Shared Resources’ folders. Take a few minutes to explore the folders.
Using the available resources • ActivInspire has many resources including: • Image files • Sound files • Diagrams, labelled and not labelled • Paper backgrounds – handwriting, music notation, graph paper, dotted paper • Activity templates – alphabet, number squares, fraction wall, periodic table, • symmetry activities, compound words, angle estimation and loads more • Blank learner response templates for brain-storming, mind-mapping, story • planning, questioning, multiple choice etc • More resources can be downloaded from the internet and particularly from the • Classflow Marketplace – you can access this from within ActivInspire
Using the available resources • Resources for use on your IWB are available form many other locations including: • http://www.crickweb.co.uk/Promethean.html • https://www.amazingclassroom.com/promethean1.asp • http://www.abcteach.com/directory/interactive-promethean-flipchart-files-9719-2-1 • http://teacher.scholastic.com/whiteboards/sciencemath.htm • http://www.iwb.org.uk/ • http://www.teachhub.com/free-interactive-whiteboard-resources • http://www.iboard.co.uk/ • http://www.teacherled.com/all-interactive-whiteboard-resources/ • http://www.whiteboardblog.co.uk/2009/07/20-interactive-whiteboard-resources-for-teachers/ • http://www.topmarks.co.uk/Interactive.aspx
Task 6 - Using ClassFlow • ClassFlow has now merged with Promethean Planet to become a single access point where • you can find high-quality, ready-made lessons which can be delivered via your • Promethean board. • ClassFlow has spaces for you to: • download further Resource Packs • create your own lessons • search for and download hundreds of lessons created by other teachers • access an online interactive whiteboard space • deliver lessons through the online environment to your students devices • Explore the ClassFlow resources and tools available.
Using ActivInspire to Embed Dynamic Content • It is possible to add dynamic content from many different sources to your Flipcharts. • Essentially, any content which comes with an ‘embed’ option can be easily added to • a page of your presentation. • The content will remain active if it was ‘active’ or ‘dynamic’ content’ to start with. • Examples of what you can use include: • YouTube video content • Google Maps • GeoGebra maths content including dynamic geometric shapes and graphs • Chat Room tools • Live weather data maps
Task 7 - Using Dynamic Content • To add some of this kind of content, you will need to do the following: • Navigate in your web browser to where you want to get the content from • e.g. YouTube, Google Maps etc • Somewhere on the page will be an ‘Embed’ or ‘Share’ option – find that and • then copy the supplied code – in Google Maps it is accessed by clicking on ‘Share’ • Copy the code and return to ActivInspire • Go to the ‘Insert’ menu and select ‘Link’ and then ‘Embedded HTML’ • In the box which appears paste the code you copied earlier and click OK
Desktop Tools Gives you access to a smaller set of specific tools Activating Desktop Tools, minimizes your ActivInspire window and places the Desktop Tools in the centre of your desktop The available tools are displayed below.
Screen Capture Tools The Screen Capture tools are some of the most useful tools in ActivInspire They allow the user to ‘grab’ content from anywhere on the desktop, any open window e.g. a web browser, a document, an image gallery etc To use the Screen Capture tools click the camera icon on the desktop tools – the different pop-out tools do the following:
Screen Capture Tools • To capture something from your computer using e.g. the Are Snapshot tool: • Navigate to the page you wish to capture • Open the desktop tools • Select the Camera icon and then choose the ‘Area Snapshot’ tool • Drag the selection box to the size and location you want it to be • From the menu choose what you want to happen to the captured item
Screen Capture Tools • Having chosen your captured item you can select to: • Send it to the current page or new page in your open Flipchart • Send it to clipboard – it can then be pasted into any other software • Send it My Resources or Share Resources for use later on • Example task – open the movie trailer for the film ‘Brave’ – we will use for a lesson • about the language of setting. • Watch the trailer through and identify 4 or 5 moments to capture • Capture these and send them each to a new page in your Flipchart • Go to your Flipchart and highlight aspects of the image and annotate with • descriptive language about the setting – describe colours, landscape, sky etc
Task 8 - Using Screen Capture Tools • Open the movie trailer for the film ‘Brave’ – we will use it for a lesson about the language of setting. • Watch the trailer through and identify 4 or 5 moments to capture • Capture these and send them each to a new page in your Flipchart • Go to your Flipchart and highlight aspects of the image and annotate with • descriptive language about the setting – describe colours, landscape, sky etc • When complete you should have a series of Flipchart pages, each containing a • still frame from the trailer and annotated with hand-written or typed text notes etc
Using the Screen Recorder • The Screen Recorder lets you create video recordings of the activity on your screen. • These can then be saved, made available and replayed as a learning resource. • To use the Screen Recorder tools either: • Click on the Desktop tools and from the toolkit select ‘Screen Recorder’ • In ActivInspire go to the Tools menu – More Tools – Screen Recorder • then • Using the very small toolbar which appears, click Record, provide a filename and carry out whatever actions you wish to capture – when finished click the Stop button. • Your video file is now available for you to share, email, upload, present etc
Task 9 - Using Screen Recorder • Create a simple screen movie which explains one of the new aspects of ActivInspire • which you have learned to use today – perhaps a short clip demonstrating: • How to use Magic Ink to create a diagram with labels which can be revealed • or • How to use the Screen Capture tools to take screen grabs • or • How to use the Desktop tools
The Clock Tool The clock can be used as more than just a device to tell the time. It can be found by going to Tools – More Tools – Clock. The clock can be used in analogue or digital formats, with or without date. It can also be used as a timer/stopwatch – great for giving students deadlines for completing tasks in the classroom. When the clock has finished its countdown or up it can be set to perform a range of actions on completion – play sounds, change page, reveal, screen capture.
Working With Video and Audio • To add sound to your Flipchart do one of the following: • Go to Insert menu – select Media – choose the audio file to be added. • Go to Shared Resources and then to Sounds – select a folder from which to • access a sound e.g. Animals and then select one of the available sounds. • From any Windows Explorer or File Manager window drag a sound file straight • to the Flipchart page. • 4. Go to Tools – More Tools - Sound recorder and record your own sound • To add video to your Flipchart do one of the following: • Go to Insert menu – select Media – choose the video file to be added. • 2. From any Windows Explorer or File Manager window drag a sound file straight • to the Flipchart page. Task 10 – practice adding audio and video content to your Flipchart
Working With Video and Audio • Once you have a video file open in a flipchart you can do some interesting and useful • things with it such as: • Having imported a video you can play it and use the camera tool at the bottom of the • video window to grab still frames from the video as it is playing. To do this play the video • and as you see a frame you wish to capture, click on the camera button. • Place two copies of the same video clip on the page – they will both play independently • and you can then do compare and contrast, looking at 2 moments to see differences etc.
The Page Zoom Tool & Page Turn Effects • The Page Zoom tool allows the board user to zoom in on content on the page to see • things in close-up detail. To do this either: • From the keyboard hold Ctrl & Shift & Z to zoom in or • Click on the page, press and hold the pen to zoom • Right-click, press and hold to zoom out • The Page Turn Effects mean that you can have more interesting transitions between • pages as you move through your presentation. To do this: • Go to the View menu and select Page Turn Effects • Select the desired style for your page transitions Use Pen Modifiers to access some additional Pen Tools - select your Pen and then go to Tools – Pen Modifiers
Using Restrictors Using Restrictors allows you to set certain rules about how things can be moved on the screen. For instance you may wish to restrict the movement of an object to horizontal only or to have it move along a specific path.
Importing other media • It is possible to import files made in other software and have them turned into Flipcharts. • ActivInspire can import PowerPoints, PDFs and some SMART Notebook files. • To import a PDF: • Go to File – Import – PDF – browse to find the PDF and select it • In the dialog box which appears select the settings as required • If the PDF appears to be displaying as very small you can adjust this by using the drop-down menu at the top-right of the screen. • Try changing ‘Best Fit’ to ‘Fit to Width’ - this should re-size to a much more appropriate display size.