Welcome
Welcome. This PowerPoint presentation is a tour of the anatomy and physiology facility at Phoenix College, Phoenix, Arizona. The facility was constructed as part of a new science building in 2000. Topics Covered. Facilities Cadaver Lab Anatomy and Physiology Lab How the Facilities are Used.


Welcome
E N D
Presentation Transcript
Welcome • This PowerPoint presentation is a tour of the anatomy and physiology facility at Phoenix College, Phoenix, Arizona. The facility was constructed as part of a new science building in 2000.
Topics Covered • Facilities • Cadaver Lab • Anatomy and Physiology Lab • How the Facilities are Used
The cadaver lab is used for cadaver demonstrations and for individual student examination of the cadavers. South End of Lab North End of Lab Cadaver Lab West Side of Lab
South End of the Cadaver Lab • The cadaver in the black bag is on a table (blue arrow). The cadaver is surrounded by a raised platform with a railing. Students can stand around the cadaver on the lower level while students on the upper level look over them.
Camera and Monitors • A camera (red arrow) on a movable arm is suspended over the cadaver. The camera projects to two 32 inch flat screen TV monitors (blue arrows).
North End of the Cadaver Lab • Camera (red arrow) and TV monitors (blue arrows) as seen from the raised platform.
Moving the Cadavers • There is room for four tables on the north end of the lab. The cadaver under the camera can be can be swapped (blue arrow) for any of the other cadavers. Supine versus prone cadavers and superficial versus deep dissections can be moved into the viewing area.
Cadaver Viewing Area • Over the cadaver a camera (blue arrow) and surgical light (red arrow) are mounted on movable arms.
Camera Arm Slide • The camera arm is connected to a slide (blue arrows), which is oriented parallel to the cadaver. The slide allows the camera to be position anywhere from the head to the foot of the cadaver.
Camera Arm Movement • The camera can be lowered for close-up views and raised for overviews (blue arrows). The camera is shown at its lowest position.
Entry to the Lab • Entry from an A&P lab into the cadaver lab (blue arrow) and steps leading to the raised platform.
Clip Boards • Clip board holders with clip boards (blue arrows) are available to students as they enter the cadaver lab.
North Side of the Lab East Side of the Lab A&P Lab South Side of the Lab
West Side of the Lab • The west side of the lab has a projection screen and white boards. On both sides of the white boards are 35 inch monitors. The instructor’s station is indicated by the blue arrow.
Computers • Every two students share a computer. There are twelve computers on twelve tables.
The A&P Lab in Action • ADAM (Animated Dissection of Anatomy for Medicine) is a computer program that enables students to do virtual dissections of the human body. ADAM, bones, cadavers, models, and animal organ dissection are used in the study of anatomy.
Camera on Cart • The monitors are supplied by a camera on a cart. A camera arm allows the camera position to be varied. Also on the cart is a monitor for the instructor.
Using the Camera • The camera projects to the two 35 inch TV monitors in the lab. The details of small objects, such as this sheep eye, can be seen by the entire class. The instructor is facing the class and at the same time can view the image seen on the large TVs in the small monitor on the cart. • There is a famous quote from the 1942 movie “Casablanca” that anatomist frequently use. While observing a female sheep eye, Rick Blaine (Humphrey Bogart) said, “Here’s looking at ewe.”
Skeletons in Our Closets • Yes, we have skeletons in our closets. On the south and north sides of the lab are skeleton closets. The articulated skeletons can be pulled out of their closets during bone labs.
Counter Top Space • Counter top space around three sides of the lab are used for display, study, and review.
Sheep Brains • In Biology 201, sheep brains are dissected as part of the study of the nervous system.
Sheep Eyes • In Biology 201, sheep eyes are dissected as part of the study of the special senses.
Sheep Heart • In Biology 202, sheep hearts are dissected as part of the study of the circulatory system.
Support Materials • A variety of models are available to supplement ADAM, the cadavers, and the organ dissections.
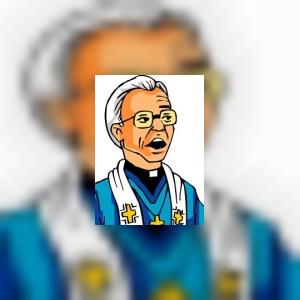
Did You Enjoy the Tour? • Greetings! My name is Dr. Phil Tate. I hope this PowerPoint slide show gives you an idea of how the anatomy and physiology labs work at Phoenix College. If you have any questions, please contact me at 602-285-7105 or phil.tate@pcmail.maricopa.edu.