Download
1 / 69
690 likes | 945 Views
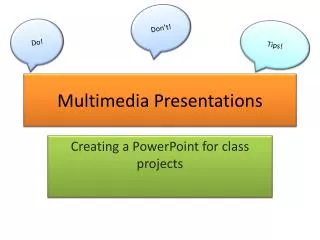
Multimedia PowerPoint Presentations. Introduction. There are several multimedia presentation applications used globally. Microsoft PowerPoint is one of the most common tools used for creating multimedia presentations consisting of slides, which are text and/or objects on a background .

E N D
Introduction • There are several multimedia presentation applications used globally. • Microsoft PowerPoint is one of the most common tools used for creating multimedia presentations consisting of slides, which are text and/or objects on a background. • Additionally, you are able to create transparencies, handouts, and speaker notes. • Using PowerPoint allows you to clarify information, reinforce main ideas, and make points memorable.
Introduction... • In this lesson you will learn the basic elements of the program and the essentials to creating a multimedia presentation using PowerPoint. The screenshots are taken from Microsoft PowerPoint 2007 and 2010 (Windows OS)
Screen Elements 2007 • Microsoft PowerPoint 2007 introduces an entirely new interface than previous versions of PowerPoint. A series of tabs gives you access to different sets of functions in PowerPoint. Clicking on a tab will cause a set of buttons to appear below in the ribbon. See the image on the next page, for a better understanding of the PowerPoint 2007 new interface. The parts of the window are as follows:
Office Button • Quick Access Toolbar - This customizable feature allows you to add the most frequently used commands • Tabs - This feature allows you to click to access different tools and commands • Ribbon - The ribbon displays commands and tools grouped by category onto different tabs • Slide and Outline tabs • Dialog Box Launcher - Allows you to click to open dialog boxes or task panes • Lists and Galleries - You can click on the down arrows to view different lists and galleries • Presentation window - Enter text and graphics in each slide • Notes Pane - type in notes for each slide • Status bar - Displays information about the active workbook • View buttons - Allows you to switch between different views • Zoom controls - Allows you to zoom in or out using the slide or the buttons.
Office Button • In Microsoft PowerPoint 2007, the Office button is located in the upper-left hand corner of the window. This button allows access to different file commands such as New, Open, Save, Save As, and Print. It performs the same function as the File Menu in Microsoft Word XP.
Quick Access Toolbar • The Quick Access Toolbar appears at the top of the window next to the Office button. It includes most common commands such as Save and Undo. You can customize the toolbar by adding command buttons to it. • To add or remove a button from the Quick Access Toolbar, click the list arrow at the right end of the toolbar to display the pop-up menu. Then, click the button name from the pop-up menu list. A check next to the name tells you which function will be on the Quick Access Toolbar.
Ribbon • The Ribbon replaces menus, toolbars, and most of the task panes that were found in PowerPoint XP. The Ribbon is located at the top of the document window and consists of tabs that are organized by tasks. Each tab is organized into groups, or subtasks, such as the Font or Paragraph group located on the Home tab. Each button within a group is called a command button, as shown in the other slide.
Tabs • PowerPoint 2007 provides two types of tabs on the Ribbon. The first are called Standard tabs, which are the default tabs that appear when you start Microsoft PowerPoint. They include Home, Insert, Design, Animations, Slide Show, Review, View, and Add-Ins (optional). The second are called Contextual tabs, such as Picture Tools, Drawing, or Table, that appear only when perform a certain task. PowerPoint 2007 provides the right set of contextual tabs when performing certain tasks.
Dialog Box Launcher • Some groups within PowerPoint 2007 have a Dialog Box Launcher that is located on the bottom right-hand corner of each group. Clicking on the Dialog Box Launcher will open dialog boxes or task panes that will allow you to modify the current settings.
Screen Elements 2010 • Microsoft PowerPoint 2010 is similar to 2007 as far as layout is concerned. The over all layout still consists of the ribbon stretching across the top of the program filled with various tabs that allow you to do functions in PowerPoint. If you need information on what each part of the window consists of, please refer to Microsoft PowerPoint 2007section in this documentation.
The only difference in PowerPoint 2010 is that rather than having a Microsoft Office Button, you now have a File Tab. This file has all the functions that the Office Button had: • Save • Save As • Open • Close • Info • Recent • New • Print • Save and Send • Help • Options • Exit
New Presentation from a Blank Presentation • When you open Microsoft PowerPoint, the program generally provides you with a new blank presentation labeled Presentation1. The new blank presentation will have a title slide that will have no design and no color applied to it.
New Presentation from Design Template • You may base your presentation on a PowerPoint template that already has a design concept, fonts, and color scheme. In addition to the templates that come with PowerPoint, you can use one you created yourself. • PowerPoint 2007 and 2010 • Single-click the Design tab • Then, click on your choice of designs in the ribbon. To the right of the ribbon you will find options to modify the colors, fonts and effects in the design.
Saving a Presentation and Open an Existing Presentation • PowerPoint 2010, to open an existing presentation: • Under the File Tab, click Open. • PowerPoint 2007, to open an existing presentation • Click on the Office Button and select Open.
If the presentation you want to open is one that was used recently: PowerPoint 2010 • Under the File Tab, click Recent. A list of recently opened presentations will come up.
PowerPoint 2007 • Hover over the Office Button, and a list of recently opened presentations will come up.
Master Slides • The slide master is an element of the design template that stores information about the template, including font styles, placeholder sizes and positions, background design, and color schemes. Changes made to the Slide Master affect all of the slides in a presentation.
Slide Master • Displays the slide master, where you can set the default layout and formatting for all the slides. For example, switch to slide master view to set the default font or to add an illustration (such as your company logo) that you want to appear on each slide. Don't add text in slide master view; switch back to normal view to add text.
PowerPoint 2007 and 2010 • Click the View Tab and then click the Slide Master button
PowerPoint Views • In order to work efficiently and effectively in PowerPoint, you will need to understand the various “views”. View refers to how you look and how you work on your slides. PowerPoint has three main views: normal view, slide sorter view, and slide show view. You can easily change views by accessing the View menu or the View buttons , located on the lower right corner in PowerPoint 2007 and lower center in 2010.
Normal View • Normal view is the main editing view, which you use to write and design your presentation. The view has three working areas: on the left side there are tabs that alternate between an Outline tab and the Slides tab, in the center there is the Slide pane, which displays a large view of the current slide; and on the bottom of the Notes pane.
Slide Pane Shows the current slide enlarged. Use this view to add text, insert pictures, tables, charts, drawing objects, text boxes, movies, sounds, hyperlinks, and animations. • Slides Tab Single-click the Slides tab to see a thumbnail view of each slide in the presentation. Use this view to navigate through your presentation and rearrange, add, or delete slides. • Outline Tab Single-click the Outline tab to see slide text in outline form. Use this view to write and organize content, navigate through your presentation and rearrange, add, or delete slides or slide content. • Notes Pane PowerPoint allows you to add notes that relate to each slide's content, and use them in printed form to refer to as you give your presentation, or create notes that you want your audience to see either in printed form or on a Web page. You can click to add notes in the Notes Pane in the Normal View or you can open the Notes Page.
PowerPoint 2007 and 2010: • Click the View tab and then the Notes Page button. • Click inside the "Click to add text" placeholder • Type notes that relate to the slide's content.
Slide Sorter View • Slide sorter view displays all of the slides in the current presentation in thumbnail form. Use this view to reorder, add, or delete slides and preview transition and animation effects.
To access the Slide Sorter View in PowerPoint 2007 and 2010 • Click the Slide Sorter View button:
Slide Show View • Slide show view takes up the full computer screen, like an actual slide show presentation. In this full-screen view, you see your presentation the way your audience will. You can see how your graphics, timings, movies, animated elements, and transition effects will look in the actual show. • The following methods will begin your presentation in full-screen mode starting with the first slide.
PowerPoint 2007 and 2010: • Click the Slide Show Tab and then you have options to click on From the Beginning as well as From Current Slide.
Working with Slides • While working on your presentation you will need to edit slides and add slides. This lesson will show you how to add and insert slides in a variety of ways. Also, you will learn to customize the content and layout of each slide to meet your needs.
Adding Text • The crucial aspect to making your presentation a success is the use of text. Animation and colored text will not impress your audience if it is poorly written and placed in your presentation. PowerPoint presentations are meant to display main points. You should not place paragraphs of text on slides. As you are presenting you can always supplement with details. • To add text click inside of a placeholder* and type the desired text. To edit text, highlight the text to be changed and start typing your new text. Click outside of the slide to deselect elements of a slide. You can also edit text in the Outline view. • *Placeholders- Boxes lined with dotted borders used for entering data
Format Text in Placeholder • To format text, click inside of a placeholder and then select the text to be formatted. To select all the text in the placeholder, select the perimeter of the placeholder.
PowerPoint 2007 and 2010 • Click the Home Tab for font-formatting options.
Changing the Background Color • If you choose not to use a design template and would like to enhance your slide, you can apply a background. You can choose to apply the background to individual slides or the entire presentation. A background can be added as a solid color or you can use one of PowerPoint’s special effects, called fill effects. To apply a solid color background: PowerPoint 2007 and 2010 • Click the Design Tab • Choose Format Background from the Background Styles button. • Choose Solid Fill and choose the color of your preference.
To apply a Fill Effect in PowerPoint 2007 and 2010 • Click the Design Tab • Choose Format Background from the Background Styles button. • Choose Gradient Fill, Picture or Texture Fill, or Pattern Fill. • Choose from the options there to apply the fill effect of your preference.
Adding and Deleting New Slides Adding Slides • There are several methods for inserting a new slide layout into a presentation: • Pressing Enter at the end of a slide title in the outline mode will create a new slide. PowerPoint 2007 and 2010 • Under the Home Tab in the Slides section, click on the New Slide button. (The default Title and Text layout is automatically inserted when you first open up PowerPoint).
Changing Slide Layout • Layout refers to the way things are arranged on a slide. A layout contains placeholders, which hold text such as titles and bulleted lists and slide content such as tables, charts, pictures, shapes, and clip art. • To choose a layout for the slide, • PowerPoint 2007 and 2010, • Click on the Layout button under the Home Tab. The Layout button drops down to show your available options.
Using Images Insert Clipart • If a slide does not have the clipart layout provided, an image from the clipart gallery can still be inserted. PowerPoint 2007 and 2010 • Click the Insert Tab and then the Clip Art button. • The Clip Art Menu will appear on the side of your screen. Type the search term and click the search button. • Single-click the picture to insert the image. Note: If you cannot find the necessary clipart for you presentation, try searching for ClipArt on Office online by click on the link on the bottom right hand corner of the task pane.