Download
1 / 14
140 likes | 160 Views
Learn robotic design and programming using VEX Robotics platform to build a Tumbler robot, develop programming skills, and explore advanced sensors and control systems. Dive into mechanics, DC motors, and autonomous capabilities.

E N D
VEX UNITS OF WORK UNIT 1: TUMBLER UNIT 2: CLAWBOT UNIT 3: 3D PRINTING UNIT 1.1: Autodesk Inventor TUMBLER Build UNIT 2.1: Autodesk Inventor CLAWBOT Build Coming 2014
Project Overview • Introduction • Frame Build • Motion • Power • Control • Sensors • Advanced Sensors • Open design challenges • Project evaluation
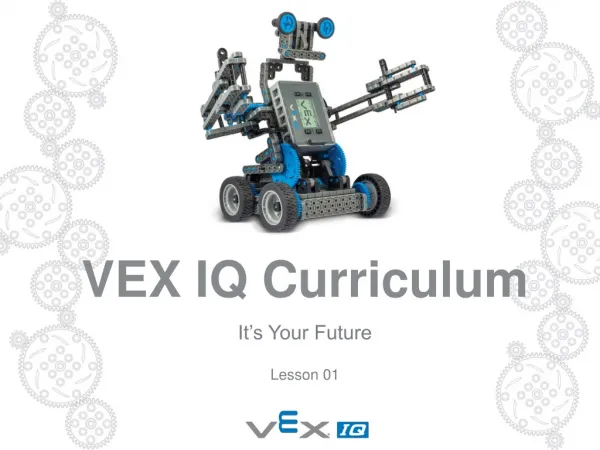
LESSON 01 INTRODUCTION In this project you are going to learn about robotic design and programming using the VEX Robotics platform. Your task will be to build a Tumbler (a simple tank style robot with four motors each driving one of four wheels), with which you can develop a thorough understanding of programming principles and control systems. You will then be set challenges of programming the Tumbler to react and respond to its surroundings, or to carry out a task. Once you have completed this unit of work, you will be able to go on and develop more complex robots using additional parts. VEX Robotics is not just a classroom based curriculum, but a spectrum of resources that allow students from Primary level (VEX IQ) through to University level (VEXpro) to design robots, create competition ready robot solutions, and explore the vast array of opportunities design and engineering provide.If your school can provide you the opportunity to do so, you can use VEX Robotics to develop a robot to compete in the annual competition (which changes each year), to take on local schools in regional heats before competing in the UK National competition for a place in the VEX World Championships in the US.For more information about all of these opportunities go to www.vexrobotics.com or www.roboticseducation.org
LESSON 01 STARTER Learning objective: Establish what I will be aiming to achieve in the project. Learn about robots, force and motors. Be able to label features of a DC motor. A robot is a programmable mechanical device that can perform tasks and interact with its environment, without the aid of human interaction. Robotics is the science and technology behind the design, manufacturing and application of robots.Basic Components of a Robot The components of a robot are the body/frame, control system, manipulators, and drivetrain. Body/frame: The body/frame provides the structure of the robot. Control System: The control system coordinates and controls all aspects of the robot with sensors providing feedback. Manipulators:The manipulators are parts required to interact with their environment like a claw or grabber. Drivetrain:Drivetrains consist of a powered method of mobility like wheels. Key words: Programmable, environment, design, manufacturing and application
PROJECT INTRODUCTION What you are going to doYou are going to use the VEX Robotics design system to develop a Tumbler robot (shown below), using the various sub-systems shown right. You will then have to develop its capability as an autonomous robot, so that it can conduct a task or complete a challenge without human interaction. Worksheet for lesson 1 =
PROJECT INTRODUCTION Creating moving robotsThe mechanical aspects of robot design are tied heavily to mechanics and the study of bodies in motion (movement). There are key terms you should learn to help you study your developed robot.Task: Note the following definitions into your workbookSpeed = The measure of how fast an object moves. Described as a change of position in time (e.g. miles per hour, metres per second)Rotational Speed = Speed as expressed rotationally. Described in angular distance in time.(e.g. degrees per second or revolutions per minute)Acceleration = A change in speed over time. Described between two speeds and time.(e.g. 0 to 60 miles per hour in 3 seconds)Force = A acceleration as exerted onto a surface. Described in unique units.(e.g. grams, kilograms, Newtons)Torque = A force directed in a circle, or a spinning force. Described as a measure of force over a distance that is rotational.(e.g. Newtons metres)
PROJECT INTRODUCTION Learning about DC MotorsMotors are simply actuators, mechanisms that act upon their environment. VEX Robot motors are direct current (DC) Motors convert electrical energy into mechanical energy through the use of electro-magnetic fields, and rotating wire coils (see the image above). When a voltage is applied to a motor it outputs a fixed amount of mechanical power. The mechanical power is seen as the motor’s output (usually moving some shaft, socket, or gear), spinning at a speed with an amount of torque. Positive magnetised side Central spinning coil Power source (battery) Negative magnetised side
PROJECT INTRODUCTION Learning about DC MotorsMotors only apply torque (force directed in a circle) in response to loading (added resistance). With all motors there is always resistance on a motor in the form of friction which acts as a load. This requires the motor to output some torque to overcome it (otherwise it would not move), and takes some of the potential torque away from your planned use in the Tumbler…Designing how motors will work in robotsAs you add higher load (more for it to do) onto the motor, the motor will “fight back” with opposing torque so that it keeps rotating. The more you ask each motor to do the more load you are adding. As torque increases, the motor slows down. So heavier robots are slower as the motors struggle.As with all things, if you keep increasing the load onto the motor, eventually the load overcomes the maximum torque it can produce and it stops spinning. This is when a motor STALLS and your robot stops moving!
PROJECT INTRODUCTION Learning about DC MotorsAs you increase the load on a motor, it has to draw more current from the battery to create the torque required. You only have a limited amount of current from the battery, to use it wisely.As seen in the graphs above, current and torque load are proportional (the have a relationship where one affects the other). More torque load means more current drawn. However current and rotational speed have an inverse relationship. The faster the motor can spin, the less current it will draw.
PROJECT INTRODUCTION • DC Motors have 6 features: • Armature or rotor • Commutator • Brushes • Axle • Field magnets • DC power supply 1. An electric motor requires magnets and magnetism: A motor uses magnets to create rotational motion. With magnets, opposites attract and likes repel. Inside an electric motor, these attracting and repelling forces create the spinning output. 2. An electromagnet is the basis of an electric motor. By wrapping copper wire around a metal core, the core becomes a magnet and has a north and south pole when there is a flow of current from the battery. - + 4. At the moment when a half-turn of motion is completed, the brushes lose contact with the current from the battery, the core demagnetises, reconnects with the inverse direction of current and therefore magnetises the metal core once more, and the outside magnets attract the core further round, which keeps it spinning. 3. With the core magnetised, it is pinned to spin in the middle of the motor, and north and south magnets on the outside cause the core to spin around one half-turn.
LESSON 01 PLENARY As a class, let us consider the following questions?A. What are the different elements of a robot design system?B. What key terms do we need to know when planning movement with the robot?C. Why do we need to plan carefully our use of the motors?D. What are we going to attempt to do in this project?
SUMMARY Learning objective: Establish what I will be aiming to achieve in the project. Learn about robots, force and motors. Be able to label features of a DC motor. • Today you have: • Learnt what the Tumbler project is all about and what the challenge is. • Learnt about robotics, force and motors and be able to talk about these competently. • Labelled a DC motor cross section to reinforce learning.