Download

1 / 22
230 likes | 492 Views
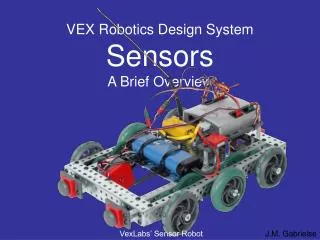
Vex Robotics. Introduction to Sensors. introduction to sensors. Sensors assist robots in seeing and feeling the physical world through which they travel. A sensor will tell a robot one very simple thing about its environment.

E N D
Vex Robotics Introduction to Sensors
introduction to sensors • Sensors assist robots in seeing and feeling the physical world through which they travel. • A sensor will tell a robot one very simple thing about its environment. • The programs that you write will determine how the robot will react depending on the feedback from a sensor. • Sensors can be placed in two different categories based on the type of signals they send or recieve.
A brief review of sensors: • Digital sensors can distinguish between exactly two different "states". • The exact meaning of the two states depends on the type of sensor being used. • The robot will interpret information from a digital sensor as either 1 or 0. • For example the Bumper Switch can read 1 (when it is not pressed) or 0 (when it is pressed).
Analog sensors can provide a range of feedback. • The feedback provided by an analog sensor ranges from zero to a predefined maximum limit for that particular type of sensor. • The robot will interpret feedback from an analog sensor as a specific number between 0 to that maximum value. • The Light Sensor and the Line Tracking Sensor, available separately as sensor accessory kits, are prime examples of analog sensors. • They can read the relative "lightness" of a tabletop or other surface as a single numeric value. • That value ranges from zero to one thousand.
The Analog/Digital Port Bank on the Vex Micro Controller consists of 16 ports that can be reconfigured to work as Analog Input, Digital Input, or Digital Output ports. • The ports must be configured to match the type of sensor that is plugged into them (digital input for a digital sensor, etc.). • To configure the Analog/Digital ports, double click the Config icon located on your programming screen.
A window will appear revealing a blueprint of the Vex Micro Controller. • The section labeled "Analog / Digital" represents the sensor ports on your Vex Micro Controller. • Left-clicking the ports switches the port to either digital input or • digital output. • Right-clicking these ports toggles them • between analog and digital settings. • Note that the Analog ports must always be together on the bottom, so switching a port to Analog will automatically change all the ports below it to Analog as well. • Due to electrical load limitations on the Analog/Digital port bank, you cannot configure a port as an Analog Output.
Digital ouput ports are used for the Ultrasonic Sensor, and other 5V digital output devices, such as LEDs. • Digital input ports are used for Bump Sensors, Limit Switches, Jumpers, and other 5V digital sensors. • Analog inputs are used for the Light Sensor, the Line Tracking Sensor, and any other 5V analog sensor.
using a sensor • easyC includes a group of default sensor test files, which will allow you to test your sensors. • First, you will compile and download a sensor test file to your robot to test it. • Then, you will examine all the parts of this code and how they interact.
To open the test file for the bump sensor, click "Open Project..." in the "File" menu. • Open the folder labeled Test Code, then click on the file called "BUMPERTEST". • Then click "Open".
BUMPERTEST should open and your program window should look like the following:
Make sure your robot is set up according to the motor and sensor guide and your robot is on. • Compile and download this code to the robot.
At this point, your robot should not be doing anything. • The terminal window should open automatically. • If it does not, click on the terminal window icon in the toolbar.
You should see the window to the right, with text scrolling across it. • If you press and release the bump sensor, you should see the Bumper Switch output number change between 1 and 0. • Press and release the bump sensor until you are familiar with the its operation.
The terminal window is the window used to display any information gathered from the robot, not only information from the bump sensor. • If you have purchased any of the Sensor Accessory Kits, you will find that easyC also comes with test programs for all of these, and all the test programs will function very similarly.
Comments • Comments allow you to leave notes to yourself and others about your code. • These comments do not affect how the program runs, but are very important in helping others to understand your code (and reminding yourself, if you revisit a program several weeks or months later).
While Loops • This is a block of code that will repeat itself as long as the condition inside the parentheses is true. • The condition in the while loop in this program asks whether (loop == 1), i.e. whether the value of the variable "loop" is • equal to 1. • The code inside of this loop will run over and over as long as "loop" is equal to "1". • As it turns out, the variable "loop" was set to a starting value of 1 in the variable window (see previous page). • Since we never change the value of the "loop" variable, we can reason that it will always be equal to 1, and so this while statement will repeat its code forever (or at least as long as • the robot is on.)
Print to Screen • This is the code that allows you to see information in the terminal window. • If you double click on the icon next to the PrintToScreen statement, you will see the "Print To Screen"configuration menu.