Engineering Design Process: Practical Application Methods
600 likes | 741 Views
Explore the 9-step engineering design process through real-world examples and decision techniques like decision trees and cost-benefit analysis. Work on problem-solving scenarios and communicate solutions effectively.

Engineering Design Process: Practical Application Methods
E N D
Presentation Transcript
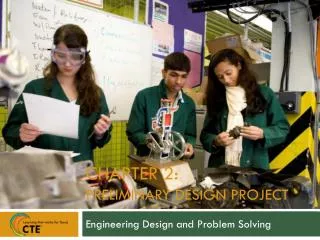
CHAPTER 2: Preliminary design project Engineering Design and Problem Solving
Introduction/Description • The Preliminary Design Project will introduce the 9-step engineering design process (EDP) through real-world examples, as well as decision techniques, including decision trees, decision matrix, and cost-benefit analysis. • You will work individually and in teams to complete problem solving scenarios and experiment with various communication mediums, including technical reports, journal articles, press releases, models, and/or patents.
Chapter 2: Outline Introduction to Engineering Design Process Defining the Problem and Coming up with a Solution Applying Logic, Finishing the Job and Communicating the Solution
Objectives and Results Objectives • Complete the vocabulary activity. • Complete the Engineering Design Process handout #2. • Complete the Compare and Contrast handout #3. • Complete the guided engineering design process for the zoo scenario and monkey display as outlined in the PPT. • Complete the guided engineering design process for the portable shelter, as outlined in the PPT. • Select a product from the list given or come up with one that the teacher approves and go through the design process for the product. • Communicating and present the product and process to the class.
Objectives and Results, cont. Results • Students will be able to work in teams of 2-3 and apply all of the knowledge and skills they have learned to come up with a workable solution to a problem. • Students will create a written explanation of the problem, solution, and processes, and present their design to the class. • Students will complete handouts to guide them through the process and will use the rubric and/or examples given.
Vocabulary to Learn • Engineering Design Process • Engineer • Team Work • Brainstorming • Efficiency • Ergonomics • Technical Writing
The Engineering Design Process Using the nine-step engineering design process (EDP), you will complete six student challenge problems.
Student Challenge #1 Complete the Engineering Design Process Activity Mat.
Engineering Design • Consider the objects around you in the room and think about the objects in your home. • Almost everything around you has been engineered in some way, meaning that the objects were designed to solve a problem. • As you look at the objects in the room, consider what problem each object solved and brainstorm about how the object was designed.
Engineering is What Engineers Do! • Engineers are problem solvers. • To solve problems, engineers use science and math as tools. • The problem-solving process that engineers use is called the engineering design process (EDP).
Engineering Design Process • The engineering design process is a problem-solving process (EDP). • It teaches someone how to think critically and carefully through a problem so that a clear, reasoned, and purposeful solution is reached. • This design process is a powerful tool that leads to better-engineered products.
Identify the Problem Determine Goals for Problem Solution Communicate the Solution Evaluate Chosen Solution Determine Design Parameters Choose and Justify a Solution Establish and Evaluate Constraints Test and Evaluate Solutions Identify Solutions to the Problem Engineering Design Process, cont.
Who Uses the Engineering Design Process? • Many professionals can and do use the engineering design process (EDP) to solve problems, such as • scientists, • fashion designers, • businessmen and lawyers, • doctors and nurses, • mechanics, and • teachers. • How can EDP be used in each of these professions?
Student Challenge #2 • Develop an example problem. It can be a new problem or one that has already been solved. • Write a short paper detailing the process used to solve it.
Scientists versus Engineers • Scientists and mathematicians provide a different function in society than engineers. • Scientists and mathematicians seek to explore and explain the natural, social, and human-built worlds. • Engineers seek to modify the natural world to improve life. • The fundamental research done by scientists and mathematicians is often used by engineers to design optimal solutions to the problems they seek to solve.
Student Challenge #3 Use a compare and contrast graphic organizer to compare and contrast the scientific process versus the engineering process.
Student Challenge #4: Scenario • A zoo would like to connect two separate buildings where monkeys live and play. • They believe they could build a transparent “connector” above the walkway between the two buildings. • Monkeys could move from building to building above an area where zoo visitors walk. • The zoo managers believe the visitors would be entertained by seeing the monkeys crossing above them.
Applying the Design Process: Step 1 Identify the Problem What is the problem in this scenario? The zoo wants a structure that connects the two monkey buildings and allows the visitors to view them as they cross.
Applying the Design Process: Step 2 Determine Goal for Problem Solution • What are the goals for the design in this scenario? • The goals are stated or implied by the scenario. • What are some additional questions that an engineer should ask a client to determine the client’s goals for the design?
Applying the Design Process: Step 3 Determine Design Parameters • What are the parameters? • What is the budget for the project? • In each design, what materials will be used? • How wide, tall, and long must the bridge be? • How much time is allotted for construction?
Applying the Design Process: Step 4 Establish and Evaluate Constraints • What are the constraints? • How much weight must the bridge be able to carry? • Does the design keep the monkeys safe from visitors and the visitors safe from the monkeys? • What environmental conditions does the zoo experience, and does the bridge have function in extreme cold or heat? • What regulations and codes exist for zoo structures?
Applying the Design Process: Steps 5 and 6 Identify Solutions to the Problem Research the problem and put together several monkey bridge designs, making sure that all of the parameters and constraints are addressed and the goals are met. Test and Evaluate Solutions Review each of the bridge designs. Run computer simulations, build and test scale models, and run experiments.
Applying the Design Process: Steps 7 and 8 Evaluate Chosen Solution Using the results from tests and experiments, choose the most viable bridge design. Choose and Justify a Solution Test the chosen bridge design against the goals, parameters, and constraints.
Applying the Design Process: Step 9 Communicate the Solution • After the monkey bridge design has been chosen, the design must be presented to the client. Communicating the design usually involves some combination of an oral presentation, a written report, a model, and/or a simulation. • Using the feedback on the proposed solution, repeat the design process as needed.
Applying the Design Process: Step 9, cont. Examples Resources Here are some examples of how to communicate the chosen solution to the problem. • Write a technical report paper • Write an engineering journal article • Create a press release(s): news paper, social media, and/or video • Give a presentation with model to the client and/or the public • Complete the patent paperwork NASA and other government websites have resources that can assist you in this process. • Technical reports • Engineering journal articles • Press release(s) • Presentation with model to the client and/or the public • The U.S. Patent & Trademark Office
Use EDP to Develop Projects Through out this class, we will be referring back to the engineering design process as we work through our varying projects.
Student Challenge #5 • Write a short paper detailing the process used to solve the example shading structure problem given. • You will be working in teams of 2-3 students, as you walk through the engineering design process. • Along the way, you will be asked questions. Individually, you will need to develop your own answers to each question on paper or the “Mini Engineering Notebook,” as you proceed through the process.
Student Challenge #5 Scenario Shading Structure A manufacturer sees the need for a portable, collapsible, lightweight device that can give shade during hot weather to a variety of living things and objects, such as animals, humans, plants, and construction materials, for an indefinite amount of time. What is the problem(s) in this scenario?
Step 1: Sample Problems • The shading structure is meant to solve the problem of too much sun reaching animals, plants, people, and inanimate objects. • The shading structure also needs to be portable and able to move easily from location to location by a person of average size and strength. • The structure needs to be able to function in one location for an hour or days.
Step 2: Define the Goals • The goals elaborate on the job and provide more specific criteria than the job itself. • An engineer must work with the client to define the goals. • What questions should an engineer ask to determine what the client’s goals are for the shading structure?
Step 2: Sample Questions The engineer might ask these questions of the shading structure manufacturer: • How large an area would you like the structure to cover? • What are the heights of the materials that the structure must cover? • How portable is portable? • Will the structure require power? • What sort of set-up scenario do they envision? • What is the anticipated lifetime requirement? • What is an appropriate cost for the product?
Step 2: Sample Goals • Here are some sample goals. The shade structure should • be no more than 10 feet high to provide shade in a 10-by-10-foot square area; • be capable of being carried in a truck’s flatbed or inside a van; • weigh less than 100 lbs; • be capable of being erected in less than 20 minutes by three people and with no more than ordinary tools; • require no electrical power; • have a useful life of 10-15 years; and • have a retail cost of no more than $500.
Step 4: Sample Constraints • Constraints that would affect the shading structure design might include the following: • The shading structure must not harm people, animals, the environment, or surrounding. • The shading structure must meet any codes and regulations regarding temporary structures. • Engineers must make sure that the structure they develop and the materials they plan on using account for these constraints.
Step 5: Identifying Solutions • Now is the stage for sketching the designs that have the most promise given the constraints, parameters, and goals. • Engineers will put the following techniques to work: • Brainstorming • Research into past successes of similar jobs • Reverse engineering of existing products • What design ideas do you have for the shade structure scenario?
Step 5: Design Elements • Two design elements are paramount: • Shading materials might be canvas, cloth, plastic, and/or aluminum. • Collapsing the uprights might involve telescoping, hinging, and/or bolting. • The engineer will narrow the design choices down to the most promising. • What are the pros and cons of using aluminum for the shading material?
Step 6: Testing Proposed Solutions • The engineer will test each solution to see if it meets or exceeds the design goals, parameters, and constraints. • Testing involves many strategies, including • conducting experiments, • running computer simulations, • building and testing prototypes and models, and • performing statistical analyses. • What testing methods would you use to test your shading structure design?
Design, Build, and Test • Shading materials should be tested by subjecting them to varying conditions. • Materials should withstand the stresses and strains that are imposed upon each of the structural designs. • The uprights should be tested, using prototypes and models. Safety is a priority.
Step 7: Choose and Justify a Solution • Engineers need to be able choose a solution and provide the reasons they made that decision. • Engineers apply several logical analysis techniques: • Decision tree • Design matrix • Cost-benefits analysis
Step 7: Shade Material Choice Plastic Aluminum Winter Summer Winter Summer Safe Safe Safe Safe Unsafe Unsafe Unsafe Unsafe 70% 40% 30% 15% 90% 10% 60% 85%
Step 7: Cost-Benefit Analysis • A cost-benefit analysis compares the cost of a choice with the expected future benefits of that choice. • One cost-benefit analysis for the shading scenario is to weigh the costs of materials and assembling to the amount of money the company would make. • To compare scenarios, calculate the ratio: • The material with the largest ratio is the most beneficial.
Step 7: Cost-Benefit Analysis, cont. • The simple scenario does not account for any collateral costs, benefits, or time. • Future benefits must be “discounted.” This can be done with following equation: where PV is the present value of the amount invested; Pt is the dollar value of the future amount in time t; r is the discount rate; and t is the year in which Pt is realized. • The material with the largest ratio is the most beneficial.
Step 7: Analyzing Designs • Engineers use the logic step process to weed out any personal bias. • The designs that have survived this far in the process • use various materials, • have differing manufacturing costs, • require different tools and times for assembly, • have different aesthetics, • occupy different volumes when collapsed, and • weigh different amounts.
Step 8: Evaluate Chosen Solution • Engineers subject the design to rigorous analysis which can • reveal flaws that may have been overlooked, or • provide the engineers with a better understanding of the expected life of the manufactured design. • Engineers test a prototype and have new users come in and operate it. • Tests often reveal some aspect of the design that has been overlooked.
Step 8: Chosen Solution • The engineers have chosen a structure using hinged aluminum struts topped with a tough, white plastic. • The plastic contains linear slits at regular intervals. • The slits allow rain to get through, and the structure is likely to stay in place during a heavy thunderstorm. • How would you test this structure?