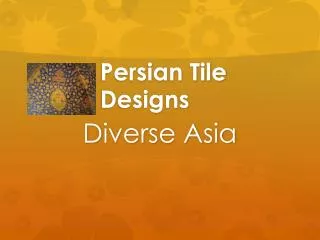
Tile designs
Tile designs. Creating original, unique works. We will be making tile designs that are abstract or non-representational. These designs are abstract designs. You can see the source of the idea: a window or door, a room, a face and maybe a river and plants.

Tile designs
E N D
Presentation Transcript
Tile designs Creating original, unique works
We will be making tile designs that are abstract or non-representational • These designs are abstract designs. • You can see the source of the idea: a window or door, a room, a face and maybe a river and plants. • These 4 tiles work together as a single piece of art. The lines from one connect up to the lines of the next.
Non-representational designs • You can just see shapes in these and you might be able to imagine a feeling, emotion or source, but each person may see something different.
When you work with abstract design there is no “object” • You need to be thinking of the entire space, the background and foreground are interchangeable.
What do you see? • This is a project based on seeing things in new ways. • Look at the logo for the Pittsburgh Zoo and PPG Aquarium. Do you see the tree and birds? • How about the monkey and lioness? • How about the fish?
Logos • Many companies embed their location or company’s interests in their logos. • Do you see the city skyline?
Kölner Zoo, Pet shop, Buffalo Zoo • How many animals can you see in these logos?
Negative and Positive space • When you are creating an abstract design you need to be thinking about both the negative and the positive space as they are often interchangeable in these works of art. • Do you see the peacock’s head?
Contrasts in value, and line play an important role • Which is the negative space and which is the positive space?
Start with a doodle. • When you create your tile designs you will start with a simple doodle. • This will help you keep your ideas original and you won’t be tempted to copy someone else’s ideas.
Being creative • This website helps you design original creatures by starting with a scribble. • They encourage you to look for cartoon animals or people embedded in the scribble. • This is a wonderful way of coming up with ideas that are creative and unique.
For our tile project, we are looking for abstractor non-representational designs • We want to create original ABSTRACT/ NON REPRESENTATIONAL designs. • So we follow the same sort of process. • Place a sheet of paper over the scribble and just choose four separate sections of it to fill each of the four squares on your handout. • The positive and negative spaces are interchangeable.
So how do you do this? • Cut out a “view finder” or use the squares on your worksheet and place it over your “scribble”. • Find several different areas that you can trace to create a series of designs.
Trace them onto your worksheet • At this point just collect a series of designs. • You can edit them later. • You can see 6 different designs here.
Now you need to start your first sketch • At this point, you need to choose just 4 squares. • You can trace them in any direction you want: #1 and # 2 are both turned sideways. • You can begin to add or subtract lines, and start looking for ways to connect the 4 squares.
Now you need to start to get your critiques • This design is very organic, and creates an impression of plants, fish, coral But, it needs some work: • The tiles need to feel more connected • It needs to be less “busy” visually • It needs more of a focal point • The lines suddenly start and stop so it looks unfinished.
It’s time to edit • This stage gets you closer to your final drawing. • You need to start to add and subtract lines, getting them to look as smooth and consistent as possible. It’s time to pay attention to the Principles of Art: • Is it balanced? • Is there a sense of rhythm? • Are there elements that repeat to create harmony? • Is there a flow from one to the next? • Is it too busy or too sparse?
Take your previous drawing and edit it. • Your first sketch may still need some revisions to simplify and clean up the design. • This design is cleaner and crisper and is not too complex for the function. You need to make a tile from this design, so it can’t have too many tiny pieces.
Then make lots of copies and shade in the three levels • Start by making lots of copies of your concept drawing and then begin to shade it in. • There should be three values to represent the three levels. One level should be shaded black, the second a medium grey and the last you can leave white. • Usually you still need to simplify the work and clean up the lines
So, to review: • This shows the first sketch, then the first revision, a second revision to create the concept sketch and the shaded copy. You are now ready to make your tile.
The lines in the tiles don’t need to connect • The lines in the tiles do not need to connect but there needs to be something to allow the tiles to look like they belong together. • They need to look like a set. • These tiles are by artist Meagan Chaney Gumpert.
Another way to get started: • You can start with a doodle or with a drawing of something that is a little more realistic. • You can then abstract your design from that drawing. • Here we start with a leaf that Morgan drew. It is not abstract enough to make a tile from this sketch for our project.
You may have to enlarge it to get an abstract design • We enlarged the leaf to 200% but it was still too small. • You can see the previous drawing under the leaf, but you don’t have to worry about that.
Another 200% • We took this leaf and enlarged it again on the photocopier. • You could scan and print it. • Now it is big enough to get just parts of the drawing in each of our squares.
Make a view finder • We made a view finder the same size as the squares and moved it over the leaf until we found a section we liked.
Our first design • The first section we have chosen is from the tip of the leaf.
Our second area • Our second section is from a little lower down on the leaf. • We used a line from the previous drawing as it added some interest.
The third section • This section is from the left side of the leaf
The fourth section • Our last section is from the right hand side.
Putting them together • We have traced all four sections so we now place them together as a grouping of four tiles. • This is our 1st sketch. • To see what these might look like as tiles we need to shade in the three levels.
Filling in the lights and darks • The 3 values represent the three different levels in the tiles. • There needs to be some variation in depth in the tiles: a part that is one layer thick, a raised section at a second level and then a third level to add interest. • The last might be cut right through the tile. To create a hole all the way through.
The various levels add interest to your work • Different levels and textures add interest to your tiles. • These abstract tiles by Ron Hichens show a variety of textures and levels.
Make the design bigger • Once you have worked at the small scale of these drawings it will probably help you to see them better if you enlarge the drawings closer to the size you will be using when you make the clay tiles.
Go and get feedback • You need to turn to your classmates and get some feedback to help you make the design better. This step is called a critique. Get three different people to critique your work so that you have the ability to improve your design.
The feedback • The lines do not connect from one tile to another so they look a little fragmented • The change in levels are not the same from one tile to the next • The width of lines is not consistent and they don’t flow smoothly
The red lines show the revisions • Using the information from your classmates you now need to create a second generation design; an improved design. • Now you need to shade them in again and enlarge the work.
Concept sketch • This shows the revisions and the shading completed so now you can start making the tiles
Let’s compare • This shows the change from sketch to final concept:
You will then make photocopies of your design • You need to make several photocopies of your design so that you can use the paper as a pattern to cut out your clay. • It will make it much easier to copy the design this way.
References • Pittsburg Zoo and Bronx zoo and NBC logos: http://twistedsifter.com/2011/08/20-clever-logos-with-hidden-symbolism/ • Kölner Zoo logo: http://www.koelnerzoo.de/ • Buffalo zoo: https://buffalozoo.org/ • Bird and Cat logo: http://www.50foot.com/logos • Legs by Shigeo Fukuda: https://s-media-cache-ak0.pinimg.com/originals/1c/6a/23/1c6a23936a82bbff6ebcb3f217d96532.jpg • Women walking: https://hsnu20054.wordpress.com/2011/02/07/shigeo-fukuda/ • Scribble and fish: http://procartoon.com/cartoonists-how-to-improve-drawing-skills/ • Art critique sandwich: https://www.teacherspayteachers.com/Product/The-Art-Sandwich-714026
References (cont’d) • White glazed, Terracotta wall tiles framed: https://www.1stdibs.com/furniture/decorative-objects/sculptures/terracotta-wall-sculpture-ron-hitchens/id-f_733657/?pdpBenefits=false • Tiles by Meagan Chaney Gumpert: http://www.meaganchaneygumpert.com/_blog/unique_mixed_media_sculpture/post/Tile_Plaque_Variation_and_Process/#.WYN544jys2x