Download

1 / 33
340 likes | 553 Views
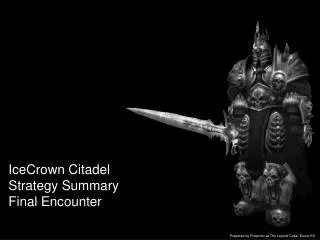
IceCrown Citadel Strategy Summary. Intro. This is intended as a primer, a basic summary of what you should be aware of for EACH boss. This is not definitive and classes should take note and discuss specific issues in the class forums.

E N D
IceCrown Citadel Strategy Summary
Intro This is intended as a primer, a basic summary of what you should be aware of for EACH boss. This is not definitive and classes should take note and discuss specific issues in the class forums. Raid leaders will use this as a summary to remind them of tactics Guild members can add information to this file by submitting it to raid teams via forums / in game mail Wherever possible Videos from Tankspot and StratFU will be linked in the forums for people to review alongside these notes
Lord Marrowgar ABILITIES Bone Storm — Attacks nearby enemies in a whirlwind of bone that lasts until cancelled. 3 sec cast. Every two seconds, triggers... Bone Storm (Heroic mode) — Attacks nearby enemies in a whirlwind of bone, which causes them to bleed for 15 seconds. Instant. 8000+?/3 on Normal. 11000+?/3 on Heroic Bone Spike Graveyard (Heroic mode) — Hurls a massive bone spike which impales any enemies in the way. Deals 10% health per sec for 5 seconds or until killed. 3 sec cast. 5 sec duration Puts the Impaled debuff on the affected player. Coldflame (Heroic mode) — Summons a line of frost that hits enemies in the way. Instant. Should the Coldflame get within 8 yards of anyone, it casts... Coldflame (Heroic mode) — Inflicts 8000 Frost damage every 1.0 sec for 3 sec. Instant. 8 yd radius. Deals 11000 Frost/sec for 8 sec on Heroic Sabre Lash Melee range — Splits 200% of normal melee damage to an enemy and its two nearest ally, replacing melee attack. used every second, but not during bone spike graveyard cast; prevents the targets from being targeted by Bone Spike Graveyard. TANKING Tanks need to stand on top of each other to soak Sabre Lash. If short tanks and the raid has plate DPS available, one can be put in front of the boss with the tanks to help soak the Sabre Lash damage. If said DPSer has a tanking set, equipping a piece or two to increase their HP is an option should they be taking too much damage. Note that the tanks will take substantial damage during the fight - using an off tank of this sort is not advised, as it will make healing even more difficult, although it is better than insufficient tanks. It is entirely possible to single tank Marrowgar, in 10man, should the tank be sufficiently geared. In 3.3(a) Marrowgar's damage was further reduced, making this an even more viable strategy. Be advised that although this frees up another DPS in your 10man raid, the tank will take heavy damage. The key to the fight is managing the transitions between the Bone Storms and going back to the Bone Graveyard phase. You have 10 seconds from the end of Bone Storm until Lord Marrowgar starts casting Sabre Lash again (until then he simply melees his target) - the tanks need to pick him up and position themselves together in that time. (The 10 second grace period also applies to the beginning of the encounter, counting from when he is first aggroed, giving the tanks time to set themselves up.) Tanks should avoid sandwiching themselves between Marrowgar and a wall. The trails of fire need a place to land behind the tanks, or they will be cast inside the hit box, effecting the tanks. It is important to note, after every Bone Storm, the boss resets aggro. The DPS must give the tank a chance to re-establish threat, before continuing to DPS. TACTICS DPSLord Marrowgar has a gigantic hit box. WE WILL HAVE a dedicated 'spike team' - chosen dps members who will kill the Bone Spike Graveyard as soon as it impales a player. Melee can choose to stay close to the boss to avoid the Coldflame, OTHERS stay out of range of the 8 yd Coldflame and still attack the boss. Bone Spike Graveyard Ranged DPS, or nearby melee, should immediately free players impaled with Bone Spike Graveyard. If the raid has an abundance of melee, members should stay relatively close together to reduce travel time. Bone Spikes should die within 3 seconds (two GCDs); any longer and you will have issues. In addition, it is confirmed that Paladin ability Hand of Salvation removes Bone Spike Graveyard, and it's most likely that similar abilities remove it too. Coldflame Coldflame is a single line of frost that runs radially outward for 8 yards. Touching it inflicts a large amount of damage. Since it moves in a straight line, melee can sidestep out of its way, while ranged players can avoid it entirely. Because it starts a small distance away from Lord Marrowgar, melee can also avoid it by staying in very close, but only do this when Lord Marrowgar is not casting Bone Storm. In heroic, touching the line of frost will apply a bleed effect. Cold Fire during his non-Bone Storm periods will be directed at a given person, thus ranged should spread out radially, preventing more than one from having to move from any given spawn. HEALING Need clarification and correction here. The tanks take moderately-high damage (10-15k every second from Sabre Lash (13-17k 25 man) [pre-3.3a nerf]). During the Bone Storms, everyone takes damage. People who don't move when they're targeted by the boss during Bone Storm will be taking full Bone Storm damage in addition to Cold Fire damage from up to four separate Cold Fire effects. They will probably die. Note that Lord Marrowgar has a red positioning reticule below him. Stacking your entire raid (with the exception of the three tanks and any hunters) on the back edge of the reticule does three things: Prevents all incoming Coldflame damage. (No one is hit by the fire) Controls the location of Impales so they may be quickly DPSed. Allows Healers and Caster DPS to remain stationary, maximizing throughput. The raid must disperse during Bone Storm. Bone Storm damage is negligible, but Priests need to be mindful that Inner Fire charges are depleted by this ability. Stay mobile, and re-collapse to the rear of the positioning reticule once the tanks regain control after it stops. Note that tanks do not take damage during the Bone Spike Graveyard cast, which can be very handy for moving into position or catching up on healing. NOTES Every 30 seconds Marrowgar will execute Bone Storm. This whirlwind attack cannot be avoided, and damage is dealt every two seconds based on your proximity to the boss as he spins. The closer you are, the more damage you take. Additionally, in heroic this will also leave a bleed effect on anyone hit by it. Every time Lord Marrowgar reaches his target and stops he will fire four lines of Cold Fire along the semi-cardinal points (NE, NW, SE, SW - they form an X). Unlike during phase 1, the cold flame lines start directly underneath him. After his fourth target the Bone Storm will end. Lord Marrowgar resets aggro when Bone Storm ends. After 10 minutes, Marrowgar will Enrage increasing his damage done by 500%, attack speed by 150% and makes him immune to taunt. If he is not killed before he enrages, he will quickly kill the entire raid!.
Lady Deathwhisper I This encounter bears some similarity to M'uru in Sunwell Plateau. It hinges on quickly picking up the spawns and proper balance between DPS-ing Deathwhisper and killing the add-waves, especially on 25-player or heroic mode. Ranged DPS in particular need to switch their target frequently, and be highly aware of the general situation. Her enrage timer is 10 minutes. ABILITIES Cult Adherent/Empowered Adherent/Reanimated Adherent Adherent's Determination — Nearly impervious to magical damage. 99% reduction. Reanimated Adherent only. Curse of Torpor 100 yd range — Afflicts an enemy target with a curse that increases ability cooldowns by 15 seconds. 1 sec cast. Curse Deathchill Bolt (Heroic mode) 45 yd range — Deals 8788 to 10212 Shadowfrost damage to an enemy target. 2 sec cast. 11563-13437 on Heroic Frost Fever 50,000 yd range — A disease dealing Frost damage every 3 seconds and reducing the target's melee and ranged attack speed by 14% for 15 seconds. Instant Shroud of the Occult — Envelops the caster in a powerful barrier that reflects all harmful magic, prevents cast interruption, and absorbs up to 100,000 damage before breaking. Instant. Used randomly. Deathchill Blast (Heroic mode) 45 yd range — Deals 11563 to 13437 Shadowfrost damage to all enemies within 10 yards of the target. 2 sec cast. Only cast while empowered. 11563-13437 on Heroic Dark Martyrdom — The caster surrenders to dark energies, exploding to deal 12000 Shadowstorm damage to all enemies within 15 yards, and leaving only skeletal remains behind, thus becoming reanimated after a few seconds of death. 4 sec cast. Cast randomly Cult Fanatic/Deformed Fanatic/Reanimated Fanatic Fanatic's Determination — Nearly impervious to physical damage. 99% reduction. Reanimated Fanatic only. Necrotic Strike (Heroic mode) Melee range — Strikes an enemy with a cursed blade, dealing 70% of weapon damage to the target and inflicting a lasting malady that negates the next 14000 healing received. Instant. 20 sec duration. 20000 healing on Heroic Vampiric Might — Empowers the caster with dark might, increasing all damage dealt by 25% and heals the caster for 300% of his damage dealt. Instant. Magic. 15 sec duration. Used randomly. Shadow Cleave (Heroic mode) Melee range — Inflicts 15913 to 17587 Shadow damage to enemies in front of the attacker. Next melee. 8 yard radius. 19000-21000 on Heroic (6 sec cooldown) Dark Martyrdom — The caster surrenders to dark energies, exploding to deal 12000 Shadowstorm damage to all enemies within 15 yards, and leaving only skeletal remains behind, thus becoming reanimated after a few seconds of death. 4 sec cast. Cast randomly. Vengeful Shade Vengeful Blast Melee range — Inflicts 23160 to 24840 Shadowfrost damage to all enemies within 20 yards of the target. Lady Deathwhisper Death and Decay (Heroic mode) — 4500 Shadow damage inflicted every 1 sec to all targets in the affected area for 10 seconds. Instant. 8 yd radius. 6000 on Heroic Note: Lady Deathwhisper's D&D uses the same animation as a death knight's but her is a distinct green colour, making it easy to distinguish from a friendly player's D&D. Dominate Mind 50,000 yd range — Subdues the will of target enemy, causing them to become charmed for 20 sec, with their damage dealt increased by 200% and healing done increased by 500% during that time. Instant. Targets three players on 25-man heroic difficulty. Phase one only Animate Dead — Reanimates a Cult Adherent or a Cult Fanatic. Dark Empowerment 200 yd range — Empowers the Cult Adherent's spells, causing them to deal area damage and making them uninterruptable. 2 sec cast. Dark Transformation 200 yd range — Transforms one random Cult Fanatic into an un dead behemoth, increasing damage dealt by 100%. 2.5 second cast. Mana Barrier — Envelops the caster in a powerful barrier that continually replenishes any lost health, at the expense of the caster's mana. Shadow Bolt — Sends a shadowy bolt at the enemy, causing 11813 to 13187 Shadow damage. 100 yard range. 2 seconds cast. Phase two only Frostbolt 40 yd range — Inflicts 50,700 to 53,300 Frost damage to an enemy and reduces its movement speed by 50% for 4 sec. 2 sec cast. Interruptible but un resistible on heroic difficulty. 58,000 to 61,000 on Heroic. Frostbolt Volley — Inflicts 14400 to 17600 Frost damage to nearby enemies, reducing their movement speed for 4 sec.. Instant. Summon Vengeful Shade — Calls an un attackable Vengeful Shade that chases a player for a short time, casting Vengeful Blast upon catching them. Touch of Insignificance 50,000 yd range — Reduces the target's threat generation by 20%. Instant. Stacks to five. Lasts 30 seconds.
Lady Deathwhisper II ABILITIES PHASE 2 After her shield is down, Lady Deathwhisper switches to a new set of abilities, she gets an aggro table (in effect her threat is reset) and also starts to melee and cast Frostbolt volley. No more Adherents or Fanatics spawn, instead Vengeful Spirits randomly spawn near players. Her Frostbolt spell should be interrupted. Dominate Mind and Death and Decay continue as before. She stacks an ability called Touch of Insignificance on her tank. This reduces threat generation by 20% per stack (stacks to 5). On normal difficulty, she can be taunted. Vengeful Spirits pick a random target and follow it for 10 seconds, they explode for 25,000 shadowfrost AoE damage when they catch up. In normal difficulty it's possible to heal through this, in hard mode probably not. Players targeted by a Vengeful Spirit need to kite it until it goes away. Hard Mode On the Public Test Realm Heroic difficulty had limited testing. Other than every ability simply hitting harder the main difference in the encounter that may encourage groups to alter their strategy is a shortened enrage timer and doubled hit points (but not mana) on Lady Deathwhisper herself thus greatly extending phase two. HEROIC If the heroic encounter is similar to the M'uru encounter on which it seems to be modelled on it is highly unlikely you will be able to focus all of your DPS on the add waves as they come, you will simply lose too much DPS on Deathwhisper herself. It seems likely that you will need to CC at least some of the adds through the entirety of phase 2 in order to beat the enrage timer, at least until the encounter is outgeared. NOTES Immune to taunt. Three mind controls on 25-man, one on 10-man. Adds continue to spawn in phase 2. Vengeful Shades explode in a 20 yard radius instead of single target. PHASE 1 Lady Deathwhisper is protected by her Mana Shield, which converts damage taken to mana lost. Phase 2 starts as soon as she has taken enough damage to bring her mana to zero. If Phase 1 takes longer than 7 minutes, there may not be enough time remaining to kill her in Phase 2 before she enrages. During Phase 1 she cannot be tanked and spams Shadow Bolt, Death and Decay and Dominate Mind on random raid members (Dominate Mind is only cast in 25-player mode, it affects one raid member in normal mode, and multiple targets in hard mode). The mind controlled raid members need to be Crowd Controlled. After 5 seconds of combat and every 60 seconds thereafter seven adds (three in 10 man, alternating left, then right) spawn. The three gates on the left side of the room always spawn two fanatics and one adherent, the right side gates one fanatic and two adherents. A seventh add of a random type spawns on the stairs. All types of adds can be CC'd. Living adds can explode (dark martyrdom) at random times, which deals AoE damage and turns them into their reanimated versions. Reanimated Fanatics (melee) are immune to physical damage, Reanimated Adherents are immune to magical damage. Also at random, Lady Deathwhisper buffs living adds. Buffed Adherents become "Empowered Adherents", adding an uninterruptible AOE spell to their abilities, buffed Fanatics are "Deformed Fanatics" and double their melee damage output. These four special add types are the most dangerous, and must be killed as priority targets. Adherents are caster mobs who spam deathchill bolt, put a cooldown increasing curse on random players, and sometimes shield themselves with a spell reflect shield. The shield (Shroud of the Occult) takes 50,000 damage to remove, or can be [Mass Dispelled]. While the shield is on them, typical silencing effects like [Shield Bash] do not work. Fanatics have a high melee DPS output and a vicious cleave (melee DPS must take care to stand behind them). When buffed (as Deformed Fanatics), they double their damage output, and may also gain Vampiric Might, which is another 25% damage increase, plus a self heal for 3x the damage they cause. Deformed Fanatics should be kited, which is quite easy because their movement speed is halved. A basic method is to assign three tanks to the spawn locations. The left and right sides also get a fixed set of melee damage dealers (more to the right side, fewer to the left). When adds spawn, all ranged DPS switch and kill the adds right where they spawn. After all adds are dead, all damage dealers switch back to the Boss, a few seconds prior to the next wave, melee run back to the spawn locations. This method feels rather natural and it leads to a rather distributed setup, which helps minimizing the effect of Death and Decay. The drawbacks are rather low DPS (particularly by melee), and frequent target switching.
Saurfang I ABILITIES Blood Link — Saurfang gains Blood Power from damage he inflicts with abilities and summoned creatures. Also increases his Energy by 1 each time Blood Link triggers. Blood Power — Saurfang grows 1% larger and deals 1% more damage for each point of Blood Power he has. Blood Nova — Blood explodes outward from a random enemy target, inflicting 10,000 Physical damage to nearby enemies. Boiling Blood — Boils the blood of an enemy, inflicting 9,500 Physical damage every 3 seconds for 24 seconds. Call Blood Beast — Saurfang calls forth 5 blood beasts every 40 seconds. Frenzy — Saurfang goes into a frenzy, increasing his attack speed by 30%. Mark of the Fallen Champion — Causes Deathbringer Saurfang's melee attacks to splash to this target, inflicting 5,700 to 6,300 additional Physical damage. If the target dies while under this effect Saurfang is healed for 5% of his total health. Cannot be dispelled or removed by any means, including death. Rune of Blood — Saurfang leeches health when he performs melee attacks on targets marked with Rune of Blood. Leeches 5,100 to 6,900 health from an enemy target and heals Saurfang for 10 times that amount. Lasts for 20 seconds. Scent of Blood — Saurfang's Blood Beasts catch the scent of blood, reducing all nearby enemies movement speed by 80% and increasing their damage by 300% for 10 Blood Power Sarufang starts with 0 Blood Power. He can accumulate up to 100 in his Energy bar (like a Rogue, or a Warrior's Rage). He gains Blood Power whenever one of his special attacks hits or ticks. When Blood Power reaches 100, he casts Mark of the Fallen Champion on a random raid member, resetting his Blood Power to 0. Marks deal significant amounts of damage to their victims, which in turn increases the amount of Blood Power he gains. Due to this mechanic, it's imperative to limit the amount of Blood Power he gains. The first Mark should be cast not before Saurfang is at 60% health or lower. Tanking Saurfang should be tanked right where he spawns. His melee damage is not high. Tanks must pay attention though that Saurfang doesn't gain Blood Power from Rune of Blood. If a tank gets it, another tank must quickly taunt and take over. The debuff lasts 20 seconds. Setup The melee group should stand right on Sarufang. All other raid members need to keep at least 12 yards away from everybody else (because of Blood Nova). Ranged damage dealers can stand closer to the boss, while healers should be furthest away. Healers need to be well spread out, so that all raid members are in range of several healers. Blood Nova is a DoT which also causes other raid members within 12 yards of the affected player to take damage. This additional damage causes Sarufang to gain extra Blood Power, which is very bad. Tactics Since the Blood Power mechanic is new, much of the strategy for this fight includes rumour and guesswork. Details on maths and some speculation can be found in the Discussion section. Saurfang does hard enrage after 8 minutes. At 30% there's a soft enrage (Frenzy), cooldowns are normally saved for that point (although some raids have success maximizing DPS early on, and thus delaying the first Mark as long as possible). Mages can use Amplify Magic during this fight, as all of the damage is Physical. Blood Beasts Blood Beasts spawn every 35 seconds. In 25 player, Sarufang summons 5 in a pentagon shape, one in front of him, two at his sides, and two behind, in 10 player it's 2, one left, one right. Whenever a Blood Beasts successfully deals melee damage to any player, Sarufang gains Blood Power. This must be avoided, therefore the Beasts must be slowed and kited between ranged damage dealers. Melee must stay away from them. When Blood Beasts are about to spawn, Melee must stop using all multi-target abilities (like Heart Strike, Hammer of the Righteous, or Divine Storm). Blood Beasts are immune to CC effects such as polymorph and fear and they are also resistant to AoE. They can (and should) be rooted, snared, or stunned. Be careful not to root them near any raid members, else they simply melee these players. Normally, the Beasts go for healers. Healers should setup away from the boss, so that ranged can pick up the beasts and nuke them. Every ranged damage dealer should go for the beast furthest away, as soon as the beast gains aggro, switch away to another one. Like this, the Beasts should ping pong between ranged, and never be able to hit a player in melee. Tanks can also help by taunting Beasts which are far away from melee but close to their aggro target. If a Beast gets close to its aggro target, that target must run away and start kiting - don't let them hit anybody. If the raid is too melee heavy, it is possible to stunlock one Beast and kill it with melee, while the other beasts are kited by ranged. Boiling Blood Saurfang casts Boiling Blood on random raid members. This can simply be healed through, although every tick grants Blood Power. It cannot be dispelled or normally removed, but immunity abilities like Ice Block and Divine Shield stop it ticking while active, as will a Priest's Power Word: Shield. Mark of the Fallen Champion Whenever Saurfang gains 100 Blood Power, he casts Mark of the Fallen Champion on a random raid member. This does heavy damage (about 6k per second in 25 player) and grants Blood Power every time it hits. Additionally, when a player with a Mark dies, Sarufang is healed for about 5%. The Mark persists through death, do not combat rez a player that dies from it. A good healer can handle about two active Marks of the Champion (if focussing exclusively on the Mark targets). Two active Marks in 10 player generally lead to a wipe, in 25 players more than 8 Marks is probably too much. It may be a viable tactic to let the Mark of the Fallen Champion victims die. It's much easier to deal an extra 5% damage to Saurfang than to heal the Mark victim and deal with the increased frequency of future Marks. There are diminishing returns however, as living DPS are required to take down the Blood Beasts. With a few Warlocks and Paladins in the raid, it's possible to Soulstone the Paladins, and have the Paladins use Divine Intervention on Mark victims, and then rez themselves with the Soulstone. Again this has the drawback to reduce the number of active DPS. It may be appropriate to use this trick at the 30% enrage, to prevent the otherwise quick buildup in Blood Power and Marks victims at this point.
Saurfang II CLASS SPECIFIC TACTICS The following class specific abilities can be used vs. Blood Beasts: Frost Trap, Earthbind Totem, Thunderstorm, Entangling Roots, Typhoon, Frost Nova, Chains of Ice. Shamans Chain Lightning does not count as AoE versus Blood Beasts, so an elemental shaman can pull up to four of the beasts with one cast (if glyphed and no charge hits Sarufang). Similarly, with talents, Earthbind Totem can root several beasts at once. A Hunter dropping Frost Trap (WITHOUT Entrapment) or an Unholy specced Death Knight with Desecration can help as ranged get more time to beat them down. Mark of the Fallen Champion damage can be prevented temporarily by Divine Shield, Ice Block and Hand of Protection, but it is not removed by these abilities. Paladins can use Divine Intervention on the marked player, which effectively removes the player from the fight but prevents the 5% health return to Saurfang. The DI'ing paladin must then be battle-rezzed or previously soulstoned. Holy Paladins additionally may stand in the back centre and activate Righteous Fury. This will pull initial aggro on the mobs. Combined with Frost trap, typhoon, thunderstorm and other abilities the blood beasts die in a more controlled fashion. The paladin should Divine Shield or Hand of Protection if the ranged are unable to kill them fast enough and/or do not out-threat the paladin in the process and/or the paladin should move. Rogues may be able to avoid Mark of the Fallen Champion being cast on them, with a perfectly timed Vanish. If they get marked anyway or it's on cooldown, rogues can greatly reduce the damage they take by constantly using Feint, as Mark damage counts as AoE. Priests can and should use Power Word: Shield in the following target priority to reduce blood power generation: Raid members with Boiling Blood Tanks People fighting Blood Beasts Mages with Incanter's Absorption (slight DPS boost especially in 25man where more than one person getting hit by the 12yd blood nova is nearly inevitable, or if they get the DoT, additionally they will be fighting the blood beasts and may inadvertently get hit especially attempting a Frost Nova or Blink) Raid members (who may get hit by Blood Nova or Boiling Blood All of which (except tanks) who are not already shielded by another priest If one or two of the healing priests are discipline specialized or can be (Dual Talent Specialization) and they shield spam following the above targeting priority, it will greatly reduce the amount of blood power he generates as long as no one gets hit by the beasts! Also in 25man, 2 discipline priests should be able to keep nearly everyone on weakened soul until they start helping the healers on marks. Additionally in 25man any discipline priest should essentially be spamming Power Word: Shield unless marked targets/tanks need heals. Those priests should still use cooldowns like Hymn of Hope (although the priest will probably not be out of mana, another healer may be), Power Infusion, and Pain Suppression as they normally would. HEROIC The primary differences ARE Blood Beasts rooting their target and Saurfang healing for 20% HP upon a mark of the fallen champion death.
Festergut ABILITIES AND RAID POSITIONING Raid Positioning Festergut is tanked in the centre of the room, with melee and healers in the centre. Ranged (plus possibly a healer or two) spread out in a wide circle around the remainder of the room such that only one person can be hit by Vile Gas at a time. By hugging the wall, players may enter the room to get in position before the pull. In 10 player, at least 3 raid members must be at range, else Vile Gas is cast at the melee group. In 25 player, that limit is probably 8. If Vile Gas is ever cast in the melee group it's normally a wipe. Gas Spore and Inoculation Roughly three minutes into the encounter, Festergut casts Pungent Blight, which causes about 50,000 damage to every player in the raid. This damage can be reduced by 75% if all players inoculated themselves via the gas spores. Festergut casts them three times prior to his Pungent Blight; since Inoculation stacks, players can get three stacks of the buff, each of which reduces damage taken from Pungent Blight by 25%. In 10 player, Festergut casts 2 Spores. Usually, one of them spawns in the melee/healer group and the other on a member of the ranged group. The melee group doesn't have to move a lot (just take care everybody is within 5 yards of the spore), while ranged must run towards the nearest spore. Since the times at which Spores are cast are fixed, it's possible to collapse the raid into two tight groups before the cast is finished. In 25 player he casts three Spores, the same principle applies (collapse into one melee and two ranged groups). If by accident several Spores land on the same group, one player with a Spore must quickly run to a group that does not have a Spore. Each player can be inoculated only once per spore cast, there's no point in running to several spores from the same cast. It's actually harmful to try to do so, because spores also deal an AoE DoT. For this reason, it must be avoided to stand in more than one AoE from the Spores. In summary the raid must regularly spread out (for Vile Gas) and then collapse (for Gas Spore/Inoculation) at the appropriate times (similar to the Akil'zon encounter, albeit not identical). Abilities Gas Spore — Unleashes a Gas Spore, inflicting 2 random targets with a gaseous spore. The Spore will explode after 12 seconds, inflicting 1,950 to 2,050 damage to all nearby friends. The damage from the Gas Spore builds the targets immune system, giving them a 25% resistance to the blight for 2 minutes. Stacks up to 3 times. Instant, 18-second cooldown. Gaseous Blight — The Gaseous Plague inflicts 4,388 to 4,612 Shadow damage to all nearby players. Instant. Gaseous Blight — (After 1 inhale) The Gaseous Plague inflicts 2,925 to 3,075 Shadow damage to all nearby players. Instant. Gaseous Blight — (After 2 inhale ) The Gaseous Plague inflicts 1,463 to 1,537 Shadow damage to all nearby players. Instant. Inhale Blight — Inhales the Gaseous Blight in the room, increasing damage dealt by 30%. 3.5-second cast, 15-second cooldown. Pungent Blight — Violently releases the Gaseous Blight, dealing 48,750 to 51,250 Shadow damage to all enemy players, releasing the deadly Blight back into the room. 3-second cast, 15-second cooldown. Vile Gas — Inflicts a Vile plague in targeted area, inflicting 4,875 to 5,125 damage every 2 seconds for 6 seconds. The plague causes the infected targets to vomit uncontrollably, inflicting 3,900 to 4,100 damage to nearby allies. Does not affect melee if there are at least 4 ranged players (on 10-man; probably 8 on 25-man). Instant. Gastric Bloat — Inflicts 9,750 to 10,250 Nature damage to the target. Damage done by affected increased by 10% per application. Causes Gastric Explosion, immediately killing the player, if it reaches 10 stacks. Lasts 100 seconds. (Instant) Gastric Explosion — Immediately kills the affected player, and does 29,250 to 30,750 shadow damage to all players in a 10 yard range..
Festergut II Tactics DPS Setup Melee DPS likely have very high numbers compared to ranged DPS in this encounter. They only need to take a step or two sometimes when spores are up, else they can exclusively focus on the best possible DPS rotation. Ranged DPS on the other side must regularly collapse on Spores and then run back to position apart from each other to avoid chaining Vile Gas. Tips and Tricks Paladin tanks can clear the Gastric Bloat debuff with Divine Shield. Vile Gas can be broken prematurely with a PvP trinket, Every Man for Himself, Ice Block, or Divine Shield. When the tanks switch, the tank that has stacks of Gastric Bloat should immediately receive Hand of Salvation to lower his threat. Defensive cooldowns Ice Block and Dispersion prevent a player from being killed by Festergut's exhale Pungent Blight — , even without any stacks of inoculation. Further, by using these abilities shadow priests and mages can deliberately ignore spores and inoculation and spend the time squeezing out a bit more DPS. Also, Rogues can use their Vanish ability, if timed right (just as the cast ends) and Paladins can use Divine Shield much in the same way as the Mages and Priests. So even though dps Paladins and Rogues will be right next to the tank, if they think they are too far away to be hit by the spore, they can use their respective abilities to block/avoid the damage. For Rogues however, this is can be unreliable as it requires immaculate timing. Heroic Difficulty Festergut received limited testing of his Heroic mode. The primary difference was Professor Putricide launching Malleable Goo at the raid during the encounter. HEALINGSetup This encounter is very healing intensive. Healers need to maintain the health of the active tank, as well as repair the AoE damage from Gaseous Blight, and heal Vile Gas victims. After an inhale, the raid damage decreases, but the damage to the tank increases more. It's possible to predesignate for each inhale one healer who switches from raid healing to tank healing. Vile Gas If there are sufficient ranged DPS standing out of melee range, healers should stand in the centre with melee, so they don't get hit by Vile Gas, as Vile Gas makes the target unable to perform any action for the 6-second duration. It also allows them to move less and heal more when Spores are up. TANKING Setup and Damage Input This encounter requires at least two tanks. Festergut stays in the centre of the room (where he begins). The boss hits very quickly for around 14,000 to 15,000 on plate. Damage output increases by 30% (additive, so +90% at 3 stacks) for each cast of Inhale Blight, after three Inhales he hits for around 24,000 to 26,000 per attack. Gastric Bloat and Gastric Explosion About once every 12 seconds, Festergut casts Gastric Bloat on the tank. This debuff increases the tank's damage, but the 10th stack kills the tank in an explosion for massive AoE damage, which is almost certainly a wipe. Therefore, the second tank must taunt Festergut when Gastric Bloat reaches 9 stacks. This happens for the first time right around when Festergut is about to cast Inhale Blight for the third time, the second time after the 5th inhale. Switching on an Inhale is a very good idea, because while inhaling, Festergut stops DPS for a short moment. Healers need to be aware of the tank switch, particularly at the first time it happens during a high-damage period. The mechanic is quite similar to the Phase Punch of Algalon the Observer. It's not possible to switch earlier, because the debuff lasts 100 seconds, it has timed out only after the second tank has taken 9 stacks. In 25 player it's possible to use 3 tanks and allow a less tight rotation, but this comes at the price of an additional melee damage dealer (remember, this is a DPS race). Paladins can also clear the debuff with Divine Shield. After the tank switch, the prior tank still does 90% increased damage (= increased threat). Therefore, the "old" tank must be very careful not to pull Festergut off the new tank, lest he get a tenth stack of Gastric Bloat, explode, and wipe the raid. Hand of Salvation helps. Tanks should switch off their aggro generation abilities (e.g. Paladins Righteous Fury) and switch on DPS enhancing abilities (e.g. Druids Cat Form, Death Knights Blood Presence). Of course they must not forget to get back in a proper tanking configuration prior to taking over again.
Rotface ABILITIES Mutated Infection — The Mutated Infection inflicts 3,900 to 4,100 shadow damage every second and reduces healing received by 50%(heroic mode: 75%) for 12 seconds. After the Infection is removed a small ooze is created at the target's location. Ooze Flood — The Ooze Flood inflicts 5,363 to 5,637 damage every second and reduces move speed by 25% for 5 seconds. Slime Spray — Raining Green Ooze. Deals 5,363 to 5,637 Nature to enemies in cone every second for 5 seconds. Little Ooze An ooze spawns when Mutated Infection is removed from a player (either by being dispelled or expiring). These merge and will eventually explode. Sticky Ooze — The Green Goo inflicts 2,925 to 3,075 damage every second and reduces move speed by 50%. Weak Radiating Ooze — The Radiating Ooze inflicts 3,413 to 3,587 damage to enemies within 10 yards every 2 seconds, it will also cause the Little Ooze to merge with other nearby Ooze. Big Ooze These spawn when Little Ooze merges with another. Radiating Ooze — The Radiating Ooze inflicts 4,388 to 4,612 damage to enemies within 10 yards every 2 seconds, it will also cause the Big Ooze to merge with other nearby Ooze. Sticky Ooze — The Green Goo inflicts 2,925 to 3,075 damage every second and reduces move speed by 50%. Unstable Ooze — Increases damage dealt by 20%. Stacks to 10. Applied each time an ooze merges with Big Ooze. Unstable Ooze Explosion — Inflicts 9,750 to 10,250 damage to enemies within 6 yards. This is caused by the Big Ooze merging with other oozes 5 times. TACTICS One tank should keep Rotface in the centre of the room. A second tank (or other seasoned kiter) needs to kite the big Oozes in a wide circle along the outer wall. The raid stands behind Rotface. In regular intervals, Rotface uses Slime Spray. He turns in a random direction (this ability is not targeted on specific players) and sprays slime in a frontal cone, all raiders must quickly move behind him. It is recommended that ranged DPS stand close to Rotface for easier dodging of this ability. Slime spray has a long range, so it can hit a Mutated Infection victim while they are dealing with their Ooze, in which case they need quick healing. Dealing with Mutated Infection is the key to this fight. In decreasing intervals, a random raid member gets Mutated Infection. This debuff ticks for some damage for 12 seconds (or until dispelled), and then spawns a small Ooze with 500k aggro on the formerly infected player. Whenever two Oozes are close enough to each other, they automatically combine into a larger one. The resulting larger Ooze deals high melee damage, moves at half speed and has a normal aggro table, thus it can be kited. Due to the debuff/small Ooze spawn mechanic, the infected player must bring the newly spawned Ooze to the bigger one which is kited. It's the infected player's responsibility to make sure the small Ooze properly merges, only after the Oozes have merged the infected player may return to the raid. Kiting and merging Oozes is complicated by Professor Putricide randomly flooding a quarter of the room with poison slime. It's possible to run through short distances of poison slime by jumping, but it's a better idea to keep an eye on the pipes leading into the room, to see which quarter gets flooded next. Additionally, the Oozes sometimes leave behind slime patches, which should also not be stepped into. After five merges Rotface emotes, and after a four second delay the big Ooze explodes. This deals heavy AoE damage around the Ooze, and additionally rains small globules of slime at random raiders. It is not confirmed, but it seems the targeting of these small globules takes place prior to the four second delay, so the raid needs to run towards the outer edge of the room during these four seconds. The entire cycle then repeats. The easiest way to join oozes together is to have the infected person run ahead of the path of the Big Ooze and receive a cleanse, then snare the Little Ooze in place while the Big Ooze catches up. Although oozes pursue their aggro targets, they also exert a "magnetic" influence on each other if they are less than 10 yards apart. Oozes periodically launch puddles of slime at random raiders, further reducing the amount of room available to the raid. Since the intervals between Mutated Infections decreases, the number of Oozes in the room increases, sooner or later the number of slime patches and Oozes gets out of control and the raid wipes (= soft enrage). CLASS SPECIFIC TACTICS Mages should avoid using Mirror Image: this may confuse the little oozes' aggro table, causing them to stop chasing the mage and aggro on a healer. Slow (mage) can be cast on the oozes to help the designated kiter if they are having problems. Death Knights are arguably the best choice for an ooze kiting tank, due to their many long-range threat generation abilities. Chains of Ice are invaluable for snaring the little oozes in position to be engulfed by the big ooze. Paladins should be prepared to cast Hand of Freedom on the offtank, should he need to run through the ooze flood. Shadow Priests can use Dispersion to run through the big ooze, merging their own ooze in the process. Heroic Mode During the heroic version of Rotface Professor Putricide will come to the balcony and cast Vile Gas on random players as the Festergut encounter Mutated Infection — The Mutated Infection inflicts 3,900 to 4,100 shadow damage every second and reduces healing received by 75% instead of 50%. Healing is harder, so this disease will slowly kill affected player without heavy heals or dispel.
Professor Putricide I ABILITIES Mutated Slime 50,000 yd range — Throws a vial of Mutated Slime, creating a puddle of slime at the targets location. Instant Mutated Slime — The Mutated Slime grows continuously, inflicting 4,388 to 4,612 damage every second until it is consumed by another Mutated creature. Instant Unstable Experiment — Professor Putricide begins to perform a wicked experiment on you all. 2.5 seconds cast Choking Gas Bomb — Professor Putricide throws Gas Bombs around him, the Gas Bomb deals 5,363 to 5,637 damage every seconds and explodes for 15,600 to 16,400 damage after 20 seconds. Instant Choking Gas 50,000 yd range — The Choking Gas inflicts 4,388 to 4,612 damage and causes you to choke, reducing your chance to hit by 75% for 10 seconds. Instant Create Concoction 50,000 yd range — Professor Putricide is rifling through the lab table, searching for a powerful potion. 4 seconds cast Guzzle Potions 50,000 yd range — Professor Putricide starts to drink every potion on the table. 4 seconds cast Malleable Goo unlimited yd range — Professor Putricide bounces a Malleable ball of Green Goo at the target, inflicting 14625 to 15375 damage and slowing attack and cast speed by 200% for 15 sec. Instant Gas Cloud Gaseous Bloat — Inflicts 1,463 to 1,537 damage every 2 seconds and if the Gas Cloud hits you it will expunge all of the remaining Gaseous Bloat and harm all nearby allies. 3-second cast Gaseous Bloat — The Gas Cloud is fixated on the player with Gaseous Bloat. If he catches him it will cause him to cast Expunge Gas, inflicting damage to nearby players based on how bloated the player is. Instant Expunged Gas 50,000 yd range — The Gas Cloud's attack has expunged all of the gas from the target! Expunged Gas inflicts damage to all enemies based on the number of Gaseous Blight stacks that were remaining on the target when they were attacked. Instant Growing Ooze Puddle Mutated Slime — The Mutated Slime grows continuously, inflicting 4,388 to 4,612 damage every second until it is consumed by another Mutated creature. Instant Mutated Slime — Inflicts damage to targets in the Mutated Slime. Volatile Ooze Volatile Ooze Adhesive 50,000 yd range — The Volatile Ooze Adhesive bonds the target to the Volatile Ooze, inflicting 2,438 to 2,562 damage every second and rooting the target. The Volatile Ooze moves towards the target, exploding for 39,000 to 41,000 damage, split among all nearby targets. 3-second cast Ooze Eruption 50,000 yd range — Inflicts 165,750 to 174,250 damage shared among nearby targets, knocking them back in all directions. Instant Mutated Abomination Eat Ooze 40 yd range — Eats nearby Mutated Slime decreasing the size of the pool, giving you 4 Ooze energy! Instant Regurgitated Ooze 50 yd range — The Regurgitated Ooze has a surprising effect on the target, slowing its movement speed by 50% and dealing 6,338 to 6,662 damage every 2 seconds for 20 seconds. Instant Mutated Slash Melee range — Inflicts 100% weapon damage instantly! Instant
Professor Putricide II ABILITIES PHASE 2 Phase 2: 80% to 35% Putricide casts Tear Gas, which stuns the raid for 10 seconds while he phases. All previous abilities continue in this phase. In addition, Putricide gain two new abilities: Choking Gas Bomb and Malleable Goo. You can see Putricide holding Choking Gas Bombs (one in each hand), which look like orange laboratory flasks. When Putricide tosses these to the ground near him (and relatively close together), they form an orange cloud on the floor. These flasks explode after 20 seconds, killing nearby players. Malleable Goo looks like a bouncing green slime ball. Putricide randomly targets and tosses the goo to a ranged player. These cause 20,000 AoE damage on impact, and slow attack/cast speeds by 200% on impact. Easily avoidable by moving out of the way of the goo. You will need to keep killing adds and controlling slime pools while dealing with these abilities. Phase 3: 35% to 0% Professor Putricide casts tear gas again and phases. No more adds will spawn, however adds that are up will remain. Save Heroism/Bloodlust for this phase. Your abomination driver will need to tank Putricide now. Malleable Goo, Choking Gas Bomb, and Slime Pools continue. You cannot get rid of slime pools anymore so they will grow until you are overrun or Putricide dies. Putricide stacks a debuff on his current tank every 10 seconds called Mutated Plague, which has a one-minute expiration timer. This causes damage to the entire group, and should a person die from Mutated Plague, heals Putricide for a massive amount. Tanks should switch over at four stacks, and if a tank is going to lose their mutated plague stack, they should taunt, since Putricide is healed if the debuff expires. Switching at four stacks eliminates this issue. Putricide also stacks a buff on himself called Mutated Strength, causing him to do more damage over time. Phase 3 is a burn phase in which Putricide must be killed in short order or he will wipe your raid. After about 80 seconds when someone gains a 5th stack of Mutated Plague it will cause too much damage to handle. Putricide will berserk after 10 minutes of combat. PHASE 1 Phase 1: 100% to 80%. Putricide will spawn growing slime pools throughout the encounter, which the abomination pilot (the offtank) eats to gain ooze power. If you are almost out of ooze, stop eating the puddle to retain your source of ooze power, as you will need the ooze power to snare the Volatile Oozes and Gas Clouds. You will cause 4,000 damage every 2 seconds to the raid while an abomination is piloted. If your abominations dies, you can click the table again to obtain a new one. Tank Putricide next to the Orange tank on the left side of the room to start with. Not long after the pull you will see a raid warning for "Unstable Experiment," which causes a Volatile Ooze to spawn next to the Green tank on the right side of the room. Ranged DPS should switch to it immediately and melee DPS should switch to it as soon as it is clear who it is targeting. The Volatile Ooze will root a player in place and move towards them; your abomination pilot needs to snare it with Regurgitated Ooze. It will explode for 175,000 damage split between every player standing on top of the affected person. When the Volatize Ooze is close, all players should collapse on the affected player. If the Ooze is not yet dead it will acquire a new target and do the same thing. It needs to die quickly. After the Ooze is dead, move Putricide next to the Green tank. He will soon cast another Unstable Experiment and spawn a Gas Cloud next to the Orange tank. The Gas Cloud also follows a random player, applying a dot called Gaseous Bloat on them, which requires a lot of healing. Gaseous Bloat starts with numerous stacks that decrease over time. Should the Gas Cloud reach its targeted player while stacks still remain, the raid takes a large amount of damage, potentially wiping the raid. The targeted player must kite the cloud around the room while everyone else kills it. The abomination pilot should also snare it. After this, Putricide should be moved back to the Orange tank. The add spawns alternately in a predictable manner. Alternate Tactic A different approach to dealing with the Volatile Oozes is to have the raid stack where the Volatile Ooze spawns. Healers will be near the ranged, but will move away from the target of the Volatile Ooze. When the Volatile Ooze spawns, melee and ranged will quickly kill it. If a healer is the target, ranged will move and stack with the targeted healer. Damage will be split between ranged and melee and they will be thrown back. Quickly finish off the Volatile Ooze before it hits another player. AoE healers can start pre-casting to quickly bring the health back up. With sufficient DPS and less movement, the raid should enter phase 2 before the first Gas Cloud spawns. Handling the Gas Cloud remains the same. This approach works in phase 2 for the Volatile Ooze as well, the raid will still need to watch for Choking Gas Bombs and Malleable Ooze. NB THIS IS WHAT WE DO IN 10 man HEROIC 25-man Differences Professor Putricide will launch two Malleable Goo projectiles rather than just one. Three tanks will give you the most time to kill Putricide in Phase 3 since Mutated Plague triples in damage every stack. You must keep the debuff on all three tanks. Therefore each tank in turn will gain 2 stacks then gain 4 stacks in a 2/2/2 4/4/4 setup. After 120 seconds someone will gain a 5th stack, wiping the raid. Heroic Difficulty On Heroic Difficulty Professor Putricide will gain Unbound Plague which lasts 60 seconds, does a small amount of damage every 1 second and jumps to anyone within 3 yards, leaving a debuff every time it jumps called Plague Sickness which increases damage taken from Unbound Plague by 300%, stacking infinitely. Rather than casting Tear Gas on the raid on Heroic Difficulty to change phases, Professor Putricide will instead debuff half the raid with the Ooze Variable and half the raid with the Gas Variable. He will then spawn both a Volatile Ooze AND a Gas Cloud at the same time. You may only attack targets matching your variable.
Blood Prince Council STRATEGY This is a fairly simple one-phase encounter. The enrage timer is very generous and should not be of any consequence. You will need two regular tanks and either one ranged tank or a third regular tank. A 3 tank strategy using a paladin to tank Keleseth worked for us. General Invocation of Blood will randomly buff one of the Blood Princes and only that prince will have a health bar to DPS. The other princes will have 1 HP and attacking them will have no effect. Invocation of blood switches between princes throughout the encounter and DPS must switch with it. Prince Valanar will be the first prince with Invocation of Blood. It is interesting to note that though their level is classified as "Boss", their armour level appears to be that of a "clothie". What this means is that they take considerable amounts of damage very quickly. Heroism, especially, should be saved for Keleseth since he'll be constantly casting Shadow Lance. Meaning he'll be unable to dodge any attack during the time he's empowered. The Blood Prince Council will go berserk and instantly wipe the raid after 10 minutes of combat. ABILITIES Prince Valanar Shock Vortex — Creates a vortex of swirling force near an enemy target that inflicts damage and knocks back enemies near it. (Unlimited range. 1.5 seconds cast) Kinetic Bomb — Summons a Kinetic Bomb that floats towards the floor and explodes for 12,000 physical damage to every player in the room, knocking them back 200 yards. (50 yards range. 3 seconds cast)Empowered Shock Vortex — Creates force vortices on all nearby enemies within 30 yards, inflicting 7,000 Physical damage and knocking enemies near the target away. (Unlimited range. 4.5 seconds cast) Prince Taldaram Conjure Ball of Flames — Conjures a ball of flames that flies through the air toward the target and explodes on impact. 10,000 damage minimum. (50 yards range. 3 seconds cast) Conjure Empowered Ball of Flames — Conjures a ball of flames that flies through the air toward the target and explodes on impact, dealing fire damage to nearby enemies along the way. (50 yards range. 3 seconds cast) Glittering Sparks — Glittering sparks shoot from the caster's hands in a cone, burning enemies for 16,152 Fire damage over 8 seconds and reducing their movement speed by 20%. (90 yards range. Instant) Prince Keleseth Shadow Lance — Hurls a bolt of dark magic at an enemy, inflicting 17063 to 17937 Shadow damage. (40 yards range. 1.5 seconds cast) Shadow Resonance — Summons a Dark Nucleus. (Instant) Empowered Shadow Lance — Hurls a bolt of dark magic at an enemy, inflicting 85,313 to 89,687 unresistable Shadow damage. (40 yards range. 1.5 seconds cast) Dark Nucleus Shadow Resonance — The nearest target resonates with shadow, suffering 1,000 damage and reducing Shadow damage taken from all sources by 35% for until cancelled [sic]. (15 yards range. Channelled. Lasts for 6 seconds)
Blood Prince Council II STRATEGY - DETAILS Prince Keleseth Any ranged class (or alternatively a tank class with strong ranged, such as a Death Knight) that can quickly gain snap aggro on the randomly spawning Dark Nucleii will work well for tanking Prince Keleseth. Dark Nucleii will spawn in the room around Keleseth and the ranged class must get aggro on them and stand near them. They will give the ranged class a stacking debuff that reduces shadow damage taken, allowing the ranged class to survive Empowered Shadow Lance which is cast when Keleseth gains Invocation of Blood. Dark Nucleii should not be hit too hard and also destroy themselves over time, necessitating finding more to keep the shadow resistance buff up. Dark Nucleii will follow whoever hit them last, so other classes hitting them accidentally is a good way to get your ranged tank killed. Note that the damage reduction from Dark Nucleii is multiplicative not additive and you will still take damage even with 6 or 7 Nucleii on you. Prince Valanar Prince Valanar will use Kinetic Bombs which can be targeted and attacked to lift them higher into the air and prevent them from exploding -- if/when a Kinetic Bomb reaches the floor it explodes for 12,000 (or 16,500) physical damage to every player in the room and knocks them back 200 yards. For this reason, it's best to assign one or two ranged DPSers to handle the Kinetic Bombs they simply need to attack the bombs to keep them in the air and prevent them from hitting the ground. A single attack will stop them for a split second or two, continued damage will push them back up and DoTs tend to slow the bomb for the duration of the ability. The Kinetic bombs die after 1 minute of being spawned. Since keeping the bombs up can be hectic, a macro /target Kinetic Bomb is probably a good idea to prevent one from accidentally targeting a Dark Nuclei. Alternatively, having the clickable health/name plates enabled can help as well. You don't want to accidentally target a Dark Nuclei that's already attached to the Keleseth tank and kill it, thinking you're targeting a Bomb. He puts shock vortexes on random raid members which knocks both them and any nearby (~12 yards) raid members back 50 yards. When he gains Invocation of Blood he casts Empowered Shock Vortex which creates a shock vortex on top of every player within 30 yards, melee will need to scatter and get away from each other. Prince Taldaram Prince Taldaram will do a frontal-cone fire-attack and conjure balls of flame which follow a random raid member and do less damage the longer they are kited, minimum 10,000 damage. With Invocation of Blood he will launch Empowered Balls of Flame which do a huge amount of damage on impact and lesser damage to nearby targets along the way, doing less impact damage depending on how many players were hit while the ball was in flight. Melee can help alleviate this damage by running with the ball for a few seconds when it's first cast. The Ball moves faster then players can run, but that few extra seconds might make the difference between a living healer and a dead healer. Because of the frontal cone attack, Taldaram should be tanked facing a wall.
Blood-Queen Lana'thel ABILITIES Ground phase Blood Mirror 50,000 yd range — 100% of damage done to you is dealt to the linked source. This affects the person closest to the tank. Delirious Slash (Heroic mode) 10 yd range — Inflicts 50% of weapon damage to an enemy and causes it to bleed for 5250 to 6750 damage per application every 3 sec. for 15 sec. Instant. 75% of weapon damage+7000-9000/3 on Heroic Vampiric Bite (Heroic mode) 100 yd range — Deals 12025 to 13975 damage to the target, granting them the Essence of the Vampyr Queen. Instant. 13875 to 16125 on Heroic. Triggers... Essence of the Blood Queen (Heroic mode) 100 yd range — You are infused with the blood of the Vampyr Queen. Damage done increased by 100%. Attacks heal caster. Instant. 60 second duration. Healed for 10% of all damage inflicted. Attacks cause no threat. As it wears off, triggers... Frenzied Bloodthirst 50,000 yd range — The caster must satiate their need for blood, otherwise they will lose their will to Queen Lana'thel. Instant. 10 second duration. "Vampiric Bite" replaces the caster's action bars. If not sated after 15 seconds... Uncontrollable Frenzy 50,000 yd range — Charmed. Increases damage done by 100%. Health increased by 5000%. Increases healing done by 1000%. Instant Pact of the Darkfallen 100 yd range — Deals Shadow damage to you and nearby non-linked allies. This effect expires when all linked targets are within 5 yards of each other. Instant. 5000 Shadow damage every 2 seconds. 3 targets are linked. Triggers... Pact of the Darkfallen — Deals shadow damage to nearby targets. Instant Shroud of Sorrow — An aura of sorrow and despair emanates from the caster, inflicting 4500 Shadow damage every 3 sec. to nearby enemies. Instant. 40 yard radius Presence of the Darkfallen — The presence of vampyr kin infuses Queen Lana'thel, increasing the power of her Shroud of Sorrow by 5%. Swarming Shadows — A swarming void consumes the target, causing a mass of shadows to appear beneath the target and dealing 2,313 to 2,687 Shadow damage every 2 seconds. This creates a cloud of shadows on the ground that deals damage to players who stand in it. Twilight Bloodbolt — Hurls a bolt of dark blood at the target, dealing 9,250 to 10,750 damage to the target and surrounding allies within 6 yards. Air phase Incite Terror — Magic dispellable four second fear on the entire raid to begin the air phase. Bloodbolt Whirl — Summons a maelstrom of whirling Bloodbolts every 2 seconds for 6 seconds. Bloodbolt Whirl — Hurls a bolt of dark blood at the target, dealing 9,250 to 10750 damage to the target and surrounding allies within 50,000 yards.
Blood-Queen Lana'thel STRATEGY Blood-Queen Lana'thel is an intense, time critical encounter with two phases: a ground phase and a very short air phase. More so than other Icecrown Citadel encounters Blood-Queen Lana'thel is considerably more difficult on 25-player mode. The problems of coordinating much larger numbers of bites and spreading out in the same size room are exacerbated by 15 more players. Blood-Queen Lana'thel has an aura that does 4500 shadow damage per two seconds. This increases in damage for every Vampire player in the room. The raid will need to be spread out or Twilight Bloodbolt will wreck multiple players. Especially during her air phase when the whole raid is hit by Bloodbolts. Random players will be affected by Swarming Shadows which will drop a shadow patch underneath the player every second until it wears off, forcing them to keep moving for its duration. 15 seconds after the start of the encounter Blood-Queen Lana'thel will bite the player highest on her threat list who is not her primary aggro target and does not have the Blood Mirror debuff (I.E. non tank) increasing their damage dealt by 100% and allowing them to heal themselves for part of the damage they deal. Note that as a result of this mechanic if a paladin has righteous fury on or the DPS are particularly low in the first 15 seconds it is possible for a healer to be bitten, severely impacting your ability to complete the encounter. She will only bite one player per encounter ever even if you lose this member. Keep in mind that your attacks cause no threat. However, you must pay close attention to this as you will gain Frenzied Bloodthirst when the bonuses fade, forcing you to bite another player within 10 seconds or become mind controlled. Players mind controlled by Blood-Queen Lana'thel are immune to CC but can be taunted. You refresh your vampire buff by biting so eventually the entire raid will be mind controlled when there is no one to bite. It is advised that you bite your best DPS first. She will also link the tank with the closest person to them with Blood Mirror, causing the linked person to take shadow damage equal to the damage the tank takes. She also places a dot called Delirious Slash on both tanks. Finally, she has an ability similar to Yogg-Saron (basically a reverse of Mother Shahraz) she links players with Pact of the Darkfallen and they must run to each other to remove it. The entire raid (needs live confirmation) will take shadow damage each second until all linked players are standing next to each other. Blood Queen Lana'thel has a huge number of hit points (59,400,000!) and you will quickly run out of people to bite, making this encounter short and requiring huge DPS. Only DPS should be bitten until there are no DPS left to bite and bloodlust/heroism should only be used when the majority of the DPS are vampires. More than any other encounter in Icecrown to this point Lana'thel will require DPS to be outputting everything their class can output. Assuming two tanks doing a consistent 2000 dps, with 5 healers doing none, the 18 dps will need a consistent 9711 dps per player to beat enrage on 25 man. Or 7806 per player with 5 dps in ten man. Every two minutes Blood-Queen Lana'thel will fear the raid and fly into the air launching three bloodbolts at every player. If the entire raid is not spread out it is likely there will be deaths. Blood-Queen Lana'thel will berserk after 5 minutes 30 seconds of combat. BITE ROTATION Bite 3 will coincide with Lana'thel's incite terror and air phase. The two players biting and the two players bitten should either be classes who can break magical fears or should have fear ward on them from priests. You will not need any more bites after the fifth round because Blood-Queen Lana'thel will berserk at 5:30 and kill your raid. With this organization no one should ever get mind controlled as long as they memorize their targets before the encounter begins. Healers should keep in mind that when a bite round is occurring, especially the final bite round people will absolutely have to bite their targets even if they have Pact of the Darkfallen or Swarming Shadows, divine sacrifice or aura mastery shadow can mitigate this slightly if used at the right time, assuming you have one available since it's also very useful to use them in the air phase. On 25-player difficulty spreading out becomes a serious issue, especially during the air phase. To start with Lana'thel should be tanked where she stands and faced away from the raid, while ranged DPS make a semicircle at maximum range, leaving a spot in the centre (the diamond on the floor in the centre of the room works nicely) as the position where all players will run with pact of the darkfallen. During the air phase ranged DPS will run to the walls of the room and melee will use the middle of the room to spread out and avoid deaths. Healers should be in a circle between the melee and ranged. Again, aura mastery and divine sacrifice are very useful here. This encounter is very demanding for a normal mode boss, if a vampire ever dies you will likely be dangerously close to the berserk timer. If a DPS in the bite order dies and cannot be resurrected you will have issues mid fight. No one can die. NB Hunters may use deterrence during her air time to mitigate the damage! As for who bites who, VAMP!
Blood Queen Position Primer Ranged At Safe distances 6 yards apart G4 6 yards G2 6 yards G3 6 yards G4 SPOT BQL Ranged Raid Groups Melle Tanks SPOT BQL Ranged Raid Groups Melle Tanks G2 People with Pact of the Darkfallen MOVE to CENTRE G3
Blood Queen G4 STAR BITES BLUE STAR RETURNS TO POSITION BITERS ALWAYS RETURN G2 G3 Notes It is essential that spacing is maintained. It is essential that Bite order is maintained. People MUST return to their groups and remain spaced out. People must be aware of bites and move accordingly. SPOT BQL Ranged Raid Groups Mêlée Tanks
Valithria Dreamwalker ABILITIES Valithria Summon Nightmare Portal — Instant. Nightmare Portals allow players access to the Dreamstate, where Dream Clouds spawn. Emerald Vigor 50,000 yd range — Regenerating 200 Mana every 3 sec. Increases Damage done by 10%. Increases Healing done by 10%. Instant. 10 yd radius. 35 sec duration. Stacks to 100. Cast when a Dream Cloud is killed in Valithria's dream state. Dreamwalker's Rage — Deals 10,000,000 Nature damage to all surrounding enemies. 3 sec cast. 50,000 yd radius. Cast after reaching full health. Will not hit players. Blazing Skeleton Fireball — Inflicts 4,713 to 5,287 Fire damage to an enemy. Lay Waste — Surrounds the caster in flames for 12 sec, pulsing 3770 to 4230 Fire damage to all enemies every 2 sec. Instant. 50,000 yd radius. 4713-5287 on Heroic Blistering Zombie Acid Burst — The caster explodes, dealing 9425 to 10575 Nature damage instantly and 750 Nature damage per second to all enemies within 15 yards. Lasts 20 sec. 11782-13218+900/sec on Heroic Corrosion — Whenever the caster lands a melee swing, the target takes 2000 Nature damage every 3 seconds and their armour is reduced by 10%. This effect can stack up to 5 times. Lasts 6 sec. 2500/3 on Heroic. Risen Archmage Column of Frost — Marks the location under a random player target. After 2 seconds a column of frost erupts from this location, dealing 11310 to 12690 Frost damage to all enemies within 3 yards, knocking them into the air. Instant. 3 yd radius. 14138-15862 on Heroic.Frostbolt Volley — Inflicts 8550 to 10450 Frost damage to nearby enemies, reducing their movement speed for 4 sec. 1.5 sec cast. 200 yard radius. 10800-13200 on Heroic (8 sec cooldown) (This can be interrupted) Mana Void — Summons a Mana Void at a random enemies location. This Mana Void burns 800 mana per second to all enemies within a 6 radius. Lasts 30 seconds. Instant. 1000 mana on Heroic Gluttonous AbominationGut Spray — Deals 2000 Nature damage per second and increases Physical damage taken by 25% for 12 sec. Instant. 8 yd radius. Disease. 9425-10575 Nature damage initial blast. 11782-13218+2500/sec on Heroic Spawn Rot Worms — Spawns 8 to 10 Rot Worms after the abomination dies. Rot Worm Rot worms spawn in 7-10 per abomination when it dies. Melee — 4,000 to 5,000 damage on their current target. Suppresser Suppression (Channelled) 50,000 yd range — Reduces healing received by the target by 10%. Lasts until cancelled. Cast on Valithria. STRATEGY Valithria starts at 50% health and the objective is for players to heal her to full. This is accomplished through the raid healers healing the boss, in addition to the remainder of the raid. While this is being done, waves of adds will spawn and rush your position, to try and stop you from healing Valithria. These waves spawn progressively faster as the fight goes on, so it's important to have a good mix of DPS to keep the adds down, as well as healers to heal Valithria. Tanks are also useful to protect the healers and divert the adds. A basic strategy is to split the raid into 3 groups. 2 of these should comprise of a healthy DPS component, and will be concerned with shielding the final group, by keeping the waves at bay. The final group will be concerned with healing Valithria at all times. Within each shielding group, one person should be assigned to kite Blistering Zombies well away from the main groups, in order to mitigate the effects of Acid Burst. This should ideally be assigned to members who are skilled in ranged kiting, not only to aid in kiting, but also to minimize additional healing required, after being hit by the Corrosion debuff. Healers should also be aware of the Emerald Vigor buff, and aim to have as many of these active as possible, not only to reduce the amount of casts required, but also for mana management. If your healers are able to manage this helpful debuff, then mana should not be an issue at all. DPS players should also be on the look out for this, as the increase in damage dealt will provide a small amount of breathing space as the waves spawn faster. The key to this encounter is for your shielding groups to be able to produce the DPS required to eliminate each wave before the next spawns, and also to minimise the healing that is directed away from Valithria. Healers should be suitably geared in order to not only produce the massive healing requirement on the boss, but also to be able to heal through any unavoidable damage. In 10 man, mobs spawn from the two areas sealed off by gates in the front of the room as the players come in. In 25 man, mobs will spawn from all four gated areas. Mob Priorities Several members (no more then 2 on 10 man) should be tasked with attacking nothing but the Suppressors (Cat druids are quite effective). Blazing Skeletons are a priority for all members and should be brought down quickly, lest they waste the raid with Lay Waste. The exception here are the DPS handling the Suppressors; they should stay on the suppressors at all times. Zombies should be kited by ranged DPS. Archmages should be tanked and taken out by Melee DPS. Abominations should be tanked and taken out by the Ranged DPS. Class Specific Tactics Feral Druids (Cat): Cat Druids are particularly effective against the Suppressors with Swipe (Cat). One or two cat druids can easily keep the Suppressors under control. Paladin Tanks are good for tanking the Abominations, as Consecrate can help gather up the worms that spawn, allowing casters to quickly AoE them down. A Shaman with Cleansing Totem can be useful for the Abomination tank to help alleviate the already high stress that healers are enduring. Death Knight tanks are good for tanking the Archmages as Frostbolt Volley can be interrupted.
Sindragosa I STRATEGY As with most Dragon bosses, Sindragosa tail swipes and cleaves so players (other than the main tank) should be located at her sides; this applies especially to the melee who are more at risk. She also has a constantly running aura throughout the ground phases of the fight which deals 4,500 ice damage to the raid every 3 seconds. In addition to this, Sindragosa has a 20% chance to apply Permeating Chill to anyone dealing physical damage to her, a debuff inflicting 1,000 Frost damage every 2 seconds for 8 seconds, per application. In the ground phases, the tank will also have to deal with damage from Frost Breath which is a 60 yard frontal AoE causing 37,000 - 43,000 damage (27,000-32,000 on 10-man). This damage is dealt over 4 seconds. ABILITIES Phase One Cleave — Inflicts normal damage plus 50 to an enemy and its nearest allies, affecting up to 10 targets. Tail Smash — Inflicts 11,250 to 18,750 damage on enemies in a cone behind the caster, knocking them back. Frost Aura — Deals 4,500 Frost damage to all nearby enemies every 3 seconds. Frost Breath — Inflicts 37,000 to 43,000 Frost damage to enemies in a 60 yards cone in front of the caster. In addition, the targets' attack speed is decreased by 50% and movement decreased by 15% for 1 min. Icy Grip — Extend tendrils of frigid wind to pull all nearby enemies to the caster. After she uses this, she will follow it up with a Blistering Cold. Blistering Cold — Deals 35,000 Frost damage to enemies within 25 yards. Unchained Magic — Inflicts an arcane malediction on the target, causing any spells cast to result in a backlash of Arcane power after 8 seconds. Multiple spellcasts by the afflicted target will intensify the backlash. Instability — Using magic while afflicted with Unchained Magic will build up unstable energy, dealing 2,000 Arcane damage to the caster per spell cast, 8 seconds after spellcasting ends. Stacks 99 times. Permeating Chill — Physical attacks against Sindragosa have 20% chance to debuff the attacker with Chilled to the Bone, inflicting 1,000 Frost damage every 2 seconds for 8 seconds, per application. Phase Two Frost Beacon — Marks a target for imprisonment in an Ice Tomb. Ice Tomb — Entombs the targeted foe and all enemies within 10 yards in ice. She targets five random players after taking off and casts this on them. They are then trapped in a tomb with 454,000 HP which must be killed. These tombs also block line of sight on Frost Bomb, but anyone inside the tomb has Asphyxiation placed on them after 20 seconds in the tomb. Asphyxiation — Suffocation due to lack of air. Deals 8% of total health in damage each second. Frost Bomb — Deals 23,563 to 26,437 Frost damage to all nearby targets. You need to hide behind Ice Tombs to avoid this damage. Sindragosa will target locations in the room while flying and cast it there. After she uses this 4 times she lands. Phase Three All Phase One abilities. Mystic Buffet — Buffets all foes within 200 yards with arcane energy, increasing all magic damage taken by 10% per application for 8 seconds. Stacks 99 times.
Sindragosa II STRATEGY - DETAILS Phase 1 Phase one involves two main abilities. The first ability to watch out for is the pull/blistering cold ability which sees Sindragosa pull the entire raid towards her into close range (Icy Grip) and then blast the raid with 35,000 Frost damage (Blistering Cold). This is cast immediately after Icy Grip and has a 5 second cast time which cannot be interrupted. This gives the entire raid (tanks included) 5 seconds to get 25 yards away from her to avoid instant death. It should be noted that a high health tank can withstand this blast but quick, high heals will be needed following. Tip: If a tank would rather not take the damage from the blast, a tank may run out and charge back in (where able) immediately after. The second set of abilities in phase one is Unchained Magic. This is cast on raid member(s) and any spell cast by the afflicted member results in a delayed backlash (Instability). It should be emphasised that the backlash is not immediate but rather is delayed for 8 seconds. Additionally, the debuff can stack up to 99 times dealing 2,000 damage per stack. Tip: Possibly dispellable with immunity talents such as Divine Shield. Tip: The delay in damage allows pre-healing, pre-shielding or the use of planned defences. Phase 2 At 85% and every 1:50 minutes after, Sindragosa will fly into the air, starting phase two of the fight. She will target 5 players (two in 10-man) with a Frost Beacon who will, shortly after being targeted, be placed into an Ice Tomb and inflicted with 16,000 damage. Any player about to be entombed must be at least 8 yards from other players and one another otherwise the Tomb debuff will chain to someone else and inflict splash damage, with the chance of killing the player. She will then drop four Frost Bombs onto the ground and anyone who is not out of line of sight of them will take around 24,000 damage, killing most players. The idea of this part is similar to the Sapphiron fight in Naxxramas. One must be behind the Ice Tombs in order to avoid the Frost Bomb. Tip: Afflicted players may wish to assemble in close proximity, allowing the raid to essentially use them as a wall from the blasts. As soon as all of the frost bombs have gone off the players in the Ice Tombs will begin asphyxiating and quickly die meaning you should time DPS on the tombs to kill them as soon as the frost bombs end. After the fourth Frost Bomb, Sindragosa will land and re-enter phase one and this cycle carries on until the third phase. Phase 3 At 35% health, Sindragosa enters the third phase of the fight which is also the crux of this fight. She becomes permanently grounded (and thus, a permanent Frost Aura). Ice Tomb will still be cast on random raid members but there are no Frost Bombs. Players must still be broken out. In order to meet the DPS requirements of this fight you should be able to push Sindragosa into phase 3 before a third air phase occurs. Phase three will take some time. The stressful factor in this fight is the new ability she gains - Mystic Buffet. This debuff is applied to players in line of sight every 6 seconds and stacks with itself. This increases the magical damage taken by a target by 15% (10-man 10%) per stack and this is the critical mechanic of the encounter. You must control this debuff if you hope to win. You should remove it as often as possible by hiding behind the frozen players with 2-3 seconds left on your debuff to ensure it is not refreshed. If you gain a large number of stacks the damage will become unhealable and you will die. It cannot be stressed enough, phase 3 is not a DPS race, rather it is about control and endurance. Sindragosa's HP will go down slowly as you reset your stacks and free the frozen players. This is perfectly fine and the enrage timer is lenient if you only took two air phases to hit phase three. Whittle down her HP while keeping your stacks low and surviving her abilities and you will score a kill. Mystic Buffet makes tanking her considerably more difficult as only a few stacks will cause a tank to be instantly killed from her Frost Breath which carries on in phase three. Defensive cooldowns should be used to mitigate this damage and a tank rotation should be established to switch off at as low a number of stacks as possible.
Lich King ABILITIES The King Pain and Suffering - Inflicts 2,828 to 3,172 Shadow damage to enemies in a frontal cone, as well as an additional 500 Shadow damage every 3 seconds, stacking up to 5 times. Infest - Inflicts 6,598 to 7,402 Shadow damage to the entire raid. In addition, affected targets will take increasingly higher Shadow damage every 1 second, starting at 1,000. Secondary effect is removed when the target is at more than 90% health. Defile - Inflicts 3,000 Shadow damage to all players in the targeted area. Every time a player takes damage from this, Defile's damage and area increase. Remorseless Winter - Inflicts 7,069 to 7,931 Frost damage every second to players within 45 yards. Soul Reaper - Inflicts 50,000 Shadow damage and increases the Lich King's physical damage by 100% after 5 seconds. Necrotic Plague - A disease that inflicts 50,000 Shadow damage every 5 seconds for 15 seconds. If the effect ends (it expires, host dies, or is removed with a spell), the plague will jump to another target. If the effect is removed with a spell, the plague will lose a stack; if the target dies while affected, it will gain a stack. Whenever the plague jumps, the "Lich King's power will increase." Adds Summon Drudge Ghouls - Summons 1 Drudge Ghouls every second for 3 seconds. Summon Shambling Horror - Summons 1 Shambling Horror. The Horrors use Shockwave, which does 150% weapon damage to players in a frontal cone, and stuns them for 2 seconds. Summon Val'kyr Shadowguard - Summons 1 Val'kyr Shadowguard. Summon Ice Sphere - Summons 1 Ice Sphere. Ice Pulse - Inflicts 5,000 Frost damage over time. Has 5 yards range. Ice Burst - Inflicts 9,425 to 10,575 Frost damage to all enemies within 10 yards, knocking them back. Probably used before/on death. Raging Spirits - Another type of adds used somehow in the fight. Soul Shriek - Inflicts 20,000 damage and silences the targets in range for 5 seconds. Frostmourne Harvest Soul - Inflicts 7,500 Shadow damage very second for 6 seconds. If the target is still alive after the channel is over, their soul will be transferred to Frostmourne. Harvest Souls (not confirmed) - Inflicts 1,500 Shadow damage to all players for an unknown duration. The surviving players will be transferred to Frostmourne. Vile Spirits - Summons 10 Vile Spirits that become active after 30 seconds. Spirit Burst - Sacrifices the Vile Spirit, inflicting 14,138 to 15,862 Shadow damage to players within 5 yards. Also spawns an Invisible Stalker. ADDITIONAL INFO Everything said here is done from 10man, nothing different will change in 25man except more adds, more damage, more rotation and more teleports. He has 17.3Million on 10man. During the whole encounter with the Lich King (20minutes it is said to be, there is alot of Lore playing.) People will be randomly teleported to Frostmourne, for 10man it is 1, for 25man it is 3. While 1 Person / 3 People go in, 10 Vile Spirits come out. These Spirits will move around for 30 seconds then 1 at a time charge to a random player and EXPLODE, so spread out. The person inside will have to kill a target to be released
Lich King KEY POINTS 1. Have a disc priest shield as many players as possible (will help with infest later) don't pull with Misdirect as its needed later. Therefore wait until tank gets good aggro before starting DPS. Tank pulls the LK to the edge of the platform The LK opens with infest, quickly top off all the players for more then 90% so the DoT is removed. Do so every time Infest is cast. The LK summons the adds. Ghouls should be picked up by the tank, but do not DPS them directly. 2. When Shambling horrors spawn misdirect to get them on the Off Tank and make sure they are tanked facing away from the raid. When they get enrages tranquilize them or stun them. 3. When LK casts Plague on a player, have the player stand next to an add (preferably a ghoul) and then dispel it to make it jump to the add. Eventually it will reach a Shambling Horror and will hopefully kill it as well. 4. Before the LK reaches 70% and changes phase kill all the adds. Dispel the plague off the OT (as he is on his own) so that it doesn't jump to anyone else, and the buff is removed from the LK. This will prevent excess damage in transition. Also make sure not to cross the 70% line when a new horror is about to spawn. At 70% the LK moves the middle of the platform stats the transitional phase that will last 1 minute. He will cast remorseless winter and summon adds. Because he was tanked at the edge it will take him several seconds to get to the middle of the platform. Quickly run to the edges of the platform to avoid this damage. (a new extension of the platform is formed in this phase) 5 .P2 The LK will also summon raging spirits to spawn from a random player. These melee hard and have a frontal cone shape silence, so have OT pick them up, face away from the raid, and kill them ASAP. 3 spirits will be summoned on the targeted player in total. Orbs will start floating towards raid member and should be killed, or else when they reach the target it will get a lot of damage, and will be thrown off the edges of the platform. While all of this goes on stay relatively spread to avoid as much of the damage of Pain and Suffering as possible. When the LK ends this transitional phase quickly run back to inner platform because the platforms extension will collapse. 6. P3 starts. Move the LK tanked in the middle of the platform. The LK will start casting Defile (dark cloud like AOE). Avoid getting in it is high priority because otherwise it will spread and cover the whole platform and we will wipe. When we run out of defile try to run to it's left and right edges (when facing the middle of the platform) so that if we're targeted by a Val'Kyr we will not be pulled above the defile, making dps difficult or too close to the edges of the platform and sudden death. 7. The LK will summon Val'kyr Shadowguards that will attempt to pick up raiders and drop them off the edges of the platform. They need to be killed ASAP. They can also be (and should be) slowed. Use a /tar/cast macro here to ENSURE they are stunned ASAP. This may get tricky when the Val'kyr moves through a Defile AOE zone. NB. After soul reaper is applied rotate the tanks. Before reaching the next transition at 40% kill the Val'kyr as having one alive can cause problems here. 8. P4 starts when the LK reaches 40% another transition. This is a repeat of P1, however, this time 4 spirits will spawn. 8. P5 starts. LK starts summoning vile spirits that will first over the LK's head for a few seconds, and then attempt to explode on the raid. Because of this, spread out the raid, and kill them before they reach the players to avoid as much of the damage as possible. Infest and Val'kyrs will stop at this phase. OT can Spam taunt and pull adds towards him and away, for AOE on FAR side of circle. 9. The LK will start casting harvest soul on random players. They need to be healed through the DoT. Use damage shields and damage reduction to make sure they don't die as it is heavy damage. When it ends they will be transferred to Frostmourne. Players transferred into Frostmourne will watch a battle between King Terenas and a spirit. They can either Heal King Terenas or DPS the Spirit. Either choice will result in the Spirit's death and the player will escape Frostmourne. It is advisable to stun the spirit if possible when it starts channelling or interrupt it. If players die inside (have to escape in 60 seconds) the LK will gain a buff for 15% to his capabilities. At 10% The LK will kill the whole raid. Do not release and watch the ending scene. Be resurrected and fight on!
Lich King Phase 1 ABILITIES Phase 1 Summon Drudge Ghouls — Summons 3 Drudge Ghouls over 3 seconds. Summon Shambling Horror — Summons a Shambling Horror Enrage — Increases Physical damage by 200% 1 sec cast (7 sec cooldown) Shockwave Melee range — Sends a wave of force in front of the caster, causing 0 damage and stunning all enemy targets within 20 yards in a frontal cone for 0 sec. 1.25 sec cast. 150% weapon damage. (3 sec cooldown) Necrotic Plague 50,000 yd range — Infests the target with a deadly plague, causing 50,000 Shadow damage every 5 seconds for 15 seconds. If the target dies while afflicted or the effect ends, this effect will gain an additional stack and jump to a nearby unit. If this effect is dispelled, it will lose a stack and jump to a nearby unit. Whenever this effect jumps, the Lich King's power will increase. Instant. Disease. 100,000/5 on 25-player. Plague Siphon — Increases physical damage dealt by 2%. Stack increases each time Necrotic Plague jumps. 30 sec duration. Stacks to 500 Infest — Deals 6,598 to 7,402 Shadow damage to all enemy players within 50,000 yards. In addition, the targets will take increasing Shadow damage per second. This effect is removed when the target has more than 90% health. 2 sec cast. 9,425 to 10,575 on 25-player 3 Groups to Reduce overall AOE TANKS and MELEE Adds together to bounce plague. RANGED Move to tank group when infected move BACK on dispel Boss Tanks and Melee Position Ranged Raid Groups Shambling Horror
Lich King Phase 2 and Phase 4 ABILITIES Remorseless Winter — Creates a massive winter storm, dealing 9,425 to 10,575 Frost damage per second to all surrounding enemies within 45 yards. Pain and Suffering — Inflicts 2,828 to 3,172 Shadow damage to enemies in a frontal cone, as well as an additional 500 Shadow damage every 3 seconds, stacking up to 5 times. Summon Ice Sphere — Summons 1 Ice Sphere. This will cast Ice Burst when it reaches its target, doing 10,000 frost damage and knocking the target back (off the edge of the platform to their death). Summon Raging Spirit — Every 20 seconds for phase 1.5 and every 15 seconds for phase 2.5 the Lich King will summon a raging spirit with Soul Shriek. Soul Shriek — Inflicts 18,850 to 21,150 Shadow damage and silences the affected targets for 5 seconds. Targets a frontal cone. Boss Tanks and Melee Position Ranged Raid Groups Raging Spirit Ice Sphere Ensure position is at safe distance from boss AOE. RANGED Move to tank group when Marked to allow tank to acquire RANGED kill Ice spheres
Lich King Phase 3 ABILITIES The Lich King retains Infest from the previous phase Soul Reaper — Inflicts 50% weapon damage as Shadowstrike damage and causes 50,000 (25-man 60,000) Shadow Damage after 5 seconds. Used on the current tank. Defile - Inflicts 3,000 Shadow damage to all players in the targeted area. Every time a player takes damage from this, Defile's damage and area increase. Summon Val'kyr Shadowguard - Calls a Val'kyr Shadowguard which attempts to pick up a player and drop them off the edge of Icecrown Citadel. Assign groups in 25man to take care of each one ensuring a “slow/stun in each group. DBM will automatically mark each Val'kyr. NOTE One clear voice here to call timers for Defile and for Val'kyr . We run with 2 rogues, both mutilate speced (apply crippling as an extra poison). As soon as valykrs spawn they envenom (+% poison hit) and then spam FOK when they become targetable. Then shockwave or just single target stun, 5 point kidney or HOJ. Remember these are on a DR so use the longest ones first! To ensure they all move in the same direction Melee cleave and rest use an AOE. UNLESS having to slow a target Shadow priests should use sear on the LK (Glyph of Mind Sear is choice here, which you should also use for viles) and they die very quickly. Boss Tanks and Melee Position Ranged Raid Groups Val’Kyr Shadowgaurd Defile GROUP UP on boss as edge is removed. STUN and KILL Val’Kyrs. MOVE to edge for DEFILE (5 seconds)Then REGROUP
Lich King Phase 5 ABILITIES Harvest Soul — Inflicts 7,500 (25-man 15,000) Shadow damage every second for 6 seconds. If the target is still alive after the channel is over, their soul will be transferred to Frostmourne. Harvest Soul — Damage Increased by 200% for 15 seconds. If the Harvest Soul target dies the Lich King will gain this buff. Vile Spirits — Summons 10 Vile Spirits that become active after 30 seconds. These will cast Spirit Burst when they become active doing 14,138 to 15,862 Shadow damage to players within 5 yards. Fury of Frostmourne — Deals 1000000 Shadow damage to all enemies. NOTES All AOE classes should be active on the viles. Use knockbacks when they start to descend. Disc priests should keep shields up on all members at this time. Mindsear is brutally effective in this part of the encounter. Boss Melee Position Ranged Raid Groups Vile Spirit MT OT T ! OT TAUNT addsMELEE Kill adds and stun AOE. RANGED Trap/Slow AOE RANGED kill loose adds then focus on boss AOE
Lich King Phase 6 ABILITIES At 10% health, the Lich King will cast Fury of Frostmourne and kill all members of the raid. THIS IS INTENDED - this is not a wipe, so do not release! The Lich King and Tirion will have an exchange during which Tirion destroys Frostmourne using the Ashbringer. The ghost of Terenas Menethil II will appear and resurrect the raid while holding the Lich King in place. Players must use this opportunity to finish off the Lich King. Boss Melee Position Ranged Raid Groups KILL THE KING