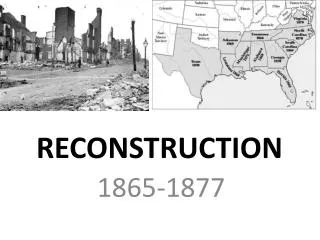
Reconstruction
Reconstruction. This project focuses on both architecture and perspective You will learn the technique, “perspective,” which will teach you how to draw and see in 3D so your art will appear more realistic. You will choose 2 “structures” to combine together in a new and exciting way.

Reconstruction
E N D
Presentation Transcript
Reconstruction • This project focuses on both architecture and perspective • You will learn the technique, “perspective,” which will teach you how to draw and see in 3D so your art will appear more realistic. • You will choose 2 “structures” to combine together in a new and exciting way. • You will use pencil, ruler, sharpie, and watercolors to create a unique artwork.
During the Renaissance artists became interested in making two-dimensional (flat) artwork look three-dimensional. They developed a system to show depth logically and consistently. Perspective Drawing
Perspective • Many of the earlier works artists created showed little depth. • Does this picture reflect depth? Why or why not? • How could this picture be changed to increase its’ depth?
Perspective • Artists used mathematics and close observation to invent linear perspective. • Linear perspective allows artists to trick the eye into seeing depth on a flat surface.
PerspectiveInfluential People during the Renaissance • Art: • Michelangelo • Leonardo da Vinci • Science • Galileo • Literature • Shakespeare Raphael, School of Athens, One-point linear perspective
Horizon Line • The place where the earth and the sky meet. • Represents the viewer’s eye level • Horizontal • You can see the top of an object if it is below eye level, below the Horizon Line. • If an object is above eye level, above the Horizon Line, you can not see it’s top.
Vanishing Point The single point on the horizon where all the lines on the ground level seem to come together and meet.
Orthogonal Line • Lines that meet at the vanishing point. They appear to go back into space. Diagonal.
In one point perspective, there is one vanishing point from which all lines radiate outwardly from.
Artists use one-point perspective to show objects face-on. • Most lines are vertical, horizontal, or orthogonal drawn to a single vanishing point.
Two-Point Perspective In two-point perspective, there exist two points from which an object’s lines radiate from; the sides of the object vanish to one of two vanishing points on the horizon line. An object’s vertical lines do not relate to the perspective rules of the horizontal lines.
Value • Value is an element of design. • Value is defined as the lightness and darkness in an art work. • Value can be black, white and ranges of grays • or it can be a color and the lights(tints) and darks (shades) of that color.
Techniques for creating Value: Hatching Cross-hatching Stippling Gradation
Steps to create the project: • After completing the packet quiz grade • Choose 2 “structures” to use in your final project • Draw the buildings each on a sheet of paper using correct perspective • Use sharpie to add values • Use watercolor paints • Cut up both artworks in an interesting way • Then reassemble them into one new and creative way. • Link to Picasa Web Album to see examples
Also think about the color scheme. These are obviously NOT the realistic colors.
Even though they cut their pictures into squares, they put them together in a more randomized way rather than alternating every other one like the ones you have seen. Appears PIXELATED!
Now connect three corners of your rectangle or square to the vanishing point. These are orthogonals. Draw a square or rectangle In your picture plane.
Vertical lines go from the top of the page to bottom of the page and are perpendicular to the bottom edge of the picture. Along with orthogonal and horizontal lines they make up a one-point perspective drawing. Draw a horizontal line between the two orthogonals where you want your forms to end.
Practice: Follow along to create objects using two-point Perspective Now draw a vertical line this is your front edge. Draw it in near the bottom middle of the page, so you have plenty of room to add more forms to your building. Draw two vanishing points on the horizon line near the page edges.
Now connect the both ends of the front edge to both vanishing points. These are orthogonals. Draw lightly so you can erase! Draw two vertical lines between the orthogonals where you want the back edges of your form to appear.
Now join the back and top corners to the opposite vanishing point to complete the top of the form. Erase the extra orthogonals. Now you have a form drawn in two-point perspective!
First complete the flash tutorial at the website: http://www.olejarz.com/arted/perspective/This will help familiarize you with how to draw 3D.