Download
1 / 10
100 likes | 299 Views
Magnetism and Electric Motors. 4 th grade electric experiment. Jim Neathery, neathery @caer.uky.edu University of Kentucky, Center for Applied Energy Research 2540 Research Park Dr., Lexington, KY 40511 859-257-0259. Outline. Experiment Objectives Materials Procedure

E N D
Magnetism and Electric Motors 4th grade electric experiment Jim Neathery, neathery@caer.uky.edu University of Kentucky, Center for Applied Energy Research 2540 Research Park Dr., Lexington, KY 40511 859-257-0259
Outline • Experiment Objectives • Materials • Procedure • General Observations and Helpful Hints • Conclusions • Resources
Overview This activity is an adaptation of the motor described in the websites listed on the last slide. This presentation is mainly focused on helpful tips to successfully complete the activity.
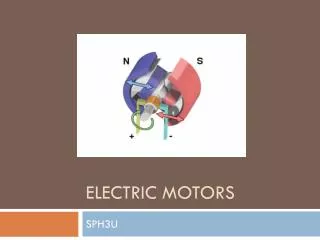
Experiment Objective To learn about how an electric motor works and how to make a magnet from electricity.
Materials Needed* • Styro-foam block: about 2 in high X 3 in wide X 4 in long • 2 large paper clips • Insulated electric wire (wire from an old toy motor with a reddish coating) • 2 wires with alligator clips (~ 12 in long) • A flashlight battery (1.5 V) or for better results a 6 volt lantern battery • 2 donut-shaped magnets *per student or group
Procedure • The drawing on the following slide provides a view of the finished assembly. • Bend the paper clip as shown in the drawing. • Form the coil of wire as described in http://home.hiwaay.net/~palmer/motor.html • Insert paper clips into blocks about 2-3 inches apart so that wire coil can rest in them. 5. Attach one wire to the (+) side and one wire to the (-) side of the battery post. • Carefully attach the other ends of the wires to each paper clip. • Place the magnets on the styrofoam block beneath the wire coil. 8. Carefully mount the motor coil onto the paper clips and gently give it a spin.
General Observations and Helpful Hints • If you have trouble getting your motor to spin, carefully blow on the red wire coil or gently give it a spin with your finger. • Make sure that the paper clips are parallel to each other so as not to bind the wire coil. It may help to tape them to the block to keep them in-place. • The coil may start to get hot and smoke if it is not spinning; if this happens, disconnect the battery for a few minutes and let it cool.
Conclusions • Passing an electric current through a coil of wire produces a magnetic field. • The magnetic field interacts with the magnets, which causes the coil to spin. • Electricity and magnetism can do work for us.
Websites for Electric Motor Info • Beakman’s electric motor:http://home.hiwaay.net/~palmer/motor.html • Science toys: http://sci-toys.com/scitoys/scitoys/electro/electro.html