Bath Water Height Alarm System Design Project
Designing a security device to prevent bath overflow incidents, addressing user concerns about safety and potential damage in households, hotels, and care facilities. This product detects water levels and alerts users through visual and auditory signals.


Bath Water Height Alarm System Design Project
E N D
Presentation Transcript
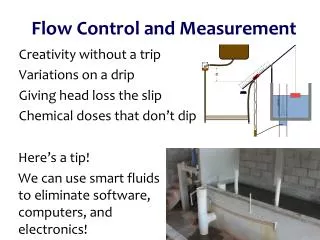
D&T: Electronics and Control Systems Unit A511: Introduction to Designing Name: David Potter Candidate Number: Centre Number: 16527
Creativity The theme for my project is security. I have chosen this theme because millions of pounds are spent each year on replacing items stolen from their house and replacing damages after things that may have happened to them, so I think that a security device will make people feel safer as well as be safer. You can use a security device to protect anything and they can range in prices dramatically, so many people get burgled every year and that could all be stopped by one device per household. I think this makes security a perfect theme for my product. Here I have highlighted my chosen product that I am going to produce. I have chosen this because there is a need for it in the market.
Creativity Anytime that the bath is used. Bath overflowing What When Previous experience Mornings and evenings when bath is being used most User Needs Scared of bath overflowing Why Because they have expensive items to protect. Who Where Universities People with Dementia. Hostels and Hotels People worried about their bath overflowing Homes
Creativity If people buy this product then they can feel safer when leaving the bath running while they do something else. People with Dementia might want this product because they may forget that they left the bath on. Here is a quote from a student from a university where a bath overflowed and caused great disruption "If we're having our lecture time cut down by 20% is there any way we can reclaim 20% of our tuition fees? It seems only fair." Here are some pictures of a bath overflowing. My device would stop this in both cases. This shows that there is a need for my product in the market. Here is a newspaper article showing a bath that overflowed in a university. My device could have been used here and could have stopped much disruption. Here is another example of a bath overflow causing serious trouble. This shop was flooded after a neighbours bath overflowed. None of these problems would have occurred if they had had my product. This also shows that there is a definite need for my product.
Reasons For Questions Survey • No point in product without bath • Wouldn’t be useful for someone who didn’t bath a lot. • Main point behind product, if they don’t leave it running they don’t need the product. • Would the product need to be adjustable. • The leading cause of bath overflows is people with dementia forgetting they left the bath running. • To see if they already understand the risks of not having the product. • Again to see if they understand the risks of not having it. • To see how popular other devices are. • To see what would be a reasonable price to sell it at would be. • What would make it most appealing to the customers. From the survey I have done I have found out that most people leave the bath on while they do something else, are frightened of their bath overflowing, would be willing to pay £10 and would want both sound and light as an output. I have also learnt that the majority of people have a bath once a week which means that there is a definite need for my product because people have baths quite often. I have also learnt that it will need to be adjustable in a bath because different people have baths at different heights.
Other Security Devices From this I have learnt that generally the more expensive the item, the more sophisticated it is. This makes sense because the complicated something is, the higher level of technology is required which is generally more expensive.
Design Brief So far I have discovered that there is a definite need for my product and peoples baths flooding is a reasonably big problem. I have discovered that a lot of people are scared of their bath overflowing from my questionnaire and that people with dementia would like the product a lot because people with dementia forgetting that they have left the bath on is the leading cause for bath overflows. I am going to design and make a bath water height alarm. It will detect when the water level gets to a good height, a too high level and when it is about to overflow using three moisture sensors. At each level there will be a light green at a good level, orange for warning and a red light and an alarm when it is way too high. It will have a sucker on the back so that you can adjust it according to the size of your bath and how high you like your bath. I will use circuit wizard to design the circuit and PCB and will then solder on the components.
Circuit Research This circuit would be quite good for me but it is too simple and not tailored to my needs as I would need three moisture sensors and 3 LED’s as well as a buzzer This circuit would be reasonably good but for the same reason as before it is not suited to my needs and is too simple. It also only has one output when I learnt from my questionnaire that I would need more than that. This circuit is very good but is way too complicated, it covers all of my needs and more but it is way to complicated to reproduce and would be too difficult to do.
Circuit Research (continued) This circuit is perfect for mine and the users needs because it contains the necessary number of inputs and outputs, and it works in the way required. As found out in the questionnaire the users want more than one output and this is put in perfectly in the circuit. This is quite a good circuit but it lacks numerous inputs and outputs that I found was wanted by people in the questionnaire
Circuit Development The first development I felt it necessary to make is to change the colours of the LEDs from three reds to green, red and yellow LEDs to make it more understandable. The second development I felt it necessary to make was to add a power indicator onto it because I said I would in my specification because the circuit runs on battery power.
Circuit Proof Here are some images to show that my circuit works as it should. This first image shows that when the power is on the power indicator is on and first button is pressed (the first water level reached) the first light turns on. This second image shows that when the second button is pressed the second light comes on.
Circuit Proof This final image shows that when the 3rd and final button is pressed, the final LED and a buzzer comes on.
PCB Testing Here we can see that when there is power, the power indicator light is on. When the bath water reaches the first water level (switch 1) the first LED comes on. When the water reaches the second water level (switch 2) the second LED also comes on. And finally when the water reaches water level 3 (switch 3) the final LED and a buzzer come on. As the water level goes back down, the LEDs turn off.
PCB Development Here I have moved all of the components around several times to allow 100% complete connections. An Here is the first stage of PCB development, this is it when it has first been converted to a PCB. 1 2 Here I am testing the version of the circuit to make sure it works before developing it further. It does so I can move on further. 3
PCB Development (continued) Here I have moved the components around again in order to put them into a smaller space, and therefore create a smaller PCB and saved money. Testing it shows that it works perfectly so I am ok to move on. Here I have changed the pad sizes and hole sizes of all the circular pads in order to make soldering easier and save money. (It is in artwork view to make this easier).
Circuit Making First the LED wires must be tinned and soldered to the wires, here is me soldering the negative leg of the yellow LED to a black wire . PIC I NEED TO GET FROM ED Next I heat shrunk all, the wires to add strength.
Circuit Making This is what the heat shrunk LED looks like. Then I had to repeat the past two steps for all the other off board components.
Circuit Making Photo I need to get from ed Then I had to solder in all of the on board components on to the PCB Here is all of the onboard components soldered on.
Circuit was designed using push button switches instead of probes so there were too many holes.