Download
1 / 32
370 likes | 707 Views
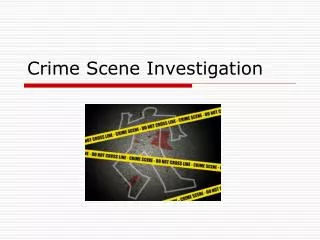
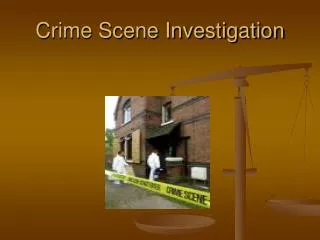
Crime Scene Investigation. What does the criminalist or police investigator do when they get to a crime scene?. Basic Considerations. The processing of a Crime Scene is an intricate and interwoven process.

E N D
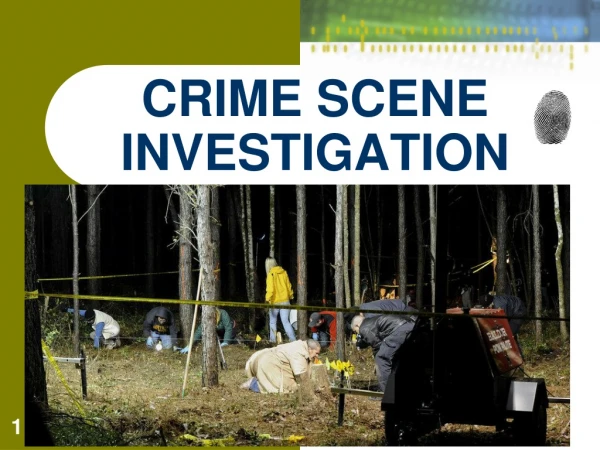
Crime Scene Investigation What does the criminalist or police investigator do when they get to a crime scene?
Basic Considerations • The processing of a Crime Scene is an intricate and interwoven process. • Every Crime Scene is different and may require some different approaches to be successful. • Despite the inherent differences, there is a basic protocol that should be adhered to at all Crime Scenes. • If these steps are consistently followed, doubts, questions, and problems are minimized.
Basic Considerations • Always follow the same ‘SCRIPT’ • S: Search • C: Chronicle • R: Recover • I: Inventory • P: Package • T: Transport
Basic Considerations • Duties of a Crime Scene Investigator: • Document the scene. • Specifics will be addressed subsequently. • Preserve and protect the integrity of the scene. • Vital to establish and maintain a chain of custody. • Collect any and all evidence. • Need to have specific knowledge how to process. • Need to have an idea what you are looking for. • Must focus on finding the elements of the crime.
Objectives of a Crime Scene Search • Determine the corpus delicti. • Must show that a crime was committed. • Establish the fundamental elements of a crime. • Determine the modus operandi of the crime. • How was the crime committed? • What was done by the offender while there? • Extract information from the scene. • Document, preserve, collect evidence.
Duties of a First Responder • Don’t act on impulse or emotion. • Notify superiors, prosecutors, Medical Examiner, and/or task force and request assistance. • In Death Investigations, verify that the victim is dead by checking pulse behind knee or at ankle. • Confirm that no suspects or any more victims are present. • Absolutely critical that either permission by owner or a warrant is obtained prior to conducting an extensive search; anything collected without this is excludable.
Duties of a First Responder • Secure area and clear everyone out. • May need to string tape or rope around area. • Better to overestimate area than underestimate. • Minimize all traffic through the scene, next to and in contact with body. • Don’t move body or begin to process scene before support arrives. • Identify and separate witnesses to avoid collaboration.
Duties of a First Responder • Begin data collection by recording: - Date, arrival time, and environmental conditions such as temperature, wind, humidity, clouds, and precipitation. • Note any transitory conditions: - Odors, smoldering ashes, indoor temperatures. • Record all who enter(ed) scene. • Use sign-in log listing entry and exit times. • Collect head / pubic hair, mouth swabs, finger / palm prints, footwear impressions as standards.
Duties of a First Responder • Check points of entry: any signs of break-in? • Record any open windows or doors. • Photograph or videotape assembling crowd and passing traffic. • Record and run license plates of anyone driving by or slowing down to observe activity.
Duties of a First Responder • It is important to realize your role as First Responder: • First link in chain of custody. • Sets the tone for the investigation. • Proper preparation precludes poor performance.
Lead Crime Scene Investigator • Interview First Responder before proceeding. • Determine what has been done prior to arrival. • Discuss any initial theories about the case. • What crime took place. • How the crime was committed. • What information has been gleaned at this point. • Use of this preliminary information may assist in formulation of hypothesis from which to start.
Lead Crime Scene Investigator • Establish command post. • Collect names, addresses, telephone numbers, and statements from assembled (and any other) witnesses. • It may be necessary to transport them (and relatives) offsite or to the police station. • Don’t recover and retain any evidence without prior approval or without proper warrants. • Don’t assume someone has already done this.
Lead Crime Scene Investigator • Set up two-person teams to: • photograph; • sketch; • document activity; • recover evidence; • begin canvassing neighborhood to interview neighbors and/or recover any/all videotapes from commercial businesses; • determine background and activities of victim (prior to death) and possible suspect(s); • download hard drive(s) if computer(s) cannot be retrieved;
Lead Crime Scene Investigator • Set up two-person teams to check for: • telephone records (local records are good for only two days); • credit card, retirement, and bank account(s) activity; • insurance policy inquiries, newspaper ads, Internet account(s) and activity; • prescription medications (look for these in the home and recover); • laptops, CDs, zip and flash drives, floppy disks, back-up hard drives, and any other medium of information storage.
Evidence Technician Teams • Formulate and continue to refine a working hypothesis of how the crime was committed. • Use the evidence to reconstruct what happened. • Be aware of and recover trace evidence. • Detection and recovery of a hair or fiber may be the crucial evidence in this case. • Vacuum rooms using individual vacuum bags. • Separate, label , and seal each bag. • Watch where you step to minimize contamination. • Lie out floor covers after processing or string a line where people should walk through outdoor scene.
Evidence Technician Teams • Before processing scene: • Don’t move or touch anything before recording via photographs, notes, videotape, and sketches. • No unauthorized personnel allowed, including command staff. • Police take external security, ET’s take internal security. • Assign one officer to mark and inventory recovered evidence. • Each team turns over their collected evidence to that officer.
Evidence Technician Teams • Sketch scene. • Include scale in legend. • Make rough sketch then finished sketch is completed later. • Photograph the entire area from all angles. • Take general then specific photos, with and without scale. • One can’t take too many photographs, but be smart about it. • Work in teams, one to photograph and one to record in photo log.
Evidence Technician Teams • Use coordinated system to search the scene. • Searchers must understand the goals and the responsibilities and the possible ramifications of what the results will reveal vs. possible alteration of the evidence. • Use any accepted method. • Strip, Grid / Double grid, Spiral, Zone, or Wheel. • Everyone has to understand the ‘how’ and ‘why’ of what they are doing.
Evidence Technician Teams • Document and collect any evidence that is perishable or subject to environmental conditions. • Bloodstain patterns. • Footwear or footprint impressions. • Fingerprints. • Tire tracks in snow or dirt. • Prioritize these items if inclement weather is near.
Evidence Technician Teams • Look for evidence of activity before the crime. • Were any lights on? Bath water temperature? Newspapers? Answering machine? Any accumulation of mail? Milk delivery? Any food cooking? Email dates? Dirty dishes in sink? Ice in glasses? Burnt candles? Car ignition on but car out of gas? Clothing laid out? Date book? Purse or car keys left out? Dated receipts? Clocks run down? Pet droppings left behind? Palm pilot? Pocket, desk or wall calendars? Any evidence of pets feeding off of victim’s body? • All indicate passage of time or victim activity. • This may help narrow or pinpoint time of death.
Evidence Technician Teams • Throughout the entire scene: • Note and document positions of any clothing, shoes (photograph all sole patterns with and without scale; note sizes), and weapons. • Examine ceilings for cast-off patterns. • Check circuit panels and telephone lines (indoor and outdoor) for cut wires (preserve for toolmark comparisons). • Examine furniture as evidence. > Check for positions in rug, fingerprints, breakage.
Evidence Technician Teams • Throughout the entire scene: • Remember that cups, glasses, toilet seats and handles, faucet handles, telephones, and undersides of dishes and ashtrays may have latent fingerprints. • Look for weapons in boxes on shelves in house and garage, behind furnace, recent diggings in yard, laundry hamper, garbage, drain traps, roof gutters.
Evidence Technician Teams • Throughout the entire scene: • Are any knives missing from sets at the scene? • Are any tools missing from toolbox, workbench, or pegboard? • In hangings, check for paraphernalia. • It is absolutely essential to document anything of evidential value before it is moved or recovered. • Failure to document may result in court exclusion. • How can you convince a jury if you can’t prove it?
Evidence Technician Teams • Observations: • How did the suspect get to the scene? Look for footprints (noting direction and gait), tire tracks, and any other impressions. • Preserve and photograph with and without scale. • Suspect’s point of entry • Look for hairs, fibers, blood, fingerprints, footwear impressions, palm prints, fabric impressions or toolmarks on windowsills, doorframes, handles.
Evidence Technician Teams • Path of suspect at scene. • Look for hairs, fibers, blood, fingerprints, footwear impressions, palm prints, fabric impressions. • Can the crime logically be reconstructed based on evidence left behind? • Place interpretations in logical order to do this. • Put yourself in the mind of the offender as he moved about. • One key to reconstruction of a crime is to place yourself in the suspect’s head at the scene.
Evidence Technician Teams • Suspect’s contact with victim. - Any evidence of a struggle? • Look for any scratches, cuts, bite marks, grip marks, wound patterns, bruising, patterns of weapons in wounds, or body fluids left behind. • Fingerprints can be recovered from skin. • Consider swabbing bite mark area with swabs and sterile saline for DNA analysis. • Take photographs of any wounds or bite marks with ABFO scale at 90o with and without flash.
Evidence Technician Teams • Suspect’s point of escape. • Look for hairs, fibers, blood, fingerprints, footwear impressions, palm prints, fabric impressions or toolmarks on windowsills, doorframes, handles. • Blood drops from wounds (direction and distance apart), changes to gait due to injury, dropped objects, handprints at steadying points. • What could have been taken away? • Valuables, but also hairs, fibers, glass or paint fragments, soil, foliage, grass, trophy from victim.
Evidence Technician Teams • Note position and posture of body and anything else of importance. • Lividity, rigor mortis, discoloration, mummification. • Clothing on or off, articles of clothing missing. • Any wounds, gunpowder tattooing, position of limbs, hair(s) clenched in hand(s), bloodstains including directional patterns, blood pooled under body. • When insects are present, recover samples to assist in time of death determination. • Preserve ligatures and knots in ropes by severing away from them; use string to tie both cut ends together. • Assume all firearms are loaded and capable of firing.
Evidence Technician Teams • Photograph and sketch body. • Document bloodstains, wound patterns, and wounds with and without scale. • Examine hands for any visible evidence. • Cover them with paper bags; do not use plastic. • Contact DNA may be recovered from skin surface. • Consider superglue fuming prior to moving body. • Wrap body in a clean white sheet prior to its placement in a body bag for removal. • Examine and photograph area under body after it is moved.
Evidence Technician Teams • Often times, the Medical Examiner is ranking official at death investigation scenes. • Make needs known to the Medical Examiner. • Be sure all known standards and unknown samples are retained. • Fingernail clippings. • Finger, palm, and sole prints (the latter especially if the victim is a baby). • Head, body, and pubic hair. • All body orifice swabs. • Blood standard for DNA and toxicological purposes.
Releasing the Crime Scene • Review all work before releasing the scene. • Assemble all teams at command post. • Discuss what was done and why. • Ensure secure transport of sealed evidence to station. • Once a scene is released, the chain of custody is ended. • Going back to an unsecured scene will require signed releases and another search warrant. • It is better to address any and all concerns prior to leaving the scene. • Is there anything else to do before leaving?
Working with the Forensic Lab • Give the Forensic Laboratory a description of the crime, any theories, what items to test, and why. • Dialogue with case Forensic Scientists is critical. • They may think of analyses and comparisons that can generate additional investigative information. • Any evidence recovered that conflicts with the case hypothesis will require a rethinking of the hypothesis; the evidence will not lie and cannot be ignored.