Download
1 / 9
100 likes | 400 Views
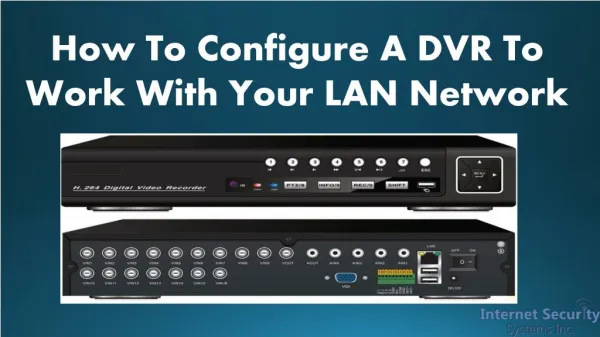
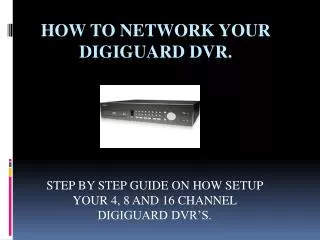
STEP BY STEP GUIDE ON HOW SETUP YOUR 4, 8 AND 16 CHANNEL DIGIGUARD DVR’S. HOW TO NETWORK YOUR DIGIGUARD DVR. STEP 1: CONNECTING DVR. First, make sure your DIGIGUARD DVR is connected directly to your local router.

E N D
STEP BY STEP GUIDE ON HOW SETUP YOUR 4, 8 AND 16 CHANNEL DIGIGUARD DVR’S. HOW TO NETWORK YOUR DIGIGUARD DVR.
STEP 1: CONNECTING DVR • First, make sure your DIGIGUARD DVR is connected directly to your local router. • Connect an Ethernet cable from the back of the DVR (LAN) to an empty space on your router. • Your DVR should now have local access to the Internet.
STEP 2: OBTAINING YOUR NETWORK INFORMATION • Locate the “START MENU” at the bottom left hand corner of your computer or laptop. • Once opened, click on the program on the right side of the window titled RUN. • This will open the COMMAND PROMPT where you will type “ipconfig” and then hit enter. If the RUN program is not on the start menu, go to “ACCESSORIES” and you will find the COMMAND PROMPT (CMD) program. • A list of information will appear that you will need to write down. This includes the IP ADDRESS, SUBNET MASK and DEFAULT GATEWAY.
STEP 3: SOFTWARE • Locate the provided CD that came within the packaging of the DVR. • Download the “AP Software” link when asked on your computer. • The download should take approximately 5-10 minutes to complete. Once the download is complete, please make sure to restart your computer.
STEP 4: SETUP • Once your computer restarts, you should find a new program on your desktop titled VIDEO VIEWER. • Double click on the the VIDEO VIEWER program and you will have a black window open on your screen. • You will have a smaller window open next to the black screen. At the top, you will find a small magnifying glass icon. Click on the magnifying glass icon and the software will automatically search for your DVR on the network. • Once the search is complete, the IP address of the DVR will appear as 192.168.1.10. Towards the bottom of the same window, you must click on the middle icon titled SETTING.
STEP 5: SETUP (CONT.) • Once the SETTING window is selected, a CONFIGURE screen will appear. • The SERVER IP will be changed to reflect a similar IP address as the one obtained in the command prompt but cannot be the same. For example, if the IP address obtained in the command prompt is 192.168.1.101, the SERVER IP of the DVR must be different (i.e. 192.168.1.108). • The default port number (Web Port) for the DVR is 80 but it is recommended that it be changed to another number (i.e. 85, 4000, 5253). • The GATEWAY should be the same number that was obtained in the command prompt. If your DEFAULT GATEWAY is 192.168.1.1, the DVR Gateway must be the same. The Netmask and DNS Server do not have to be changed. • The default user name and password for the DVR is admin/admin (Must be lower case). • Once all the correct information has been entered, make sure to hit APPLY.
STEP 6: LOG IN • Once you have selected APPLY, your DVR’s IP address should be highlighted on the window screen. • Double click on the IP address to log into your system. If your DVR displays a LOGIN FAILED message, recheck all your settings and connections and try again.
STEP 7: REMOTE SETUP • To view your DIGIGUARD DVR system remotely, you must call your Internet Service Provider (ISP) and find out if you have a STATIC or DYNAMIC IP ADDRESS. • If you have a STATIC IP address, continue with the steps below. If you have a DYNAMIC IP address, go to STEP EIGHT. • Once you have obtained your STATIC IP address from your Internet Provider, you must ask them or your router company to OPEN or FORWARD the port number (web port) you selected for the DVR (i.e. 85, 4000, 5253). If this is not done, you will not be able to view your cameras remotely on the Internet. • Once the port number is open or forwarded, you must attempt to login using your STATIC IP address from a remote computer. • Below is an example of how you would login from a remote computer: • Open Internet Explorer and in the address bar, type in • http://71.24.155.120:85. • If successful, you will be asked to enter your username and password (admin/admin). If the webpage times out or encounters an error, recheck your settings and information. • You can then save your IP Address on your FAVORITES to login easier and faster.
STEP 8: DYNAMIC IP SETUP • If you have a dynamic IP Address from your Internet Provider, we recommend creating a free account at www.dyndns.com. • Follow the steps for creating your free account on dyndns.com and save your information to login. If you have trouble with the DYNDNS service, the DVR’s CD has a networking manual that explains with more detail hot to create your DYNDNS account. • Once you have created your host name, you can attempt to login from a remote computer by typing in your information on Internet Explorer as follows: • http://demo123.dyndns.org:85 • If successful, you will be asked to type in your username and password (admin/admin). You can then save this link to your FAVORITES to login to your camera system easier and faster.