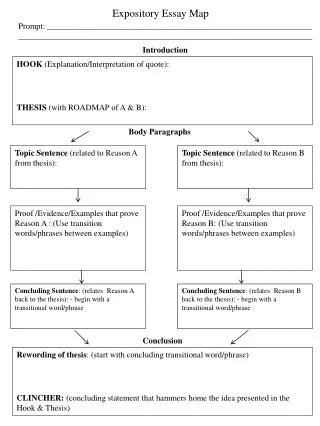
Expository Map
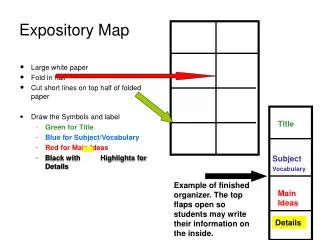
This guide explains how to create an effective expository map using a folded large white paper. Start by folding the paper in half and cutting short lines at the top of the fold to create flaps. Use different colors to designate sections: green for the title, blue for vocabulary, red for main ideas, and black with highlights for details. Each section allows students to organize information efficiently. The top flaps open to provide space for students to write their findings, facilitating a structured approach to learning.

Expository Map
E N D
Presentation Transcript
Expository Map • Large white paper • Fold in half • Cut short lines on top half of folded paper • Draw the Symbols and label • Green for Title • Blue for Subject/Vocabulary • Red for Main Ideas • Black with Highlights for Details Title Subject Vocabulary Example of finished organizer. The top flaps open so students may write their information on the inside. Main Ideas Details
Expository Map Map Topic Main Idea 3-5 Details 3-5 Details Main Idea 3-5 Details Main Idea 3-5 Details Conclusion