Download
1 / 18
180 likes | 304 Views
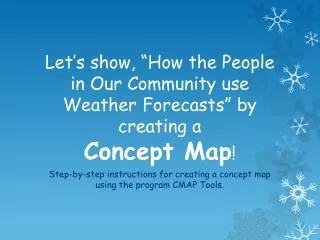
Let’s show, “How the People in Our Community use Weather Forecasts†by creating a Concept Map !. Step-by-step instructions for creating a concept map using the program CMAP Tools. Getting Started. Step 1 : Double-click on the “Start†menu and select CMAP Tools.

E N D
Let’s show, “How the People in Our Community use Weather Forecasts” by creating a Concept Map! Step-by-step instructions for creating a concept map using the program CMAP Tools.
Getting Started • Step 1: Double-click on the “Start” menu and select CMAP Tools. • Step 2: Double-click in the center of the page where you see, “double-click to create a concept.”
Step 3: Double-click on the question marks inside of the box to insert text. This is where the focus of the concept map will be written. By clicking and dragging on the arrows above the box, we can create the lines that will connect your ideas to the focus area.
This is how it will appear when we click and drag the arrows:
Step 4: We can enter text where we see the question marks. This is a good place for us to put an occupation that we will be discussing. We will use “Pilot” in this demonstration. After we have completed this step, minimize the screen. • Step 5: We may wish to include a picture/image of a person in this occupation. Using the internet and a search engine, such as Google, we will search for an image we like and click on it.
Step 7: Open the concept map screen. We will insert the picture in the “Pilot” box. Right-click anywhere inside of that box and click “paste.” • Step 6: The picture will now appear on a new page. Right-click on the picture and select “copy.” Once we have completed this step, we will minimize the internet screen.
Step 8: The next thing you will see is this “Edit Resource Link” window. It is very important that we select “Set as Background” a the top of this window. By clicking this, we are telling the program that we would like our picture to appear in the text box as a background image. We can then type text over or around the image!
Step 9: We will now see another window, that tells you that the picture is too big and needs to be adjusted. Click on the “Resize/Crop” button.
Step 10: The “Crop/Resize Image” window will appear. In this case, it is best to select “ 128 by 128” size, as we are using clipart. We could have chosen another size, depending on the type of picture we were using. Once we have selected the size, we will click “Ok.”
Step 11: In the next text box, we will explain how a pilot uses weather forecasts in his/her job.
Our friend Jeremy has an Uncle Peter who is a pilot. His uncle lives in British Columbia. Jeremy spoke to him over the phone, and asked him if he knew any weather folklore facts. His uncle had a great fact about wind. Jeremy asked his Uncle Peter to email him a picture of himself to put in our concept map, next to his folklore fact. Jeremy forwarded his uncle’s picture to our class email account. Let’s add the fact and the picture to our concept map!
Step 12: We will first need to drag the arrow to connect and create a text box for our “Weather Folklore Find”. Next, we will type in the fact. We will then minimize this screen.
Step 13: We will log in to our class email account and open Jeremy’s email. The picture of his uncle will appear and we will click “download.” A window will appear which will ask us if we want to open or save the file. We will click “save.”
Step 14: The next window that opens will ask us to choose where we want the picture to be saved on the computer. We will save it on the desktop. Select “desktop” from the column on the left. Notice the file is already named “Uncle_Peter.” We then click “save.”
Step 15: On our desktop, we will double-click on the picture of Uncle Peter. The picture will open up in a bigger format. We will right click on the picture and click “copy.” We then repeat steps 7-10 to insert the photo into our concept map.
Once the picture is in the box, we can arrange the text in any way that we like on or around it.
Use these steps to help you make your own concept map on “How the People in Our Community use Weather Forecasts.” Include any Weather Folklore Facts that you may have learned from friends and family.