Download
1 / 16
160 likes | 323 Views
Automated Industrial Wind Tunnel Controller. By Daniel Monahan and Nick DeTrempe Advised by Dr. Aleksander Malinowski. Presentation Agenda. Project Scope System Block Diagram Microcontroller Work Completed Wind Tunnel Hardware Work Completed Labview /Server Work Completed

E N D
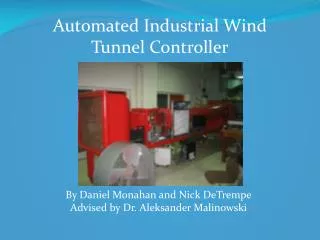
Automated Industrial Wind Tunnel Controller By Daniel Monahan and Nick DeTrempe Advised by Dr. Aleksander Malinowski
Presentation Agenda • Project Scope • System Block Diagram • Microcontroller Work Completed • Wind Tunnel Hardware Work Completed • Labview/Server Work Completed • Milestones Remaining • Revised Schedule • Questions
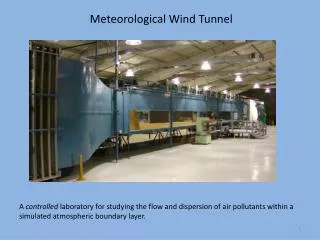
Project Scope • The overall objective is to create an automated controller for an existing wind tunnel located in the Mechanical Engineering department of Bradley University. • This controller will allow a user to position objects inside the tunnel with linear actuators, turn on the wind tunnel and adjust speed. • A user will be able to control the tunnel through existing manual controls, on a local PC or remotely through the internet.
Microcontroller Work Completed • The Microcontroller has been configured so that all inputs and outputs can easily be connected. • The microcontroller software has been configured to periodically output all data from sensors while waiting for commands to be received from a user.
Wind Tunnel Hardware Work Completed • Two three-way AC switches (light switches) have been added to the setup to switch between electronic and manual control. • The blower relay has already been connected temporarily in parallel with the existing manual relay to verify operation.
LabView/Server Work • A LabView client program has been developed to allow for testing and configuring the wind tunnel control Figure 3: LabView Test Client Front Panel
LabView/Server Work • The client both displays data from and sends commands to the server, which relays the signals to microcontroller. • The front panel can be easily reconfigured to accept alternate methods of input or to display data differently • The client is easily deployed as a packaged executable requiring only the LabView engine to run.
LabView/Server Work Figure 4: Segment of LabView code – Wind Speed control
Milestones Remaining • Configure LabView Client for Wind Tunnel Setup • Add security feature for the client/server connection • Setup web server and integrate security, webcams, and application download into website • Finish connecting relays to wind tunnel and microcontroller. • Integrate new sensors into microcontroller and LabView. • Test and debug all software and hardware on system.
Changes To Project • An ambient air pressure and ambient temperature sensor will be needed to be added to the setup. • A wiring harness will be needed to easily disconnect the microcontroller from the wind tunnel and connect another controlling system.