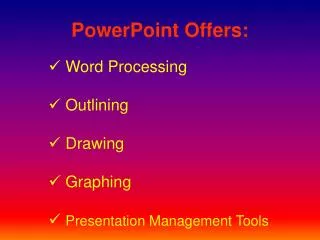
PowerPoint Offers:
PowerPoint Offers:. Word Processing Outlining Drawing Graphing Presentation Management Tools. Beginning a Presentation. REMEMBER: SAVE YOUR PRESENTATION TO A HARD DRIVE AND A FLOPPY FREQUENTLY. Click green Start Button. Select: All programs Select: Microsoft PowerPoint

PowerPoint Offers:
E N D
Presentation Transcript
PowerPoint Offers: • Word Processing • Outlining • Drawing • Graphing • Presentation Management Tools
Beginning a Presentation REMEMBER: SAVE YOUR PRESENTATION TO A HARD DRIVE AND A FLOPPY FREQUENTLY. Click green Start Button. Select: All programs Select: Microsoft PowerPoint New presentations Select: Blank Presentation
Selecting Slide Layout & Font Color Under apply slide layout: Select top right-hand box In text box type: Beginning PowerPoint Change your font color Select: Format Select: Background
Choosing a Background Pull down arrow menu. Under standard color, choose a color. Click: Apply (for single slides), OR Apply to All (to keep all slides same colors).
Adding a Fill Effect Select: Format Select: Background Choose: Fill Effects. Choose: One Color. Select from pull down menu. (You may also choose two colors or preset colors and you can make the color darker or lighter.) Select: Shading Styles (choose among six.)
Other Fill Effect Choices Choose among: Texture, Pattern, or Picture. Sample each.
Alternative Slide Design Go to Format. Select: Slide Design. Choose among the many slide design templates available for use. WARNING! BE SURE TO USE THE PULL DOWN MENU NEXT TO EACH TEMPLATE AND SELECT APPLY TO SELECTED SLIDES OR YOUR ENTIRE SLIDE PRESENTATION WILL CHANGE.
Choices While Creating Slides At left side of your current working slide you will see: Thumbnails or Outline of your slides. Thumbnails: Shows thumbnails of the slides you have created. Outline: Lists your slides by slide titles.
Working Slides View Choices Below your thumbnails (or outline) are three small Icons which show: 1. Normal View (how your working slide and thumbnails or outline appear now, or 2. Slide Sorter View, or 3. Slide Show (from current slide).
Inserting Clip Art Insert Menu: Select: Picture, then choose Clip Art. On search bar that appears in your right column, type: santa, then click Search button. Click on first Santa icon. Resize on your slide.
Clip Art There are two main ways to find clip art: 1. Clips on your computer (a clip art from a disk needs to have been added in order for you to find many examples, OR 2. Clip art from online sources. Save your presentation, minimize it, then open your browser (Internet Explorer). Then, return to clip art and select Clips Online.
Downloading Clip Art Clicking Clips Online (with browser on) will take you to Microsoft Office Online, Clip Art files. Search for and select two or more examples of turkey. Accept Microsoft Office’s conditions are download. Go to Insert, Picture, Clip Art, then From File. Select Microsoft Clip Organizer. Insert clip art.
Clip Art You may resize by placing cursor on the middle of your clip art and dragging it to where you want it, then pulling at the outside corners of the clip art. A pop up menu will appear. You may further change your clip art with it.
INSERTING SOUND Go to the Insert Menu: Select: Movies and Sound. Select: Sound from Clip Organizer. Choose first music box, select, and place speaker icon where you want (it won’t play until you select view slide show.
View Slide Show To view your entire slide show, Select: Slide Show Menu View Slide Show Stop by clicking cursor in lower left corner and then Selecting end show, or go back by selecting Previous.
PowerPoint Sites PP Tutorials www.microsoft.com/Education/PPT2003Tutorial.aspx www.internet4classrooms.com/on-line_powerpoint.htm PP Rubric Sites www.artteacherconnection.com/pages/powerpointrubric.htm www.uwstout.edu/soe/profdev/pptrubric.html Photo Albums www.brainybetty.com/powerpointpsshow.htm
PowerPoint Sites PP Ideas www.presentationhelper.co.uk/powerpoint_ideas.htm www.issen.org.uk/news_powerpoint_ideas.htm PP Game Shows for the Classroom www.monroe.k12.la.us/~mhen/PowerPointProjects.html Clip Art and Sound Sites http://208.183.128.3/tutorials/pptr/resources.html www.csc.calpoly.edu/~ebrunner/Sounds/PowerPointSound.html http://www.indezine.com/products/powerpoint/ppsound.html