Download
1 / 34
360 likes | 1.02k Views
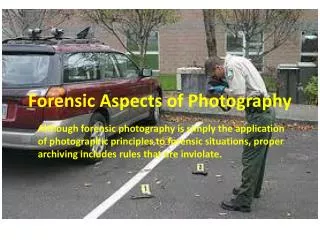
Forensic Aspects of Photography. Although forensic photography is simply the application of photographic principles to forensic situations, proper archiving includes rules that are inviolate. . Invariant Rules of Forensic Photography.

E N D
Forensic Aspects of Photography Although forensic photography is simply the application of photographic principles to forensic situations, proper archiving includes rules that are inviolate.
Invariant Rules of Forensic Photography • The first photograph in a series must have an incident photographic worksheet or cover sheet • Photographs must be listed in a photo log • Camera settings – date – case number – initials – evidence numbers. • Types of Forensic Photographs: • Establishing, midrange and close-up photographs
Invariant Rules of Forensic Photography • Illumination (metering) should be appropriate to capture impression evidence detail. • Tripods • Tripods should be used for all photographs where the camera must be steady: close-ups, certain mid-range photos, Luminol (BlueStarTM) photography and dim light situations. • The camera (and tripod) should be perpendicular to the plane in which the evidence lies and horizontal (parallel). • Photographs should be taken before and after each on-scene manipulation (enhancement attempts) of evidence. • The pop-up flash on the camera should never be used except in specific circumstances.
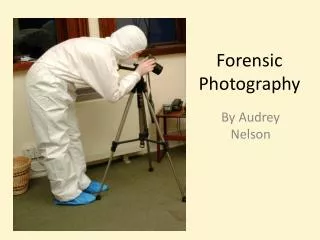
Scene Incident Photographic Worksheet • The scene incident photographic worksheet is the cover for a book or series of photographs. • Not the same as the photographic log • The cover sheet for a set of scene photographs that are listed in a photographic log. • The Photographic worksheet has specific data that includes the date, time, agency, case number and the name of the photographer. • Has color stripes for determining whether the camera is “seeing” colors correctly. • Can have scales for estimating size Photo ID Cards http://www.forensicssource.com/ProductDetail.aspx? productName=1005949&CategoryName= Crime-Scene-Documentation-Photo-ID-Cards
Photo Log • List of all the photographs taken in a specific series. • Each entry contains the specific photographic and forensic information needed about that specific photograph: • Camera settings, description of what the photograph was and the type of photograph – establishing, midrange, close-up. • Can have other case-specific information.
Critical Forensic Photographs • Forensic investigations require complete coverage. • Archiving is critical to that process • Archiving must cover the entire crime scene as though making a documentary. • Means capturing landscape and close-up photos • Forensic Archivist must be an expert in recognizing evidence at the crime scene • AND capturing it in the three principle photographic types: establishing, midrange and close-up.
Perspective in Midrange Photographs • After the establishing photos, the next step is to “get closer” to the evidence photographically so that its relative position in a specific area of the scene is made clear. • Establishing shot shows knife lying some distance from the deceased’s outstretched right arm. • Midrange shots pinpoint knife’s position perfectly, which could require more than a single photograph encompassing multiple perspective • From the deceased’s feet, from the outstretched right arm, looking from the knife to the outstretched arm, from the left and right sides of the deceased, from the deceased’s head, from all doorways if they not too far away … etc. • Knife’s position relative to the doorway, the deceased and other rooms is preserved - archived.
Midrange Photographs • A single bloodstain pattern at a scene should not present an archiving problem, but multiple bloodstain patterns should be labeled sequentially … specific designation different from other tagged evidence. • If most of the evidence at the scene is tagged as, say, items 1-99, the bloodstain patterns could be tagged using alphabet markers, such as A-Z. • Scales should be present in all bloodstain pattern photographs. Flash should never be used for bloodstain patterns. [1] Gardner, Ross A. ibid, page 147. Attribution to Toby Wolson
Close-up Photographs • All Evidence having detailed investigative value – • Knife length and width - must be preserved photographically. • Pattern evidence: Fingerprints, footwear impressions, tire tracks, tool marks, etc. • 1stphotograph taken without scales … • 2ndsecond with scales. • The scales must also be appropriate: • A fingerprint requires millimeter scales • knife on the floor does not require that much detail and can be photographed using an inch ruler.
Close-up Photographs • Use tripod because any movement blurs or obliterates critical evidentiary detail. • Rule of Thumb for Close-up photography? • The rule of thumb: • Any evidence that will not be removed from the scene that has direct comparative value • Any evidence that has potential comparative value • DoF: Close-up photographs are absent DoF • Photographer opens the aperture and concentrates on focus • Fill LCD viewfinder with the image of the evidence.
Illumination • The relative position and type of light entering the camera. • Location of the light source. • The type of light refers to a flashlight or IR, UV, or light from an ALS. • Alternate light sources (ALS) are indispensible tools for highlighting important items of evidence. • Varying wavelengths of light can visualize small items of evidence (microscene elements).
Light Interacting With Matter Object Fluoresces Light Source (White - ALS, UV, IR) Object Light Absorbed Reflected Transmitted Reflected Light Eye Or Fluorescence Reflected Light Camera Barrier Filter Barrier Filter Blocks Reflected Light Barrier filters are different colors depending on wavelength of light
Reflected Light can Mask the fluorescence. • Barrier filters. • Block reflected light so it never gets it to observer (camera and/or person). • The orange goggles used in CSI are barrier filters that block the reflected light • When blocked, fluorescent light enters the camera and is “seen” by the digital sensor and the photographer, • Goggles of an appropriate color are necessary • Orange • Red • Clear • Yellow
Crime Scene Photo ArchivingReview Using tripods Close-ups Difficult shots outside – when long exposures are necessary Shots with scales Midrange Fast shutter speeds (< 125th or 60th with fast lens) Low light requiring long exposures – avoid high ISO values Luminol Fluorescent photography Establishing Shots: Maximum Depth of Field Small aperture (large f/number) Slow shutter speed Creates possibility of vibration movement Close up Shots: Shallow Depth of Field
45deg 10 deg
Photographing Common Scenes • All crime scene investigations follow a roadmap or menu of activities. • Challenge: Follow precise schedule without undermining the intellectual thought process. • Establishing photography is one of the first activities • Must be done logically and fit team leader’s investigative philosophy. • Photography is one part of the investigative puzzle. • Not an independent activity • Must fit the logic of the investigation • Cannot interfere with the processing flow.
Photographing Common Scenes • Use logic concerning where archiving begins AND its sequence. • Generally, photography begins where activity took place. • Where team begins investigative efforts. • Where the photographer and team spends most time • Makes scheduling difficult but critical. • If photography happens out of phase, investigation will be inefficient … may miss critical evidence. .
Photographing Bodies • Photographing the body is important, • Done properly and @ proper time. • Dictated by how the investigation moves forward and the involvement of the medical examiner. • Body is part of the macroscene and is scene unto itself. • Has critical evidence that can help close the investigation or provide critical probative evidence. • Blindly photographing body 1st is illogical AND not necessarily correct. • Not necessarily a major source of fragile evidence that requires immediate attention • Does not need to be removed from the scene immediately. • Might not be where most of scene activity took place.
Defining Scene types, With Respect to Archiving • Certain scene types require specific considerations. • The crime types include: vehicular accidents, homicides, sexual assaults, burglaries, hit-and-run, suicide, arson and bombings. • Each scene dictates the specific and necessary archiving details.
Photographing Dark Areas On-Camera Flash Attached Flash Unit(s) Painting with Light Slaves
Painting with Light http://www.diyphotography.net/painting_with_light
Special Technique Using Slaves to Highlight Dark Areas of Scene Arrows show Direction of Placed Slaves