Download
1 / 37
370 likes | 540 Views
ORTOP Workshop 3 - robot Design. Robot Design, Navigation & Missions. Goals. Move your team up the ladder in navigational skills, and the use of sensors To help you as coach assess where your team is, and what is needed to move them forward. introduction. Workshop 3 Methodology

E N D
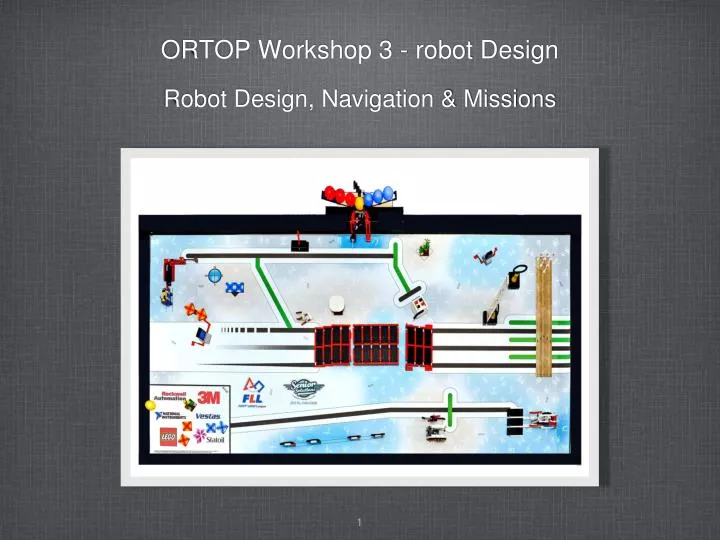
ORTOP Workshop 3 - robot Design • Robot Design, Navigation & Missions
Goals • Move your team up the ladder in navigational skills, and the use of sensors • To help you as coach assess where your team is, and what is needed to move them forward
introduction • Workshop 3 Methodology • Explore a problem • Run a hands-on experiment • Get kids’ heads wrapped around a problem • Explain how it works • Show important aspects of the problem • Add background information and knowledge • Apply knowledge • Solve a more complex problem with what you now know
Agenda • Navigation with basic robot moves and turns • Run an experiment to determine robot move error • The S curve inaccuracy and wobble • Compensation for errors - absolute positioning and other tricks • One and two wheel turns • Programming the Buoy Mission using dead reckoning • Navigation with light sensors • Run experiments with the light sensor • Light sensor hardware and software • Line following logic • Mission planning - memory, time, priority, points • Programming the Buoy Mission using the light sensor • Review / Reference • Any questions from workshops 1 & 2?
Navigation Buoy Mission - from base - note position error run 3x
Navigation • Experiment: move 2ft, stop, run 4-5x • Program the robot to move 2 feet and stop - try running different speeds • Mark: stop points and identify position error • Add axles to the can-catcher to act as a pointers (show class) • Mark points on the paper were the robot stops • Run 4-5 times - speeds 20, 50, 90 • Notice the wobble as the robot moves • Draw a box around the stopping points to show X and Y Position errors • Go! 15 min.
Navigation • S curve inaccuracy & wobble • Motor sensors • Each motor has a rotation sensor that provides position and velocity feedback to the NXT software in the brick (video of S wobble) • If one wheel slows, the Move block software senses the change and slows the other wheel causing the robot to wobble and veer left or right (classroom demo - show one wheel slows the other) • Is there wobble difference between rear skid design and rear 3rd wheel design? why?
Navigation • S wobble
Navigation • Compensation for navigational errors • Use mechanical means • Angled corners (back into a corner) • Wall follower wheels • Back against a wall • Width of attachment (e.g. buoy fork) • Use sensors • Light & touch sensors to re-establish exact robot location
NAVIGATION • Use a starting block from base
Navigation • What are the variables that affect going straight? • 1 • 2 • 3
Navigation • Variables that affect going straight • Starting box position • Speed • Battery charge • Tire size • Motor friction, gear backlash (Google these terms) • NXT software tries to keep both wheels moving at same speed - S curve inaccuracy • What is distinct about the last two variables? • Any questions about going straight?
Navigation • 2 wheel turn • 2 wheel “spin” turn - Move Block, with slider at end (show Move block)
Navigation • 2 wheel “spin” turn
Navigation • 1 wheel turn • 1 wheel turn - Move Block, turn off one motor • application? accuracy?
NAVIGATION • 1 wheel turn
Mission • Buoy Mission - no sensors • Move from base to the green line and buoy • Grab the buoy and place it between the black lines • Go! 15 min • Review of problems & solutions
Sensors • Now that we know how to move and turn with some precision, lets take a look at sensors • Sensors we can use in FLL: • touch, light, rotation, distance • Teams sometimes give up on sensors because they seem complex and don’t seem to work in a predictable manner • Most teams feel comfortable with the built-in rotation sensors in the motors to determine the number of rotations/degrees • In this segment we’ll explore the light sensor in more detail to help us navigate on the playing field
Sensors • Light sensor variables • Sensor-to-mat distance - let’s record some data: • Mount the sensor on the robot about 1/8” from the mat • Record black, green, & white values using NXT VIEW function • Move the sensor to 3/8” from the mat, record values • How does the distance affect light sensor values? • As the robot moves it bounces, which distance do you think would work best, and why?
Sensors • Light sensor variables • External light influence - let’s record some data: • Use your hands to cover the light sensor to simulate a dark room • Record black, green, & white values using NXT view function • What does this tell us about light sensor performance in various room lighting conditions?
Sensors • Trigger point calculation • LS returns value of reflected light • e.g. white = 62 • Trigger point (programmed) = • (white - black) / 2 + black • Black = 31 • Example: (62-31) / 2 + 31 = ?
Uncalibrated • Uncalibrated light sensor values • Data from 7 light sensors - uncalibrated, room light on • What trigger point would we use to stop on black? On green or black?
Calibration • Calibrated light sensor values • Calibration: a process to compensate for varying lighting conditions • Data from two sensors - uncalibrated (left), calibrated (right) • Calibration “spreads” values - lightest ~ 100, darkest ~ 0 Light Sensor 1 Light Sensor 2
Calibration • Using the internal calibration program • Connect NXT brick to your computer • On the upper left corner, click “tools” and “calibrate sensors” • To calibrate, do the following: • Select the light sensor and the port the sensor is connected to, then click the calibration button. This will download a small program to the NXT and run it automatically. • On the NXTs screen you will see text that reads “Min Value:” Point the light sensor towards a material or spot that represents what the light sensor should measure as dark. Press the orange Enter button on the NXT. • Next you will see text that reads “Max Value:” Point the light sensor towards a material or spot that represents the brightest location the sensor will encounter during the program. Press the orange Enter button again. Calibration is complete. • Caution: After calibration, read light sensor values from the light sensor program block to determine trigger points. Do not use NXT View function, as View gives incorrect values for calibrated light sensors. • W1 shows how to turn off Calibration
Sensors • Light sensor variables • Light sensor readings vary depending on: • Distance of sensor from the mat • Ambient light in the room • The particular light sensor you are using • Whether the robot’s light sensors have been calibrated or not
Mission • Buoy Mission using sensors • Move along the black line using a line follower, then up to the buoy • Grab the buoy and place it on the platform • Lets talk about line following...
Line Follow • Line Following - is really edge following • Steer to black - turn _____ • Steer to white - turn _____ • Follows left edge of black line • Loop Turn _____ , wait for dark Turn _____ , wait for light Loop Go ahead and write a program to do this B C
Line Follow • Line following - breaking out of the loop • Time • time is battery sensitive • (# of loops) • (Sensor input) • workshop 4 covers loops more thoroughly • Discuss line following in your team • Help all team members to understand line following • Judges will ask questions! B C
information • simple line follower with left sensor stop on blue • robot steers to blue line, then away • note speed, zigzag & approach angle
information • Mission planning
mission • Buoy Mission • Begin by moving away from base • Use “simple line follower” • Plan precise moves & turns to capture the buoy • Pick up the buoy and place it on the platform • Go! 20 min. • Review of problems & solutions
information • Simple line follower • Robot steers to line, then away, note speed & zigzag • Timed stop to break out of loop
review • Help your teams focus on position error and repeatability • 1) By breaking missions down to basic moves and turns • 2) By identifying error zones • 3) By compensating for errors with attachments, positioning and sensors • 4) By encouraging your team to make evidence based decisions • Help your team learn about robot behavior • 1) Ask a simple question to focus their attention on a problem • 2) Let them experiment with the problem - hands-on • 3) Provide technical background information such as how to run an experiment or program a loop • 4) Get the team to use what they know to solve a complex problem • 5) Review what they have learned, quiz them to make sure they understand the problem and their solution - next slide has more on questions...
coaching • Homework: Write 2-3 Formative Assessment questions that will help you determine where your team is in the process • Subject-Centered Questions: • What causes the patterns you noticed? • What affects the number of xxx you can observe? • Person-Centered Questions: • How do you explain your observations? • What do you think is happening with the xxx? • Ask Formative Assessment questions during team meetings • Review the material as needed • Once you are satisfied they understand the material, move on to a Quiz
quiz • How does the NXT software know when to stop the robot? • 1) With an internal GPS • 2) By counting wheel rotations • 3) By measuring light values • What causes the side-to-side wobble? • 1) Move block software • 2) Changes in light sensor values • 3) The weight of the light sensor on one side • Ask quiz questions at the end of a segment or team meeting to help you understand the team’s overall knowledge
reference • Using Scientific Inquiry in Robot Design • Forming a Question or Hypothesis • What are the robot move and turn accuracies? • Learn to ask questions that can be investigated • Designing an Investigation • Run 2ft straight move, then turn 90 deg • Run test 5x @ 50% speed • Collecting and Presenting Data • Use pen & ruler to mark where robot lands • Analyzing and Interpreting Results • Be able to defend your conclusions • Ref: Oregon Department of Education - 2009 science standards
Take Home Message • Help your team discover and use scientific processes to understand robot moves and behavior • Ask formative assessment questions to help you as coach assess where your team is, and what is needed to move them forward • Resources: • Scientific Inquiry: Oregon Department of Education ~ Inquiry • Exploratorium.edu ~ Institute for Inquiry • Winning Design!: LEGO Mindstorms NXT by James J. Trobaugh