Comprehensive Overview of UAV Hardware Components and Configuration
This overview covers essential UAV hardware components, including the autopilot control board, battery, modem, ground control station, GPS, IR sensors, motor/controller, and servos. The Tiny v2.11 autopilot board serves as the brain of the UAV, managing all critical functions while ensuring effective communication during flight. Power is supplied by a 2100mAh Li-Poly battery. The system supports IR sensors for control and offers payload capabilities, albeit limited by data transmission rates. Proper software setup is crucial for optimal operation with the Paparazzi development team’s software.

Comprehensive Overview of UAV Hardware Components and Configuration
E N D
Presentation Transcript
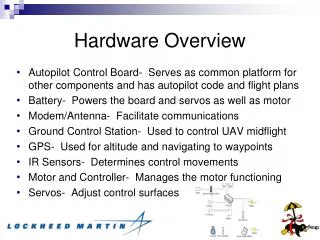
Hardware Overview • Autopilot Control Board- Serves as common platform for other components and has autopilot code and flight plans • Battery- Powers the board and servos as well as motor • Modem/Antenna- Facilitate communications • Ground Control Station- Used to control UAV midflight • GPS- Used for altitude and navigating to waypoints • IR Sensors- Determines control movements • Motor and Controller- Manages the motor functioning • Servos- Adjust control surfaces
Autopilot Control Board (Tiny) • The main control board is the Tiny v2.11 is the brain of the UAV and controls: • Servos (via Pulse-pulse-modulation) • Infrared sensors • GPS • Any applicable payload (CAM) • The autopilot board design is released by and updated by the Paparazzi development team
Battery • 2100mAh 11.1V Li-Poly battery • 6.1 – 18 VDC autopilot input voltage
Datalink Radio(Modem & Antenna) • Autopilot – Groundstation communication • Serial channel
GPS Receiver • Receiver & Antenna built into autopilot • uBlox LEA-4 serial receiver – 4Hz update
GPS configuration • Proprietary control software
IR Sensors • One x-y sensor + one z sensor • Each axis is a thermopile pair • Differential output from each pair
IR Sensor Modification • Driven by 3.3V instead of 5V • Changes amplifier gain • Replace biasing resistors for unity gain
Motor & Controller • Brushless motor and electronic speed control
Servos • Hitec HS-55 servos
Payload • We never officially implemented a payload, though this would not require extensive work • Ostensibly, we would have added a camera to feed back images or video over the modem • Due to data transmission rate limitations (9600 baudrate) any video taken would be of very low quality, though images could certainly be sent at a decent frequency • Payload would likely be placed on the side of the modem transmitter beneath and partially embedded in a wing
Software Setup • Paparazzi software requires Debian based Linux distribution • We used Ubuntu 8.04 “Hardy Heron” for all our testing • Can build source locally or install prebuilt binary package
Install Bootloader • Bootloader must be flashed to a new board before it can be programmed • Allows Tiny to be programmed via USB • Flashed via custom serial cable • This procedure only needs to be done once per board
Program GPS Receiver • Install GPS Tunnel Program to Tiny • Allows direct communication to GPS Receiver • Program GPS using U-BLOX software • Uses custom serial cable • Software runs on Windows
Programming Autopilot • Tiny is programmed directly from the Paparazzi software • Configuration files are modified and tuned as required for a given configuration • Direct USB connection to Tiny