Download
1 / 62
620 likes | 647 Views
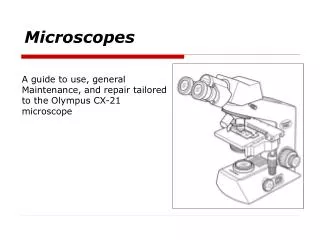
Learn the basics of using a compound light microscope, including safety precautions, focusing techniques, and understanding the different parts of the microscope.

E N D
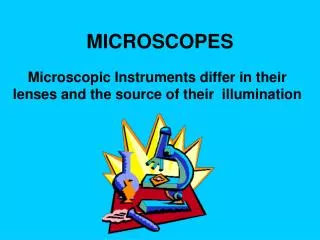
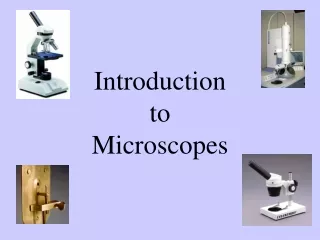
An introduction to theCompound Light Microscope(This is a note check, for p. 3)You must make sure you have these correct for studying them later.
Answer to question 1 Eyepiece lens Simple microscopes use one lens to magnify. Compound microscopes use the eyepiece and objective lens (2 lenses) to magnify.
MICROSCOPE USE-SAFETY • Carry the microscope with both hands, one under the base the other holding the arm and keep microscope close to your body. Answer to question 2
MICROSCOPE USE-SAFETY Fine adjustment is used for focusing on high and medium power. Answer to question 3
MICROSCOPE USE-SAFETY • Coarse adjustment is used to raise and lower the stage • Coarse adjustment is used to focus on low power Answer to question 4
MICROSCOPE USE-SAFETY • When raising and lower the stage (all the way up or all the way down your eyes are looking from the side. • You do this so the lenses don’t hit the stage. Answer to question 5
MICROSCOPE USE-SAFETY • To change magnification you turn the nosepiece. You watch from the side.because you don’t want to hit the lens against the stage. Answer to question 6
Putting the microscope away Answer to question 7 a. Lower the stage b. Change to low power c. Wrap the cord d. Put the dust cover on e. Slide it onto the correct shelf with the arm facing you
Image is reversed by the lenses bending light during magnification Answer to question 8
You need thin specimens with this microscope • Why? Light needs to pass through and enter lenses to magnify image. Answer to question 9
1st focus is how you set up the microscope when you first look • 1. When you know the routine, it’s easy. • 2. It really works! Answer to question 10
FIRST FOCUS TECHNIQUE 1. Lower the stage 2. Put on low power 3. Put on low light 4. Put object into center of aperture 5.Raise stage 6. Look and see * A SMALL AMOUNT OF FOCUSING WILL BE NEEDED BUT IT WILL THERE Aperture - the small “hole” in the middle of the stage. Answer to question 11
1 . Your first SKETCH *Label 3 pixels, (3 different colors) on mediumpower. *Labels go outside the circle, (field of view). *Use a ruler for straight label lines. *Draw and color the whole field of view. Name=_________________ Location=_______________ Power = _______________
Diagram Answers questions to guide your learning
Rotates =prism housing # 1 # 2
Eyepiece • Also called ocular • 10 X • Built in pointer • Turning eyepiece - moves pointer
Body tube • Not strong • To move it turn the prism housing Prism housing
# 10 # 14 # 13 #15
Lamp Switch • If the lamp does not come on check the switch.
Base • Don’t tilt microscope off base while looking. • break body tube/prism housing
Coarse Adjustment knob • Is used to raise and lower the stage of the microscope when first setting up or when putting the microscope away. • It is used for focusing on low power. • It does not get used with medium and high power
Fine Adjustment • It is used on medium & high power • Turning it more than once or twice means you should go back to low power & do 1st focus again • Over using it will result in it not working.
Resetting FINE ADJUSTMENT • Indicator marks are part 16 in the diagram • When fine adjustment is not working look at the marks and turn fine adjustment until the one mark is moved to the middle of the two other marks • This is how you reset fine adjustment
#12 #9
Stage • Holds slide
Diaphragm • It is a disc with five openings. • By lining up a big or small hole more or less light enters the lenses.changeslight • Adjusting the amount of light is done with the diaphragm
# 4 # 8
Nosepiece • You turn the nosepiece to switch lenses(objectives) • It has a click that you feelwhen it is locked into position. • You look from the side when doing this because do not want to hit the lens against the stage
Aperture • The opening in the stage • It has a non-magnifying “lens” and should be kept clean and dry • The object you wish to look at should be centered in the aperture
# 3 # 7 # 5 # 8
Arm • Faces you
Stage Clips • Replaced with a mechanical stage
Correct way to put slide in • Open the arm • Place the slide all the way back so it is snug in the corner • Close armslowly • Turn the knobs to move specimen to the center of the aperture
# 5 #6
Total Magnification • The power of magnification is marked on each objective. • Low power is a 4X, medium is a 10X and high is a 40X lens • Because the eyepiece is a 10X lens when using low the total magnification is 10X times 4X or 40X. Low power is the best lens to search or scan with, it sees a large area. • The TM of medium is 100X because the eyepiece is 10X and medium is 10X. • The TM of high is 400X magnification it is the worst lens to try to find something
TM Low Power • Scanning – Searching – sees large area Low Power Objective (4X) Eyepiece Lens (10X)
Focusing • Adjust the distance the stage is from the lens 1st focus orInitial focus • Watch from side • raise stage coarse adj. • Lookin the eyepiecefocus down with coarse adj.
Seeing “thickness” • High power • Move fine up & down • Layers come in & out of focus. • Called “DEPTH OF FIELD”
Wet Mount Drop of water and specimen Cover glass Because it uses water, is called a wet mount or wm
3 reasons Wet Mounts are made • Increases light passing through • Flattens object 3. Keeps living material moist
Cleaning slide & cover • Rinse both (slide and cover glass). • Blot dry
End of period: slide & cover glass clean up • Wipe off moisture • DON’T WASH!!!!!! • Why? • You’ll go late to next class. Takes too long
Checkout • Dry slide, cover glass & return to tray • Scope • low power, lower stage, # shelf, wrap cord, dust cover