Download

1 / 18
470 likes | 1.16k Views
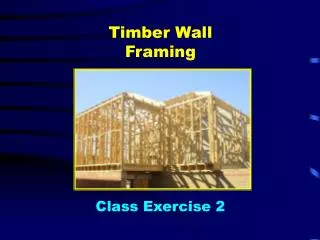
Wall Framing. Grimsby Secondary School Technology Dept. Wall Framing.

E N D
Wall Framing Grimsby Secondary School Technology Dept
Wall Framing • Wall framing is built upon the same sheathing module that floor framing used – covered with sheets 48” by 96”. The standard spacing for wall studs is 16” o.c. 15 1/4” must be used at the beginning of marking out a wood frame wall.
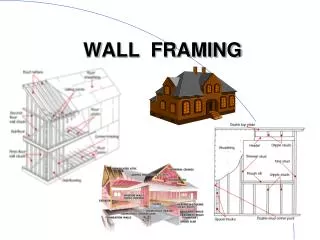
Wall Framing • Wall framing is done with standard members for the areas around openings, at corners, and at intersecting partition walls.
Wall Framing • At openings, the load from upper floors and roof is carried by the header around the opening to the trimmers (or jack studs). The size and type of header depend on the load, width of opening, construction ease, and energy efficiency.
Wall Framing • Openings for doors and windows are built large enough for the window or door to be plumbed and shimmed after installation. A 36” wide door is typically installed in a 38 ½” “Rough Opening”. An 80” high door is typically installed in a 83” R.O. R.O. sizes are typically shown on plans
Wall Framing • Walls are laid out by marking the openings (centerlines) and wall intersections (centerlines) first, and then indicating the opening edges. Then 16” (or 24”) lay out lines are drawn. Any full length studs which fall inside the opening become cripple studs
Wall Framing • The framing at an exterior corner must provide a nailing surface for both the sheathing on both outside walls and the covering (e.g. drywall) on both inside walls. Ideally there will also be room for insulation.
Wall Framing • Where an interior wall (partition) meets another wall, there must be a nailing surface for the wall covering (e.g. drywall) at both corners. There are various ways of doing this, most commonly with a partition block on interior walls.
Wall Framing • Special framing (also know as blocking, backing, nailers, etc) is installed in the wall to allow for attachment of plumbing fixtures, cabinets, bath tubs, towel racks, firestops
Wall Framing • The height of the wall should be sized so that the 8’ sheathing will get nailed to the top and sole plates. For this to happen, the studs must be shorter than 8’. Precision End Trimmed (a.k.a. “Pre-cuts”) are 92 5/8” to fit the exterior wall with a double top plate.
Wall Framing • Walls can be classified as “load bearing” or “non-load bearing” depending on whether they support the weight of a floor or roof above. Different header designs and sometimes member sizes are used on non-load bearing walls.
Wall Framing • When laying out a wall, attention must be paid to the first stud spacing, and the location for measuring the rough openings, and the starting point for the sheathing. All this will depend on whether the wall is load-bearing or not
Wall Framing • Walls are held square using either wood let-in bracing, metal bracing, or structural sheathing. Choice depends on how the walls will be assembled and lifted.
Wall Framing • Once the wall is raised in place it must be held plumb until the roof sheathing is in place. • The top plate of the wall is held straight using gauge blocks and the second top plate is installed
Wall Framing • The second top plate is lapped at all corners and wall intersections to tie the walls together. • The second top plate has its’ joints staggered from the first top plate. The nails should be installed over the studs, so that the space between studs has no nails
Wall Framing • Steel studs are commonly used in commercial and light industrial construction. • Advantages – No fire load, uniform dimensions, strong. • Disadvantages – Labor intensive to connect studs to track, thermal bridging, sharp edges.
Wall Framing • When top wall is complete, ceiling joists are installed if the roof is built with rafters. If the roof is built with trusses, the truss bottom chord will serve as the ceiling framing. Strongbacks commonly used to keep ceiling joists aligned.