Intro to Painting
240 likes | 534 Views
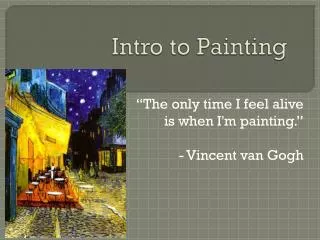
Intro to Painting. “The only time I feel alive is when I'm painting.” - Vincent van Gogh. Acrylic Paints. Fast drying, and can be diluted with water, but become water-resistant when dry.

Intro to Painting
E N D
Presentation Transcript
Intro to Painting “The only time I feel alive is when I'm painting.” - Vincent van Gogh
Acrylic Paints Fast drying, and can be diluted with water, but become water-resistant when dry. Depending on how much the paint is diluted (with water) or modified with acrylic gels, media, or pastes, the finished acrylic painting can resemble a watercolor or an oil painting, or have its own unique characteristics not attainable with other media.
Oil Paint Slow-drying. The viscosity of the paint may be modified by the addition of a solvent such as turpentine, and varnish may be added to increase the glossiness of the dried film. Oil paints have been used in Europe since the 12th century for simple decoration, but were not widely adopted as an artistic medium until the early 15th century.
Differences The main difference between most acrylics and oil paints is the drying time. Oils allow for more time to blend colors and apply even glazes over underpaintings. This slow drying aspect of oil can be seen as an advantage for certain techniques, but in other regards it impedes the artist trying to work quickly.
Brush Types Round: Long closely arranged bristles for detail Flat: For spreading paint quickly and evenly over a surface. They will have longer hairs than their Bright counterpart. Bright: Flat brushes with short stiff bristles Filbert: Flat brushes with domed ends. They allow good coverage and the ability to perform some detail work. Rigger: Round brushes with long hairs, traditionally used for painting the rigging in pictures of ships. They are useful for fine lines and details.
Brush Care 1. Gently wipe off excess paint with a paper towel. 2. Rinse brush under lukewarm water and use your fingers to release leftover paint. Do not use hot water or pull on the bristles! 3. Wipe the brush on a paper towel again. 4. Use a DAB of mild soap to wash the brush again. 5. Rinse and repeat until the brush is completely clean.
Brush Care Continued… 6. Be sure to rinse out all of the soap. Then gently shape the brush with your fingers. 7. Leave the brush to dry, with the head facing UP, so it doesn’t get misshapen! TAKE CARE OF THESE BRUSHES! YOU WILL BE RETURNING THEM TO ME WHEN WE’RE FINISHED WORKING.
Palette Knives Painting with a knife is a bit like putting butter or jam on bread and produces quite a different result to a brush. Painting knives are excellent for producing textured, impasto work and sweeping areas of flat color as well as tiny shapes of color.
Acrylic Painting Tips 1. Because acrylics dry so fast, squeeze only a little paint out of a tube. 2. Acrylics can be opaque or translucent, depending on how you use them. When applied thickly, they appear opaque. When diluted with water, they appear translucent, much like watercolor paint. 3. Because acrylics dry rapidly, you need to work fast if you wish to blend colors.
Canvas An extremely heavy-duty painting surface, typically stretched.
Color Mixing 1. To mix a color you need, first decide which two primary colors will create the color you want. For example, if you need orange, choose red and yellow. 2. Use your brush to lift some paint onto a blank area of the palette, then wipe off your brush on a paper towel and use the brush to grab some of the other color you want to use.
Color Mixing Continued… 3. Mix thoroughly. It will take practice to get the exact color you’re looking for. 4. To lighten colors, you can use titanium white to create a TINT. To darken colors, use a tiny bit of black to create a SHADE. TIP - You can neutralize a color that's too intense by using its complement (the color opposite it on the color wheel. For example, use a little dab of blue to tone down a too-intense orange.
Today’s Assignment (5pts): • Using the materials provided, create your own color wheel using ONLY the primary colors. • 1. Using your pencil and a ruler, draw a basic color wheel design. You may arrange it any way you wish, just keep it neat. • 2. Set up your area. You will need red, yellow and blue paint, a paper towel, and a palette. • 3. Begin mixing paints to create the colors in the color wheel. DO NOT WASTE PAINT. • 4. Colors should be vivid and pure – no streaks! • 5. When finished, make sure your name is on your paper and let it dry. • 6. CLEAN your brushes and put away all supplies.
Your homework for Tuesday(5pts) 1. Bring in an image of a landscape. It can be from a magazine, online, or a photograph you took (this is preferable). 2. The landscape can be a beach scene, mountainous terrain, or desert landscape, and it can be day or night. However, it can not be too simple and must have an interesting composition. 3. It must contain a foreground, middleground and background and be about 8 x 10 inches. 4. An extra point will be awarded to those students who bring in an ORIGINAL photograph.
Don’t forget about your sketchbook assignment due Monday! • 1. Research a landscape artist and choose one painting by that artist. Do a sketch of it in your sketchbook. Label the foreground, middleground and background and include the artist’s name, title of the work, date completed and medium used. • Next, answer the following question: • What do you admire in this artist’s work? What drew you to it?
Your Assignment for TODAY After you have matted… Using the paper provided, draw a color wheel, tint scale and value scale. You will be painting these in tomorrow. You may arrange the color wheel and scales however you wish but you must have every color in the color wheel (12), 9 tints in the tint scale, and 9 shades in the shade scale.