Download
1 / 57
570 likes | 591 Views
Learn to assess hazards, use ladders & scaffolds for roof access, identify roof types & hazards, secure openings, and ensure safe practices in disaster response situations as a volunteer in this informative course.

E N D
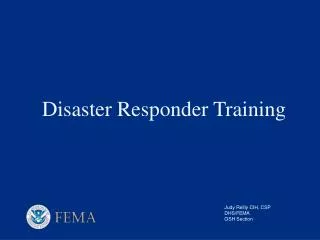
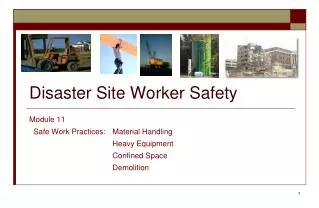
Disaster Responder Roofing Safety 2013 Lutheran Church Services Harry Dietz NRCA Director of Risk Management
What is NRCA? • One of the oldest construction trade associations • Approximately 4,000 members • Roofing contractors, manufacturers, architects, government, & institutional members • Involved with technical, safety, governmental & educational issues affecting roofing • NRCA involved in Rebuilding Together
Class Goal • To maintain your personal safety and that of other volunteers and third parties as you work to minimize further property damage in areas that have been subjected to a disastrous event • We do not intend to make you into roofing or building trade professionals, but keep you safe as you help others protect their property until those professionals are on the site.
Class Objectives • Increase your awareness of roofing hazards generally and in disaster response situations specifically • Introduce safe work practices and control measures to minimize the risk of injuries • Increase your awareness of equipment and tools to help you safely perform your work
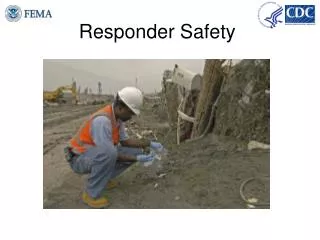
Hazard or risk assessment—preliminary site • Power lines/electricity • Other utilities, propane, natural gas • Standing water • Structural integrity • Trees, poles • Debris • People, pets
Hazard controls—power lines • Always assume they are live • Always assume they are not insulated • Keep ladders, scaffolds and workers at least 10 feet from lines • Flag and barricade areas where fallen power lines are on the ground with orange cones, caution tape to prevent contact • Follow instructions of utility workers
Ladder ratings Type IAA—375 pounds Type IA—300 pounds Type I—250 pounds Type 2—225 pounds Type 3—200 pounds
Ladder Setup 2 Ladders must extend at least 3 feet over the eave or landing surface Ladders must be tied off to prevent movement
Ladder Setup 3 A ladder must be placed on firm, stable and level ground Securing the base of the ladder helps ensure stability
Ladder Setup 4 Make sure rung locks are fully seated onto rung —this photo shows improper locking Rung locks, also called dogs or pawls, must be fully functioning and secure
Ladder Setup 5—Walking a ladder up Place feet of ladder at the base of the building While putting pressure on the ladder in the direction of the building, push the ladder upwards rung by rung
Ladder Use 1 • Do not carry anything up a ladder • Use both hands to hold the ladder siderails or rungs • Face the ladder when going up or down • Only one person at a time on a ladder • Do not load a ladder beyond its rated load capacity
Ladder Use 2 • Never stand on the top or top step of a stepladder • Never use a stepladder in the closed position
Ladder Use 3 • Control access to areas around the ladder setup point • Use the right ladder for the situation
Roof access—scaffolds • Scaffolds can provide stable roof access and staging areas but require ground clearance • Integrated ladder access is often vertical making climbing difficult
Roof Hazards—roof types • Low-slope roof, 4:12 or less • Steep-slope roof, greater than 4:12
Roof types Gable roof Hip roof
Roof types Gambrel roof Mansard roof
Skylights • Not capable of supporting the weight of a person • Found on low- and steep-slope roofs
Openings • May result from flying debris that damages roof; roof vents, solar tubes or skylights removed by force of wind
Roof hazards—deck integrity • Rotten wood decking can be a serious hazard • It is often hard to spot unless visible during an inspection • Thin 3/8-inch plywood may be found on some roofs
Roof hazards—vent stacks, satellite dishes and cables • All pose tripping hazards • Lightning arresting equipment can also be present
Roof hazards—electrical Electrical service drop on roof Solar panels on roof
Hazard Controls—skylights, openings • Cover with plywood, usually requires ¾-inch; larger openings may require additional framing • Secure with nails or screws
Hazard controls—slip hazards • Some footwear provides better grip on roof surfaces • These work shoes are designed for increased grip • More on Fall Protection shortly Korkers Footwear sells strap-on versions for use with personal footwear
Fall Protection • Personal fall arrest (PFA) systems and personal fall restraint systems are often used in residential construction
Criteria for PFA’s • PFAs often consist of a body harness, anchor, connectors, deceleration device, lanyard and lifeline • Each worker must be connected to separate lifeline • Lanyards and vertical lifelines minimum 5,000-pound strength • Anchors must support 5,000 pounds • Must limit free fall to 6 feet max • Ropes and straps must be synthetic
Personal fall restraint • Designed to stop a person from reaching a fall hazard • Some fall arrest systems can be rigged in fall restraint
Anchors • Anchors for personal fall arrest (PFA) equipment must be capable of supporting at least 5,000 pounds per employee attached
Manufacturer’s Installation Instructions • Anchors must be installed following the instructions from the manufacturer • Only the type of fasteners described by the manufacturer for use with the anchor may be used • The quantity of fasteners described by the manufacturer for use with the anchor must be installed
Locating Roof Anchors—ResidentialSome General Guidelines • Locate at roof peak when possible and at least 6 feet from any exposed roof edge • DO NOT install roof anchors on unsupported roof structures, such as eaves or gable overhangs
Locating Roof Anchors—ResidentialSome General Guidelines • Hip roofs may require a roof anchor at each hip face • Reduce swing fall hazards on long roof faces by using multiple roof anchors installed at least 6 feet from the rake edge • Best anchor position is directly above worker
Swing Fall Hazards Swing Fall Hazard Gable End Swing Fall
Slide guards • In addition to PFA or personal fall restraint, slide guards may offer support and slip protection
Slide Guards • Slide guards consist of metal brackets that secure a section of minimum 2 X 6-inch lumber
Hazards of tarped roof? • A tarped roof will be slippery especially if wet • Cleats, nails, seams and wrinkles will be trip hazards • Holes and openings that have been covered over will not be obvious to someone walking on the roof
Hazard: Power Tools Hand-held electrical tools are especially dangerous because they make continuous contact with hands.
Ground-fault Circuit Interrupter (GFCI) • This device protects you from dangerous shock • The GFCI detects a difference in current between the black and white circuit wires • If a ground fault (leakage) is detected, the GFCI can shut off electricity flow in as little as 1/40th of a second, protecting you from a dangerous shock 1926.404(b)(1)(i)
Double Insulated marking Hazard Control: Power Tools To protect from shock, burns and electrocution, tools must do one of the following: • Have a three-wire cord with ground plugged into a grounded receptacle • Be double insulated (indicated by symbol of square within a square)
Hazards and Controls Control: Power Tool Safety Tips • Inspect tools before each use • Read and understand manufacturer’s safety instructions • Use the right tool correctly • Use required PPE • Store in dry place―don’t use in wet or damp conditions • Keep working areas well lit • Don’t use damaged tools
Hazards and Controls Control: Power Tool Safety Tips • Ensure no tripping hazard exists • Don’t carry a tool by the cord • Don’t yank the cord to disconnect it • Keep cords away from heat, oil and sharp edges • Disconnect tools when not in use and when changing accessories