Download
1 / 16
160 likes | 240 Views
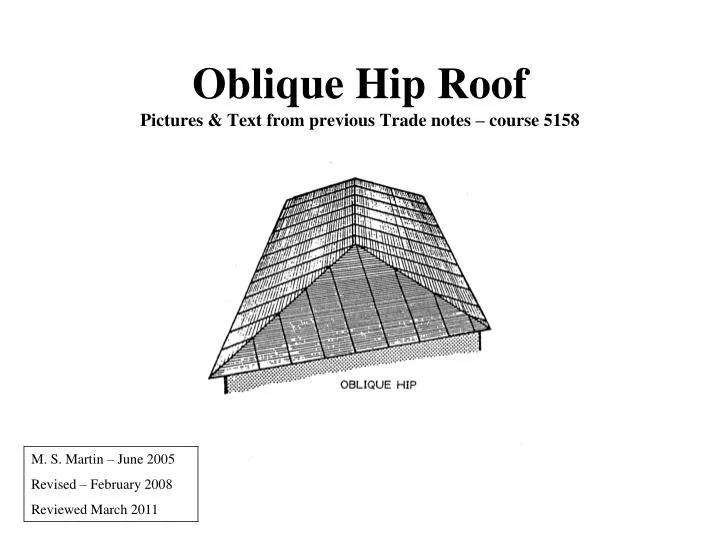
Oblique Hip Roof Pictures & Text from previous Trade notes – course 5158. M. S. Martin – June 2005 Revised – February 2008 Reviewed March 2011. First lets revise Hip Roofs. Your Ref: Advanced roof workbook Pages 4 to 6. Plumb Bevel Common Rafter Level Bevel Common Rafter

E N D
Oblique Hip RoofPictures & Text from previous Trade notes – course 5158 M. S. Martin – June 2005 Revised – February 2008 Reviewed March 2011
First lets revise Hip Roofs Your Ref: Advanced roof workbook Pages 4 to 6
Plumb Bevel Common Rafter Level Bevel Common Rafter Edge Bevel Creeper Draw in creeper Project up Draw in level line 90° to true length Join to create bevel LL1 Rise R 30° Pitch Plumb Bevel Hip 1)Measure Rise 2) Draw in Rise 90° to plan length hip 3) Join to create bevel Level Bevel Hip Edge Bevel Hip 1) Draw in crown end 2) Draw in level line 2, 90° to plan length hip 3) project across to true length of hip 4) Draw level line 90° to true length 5) Join to create bevel Rise LL2 Edge Bevel Purlin LL2 LL1 Face Bevel Purlin 1) Draw line 90°to TLCR, 2) Project down to plan length hip at two points, 3) draw line out from PLH, 4) create bevel
Calc’s continued Order Length True length / m x (1/2 span + eave + brick & cavity) 1.133 x ( 4.210 + 0.450 + 0.150) 1.133 x 4.810 5.449 + 100mm for plumb cut Order 5.700m lengths
P. 10 and 11 Comparing Roof Shapes BEVELS • Bevels CR = Same • Creeper Bevels • Develop the Same • Oblique hip do twice • Edge bevel purlin = as above • Hip Bevels • Develop the Same • Oblique hip do twice • Face bevel purlin • Develop the Same • Oblique hip do twice • Edge bevel crown end = New bevel, same principles ROOF • Hips bisect angle • Ridge in centre • Rafters 90º plates
Ridge Gathering Detail • Copy detail into student notes, top of page
Set out of members • Add to text notes bottom of page • The first members marked on the top plates being the centre lines for crown end and centring rafters, with the remaining common and creeper rafters measured into and over from these members.
Set out continued • Lengths of oblique end and offset established (eg) Oblique end = 6.400m Offset = 3.800m
Set out continued Copy into notes bottom of page 2) If the ridge was extended it would bisect the oblique end. 3) This point ‘x’ is transferred to the offset and bisects the offset 4) Half the oblique end is the radius of a semi-circle. XA = XC = XB. Therefore XC is equal to half the oblique end.
Position of Centring Rafter Copy into notes 5) Distance BE = Half Oblique end minus half the offset 6) Distance DA = Half Oblique end plus half the offset
Position of Crown End Copy into notes 7) FB is equal to BE (similar triangles)
Creeper set out Copy into notes 8) Thickness of material marked on the centre lines and remaining creepers set out, into and over.
Establishing Bevels • Just like any other roof you have done, the bevels can be established in a number of ways, the oblique end is no different • Geometrically • Direct Method or • Steel square • Your first drawing will be to establish these bevels geometrically • Example on next slide