Getting started: Basics
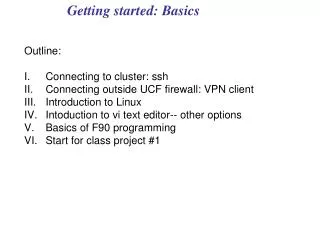
Getting started: Basics. Outline: Connecting to cluster: ssh Connecting outside UCF firewall: VPN client Introduction to Linux Intoduction to vi text editor-- other options Basics of F90 programming Start for class project #1. I. Connecting to cluster: ssh. MAC OSX-- Unix environment!

Getting started: Basics
E N D
Presentation Transcript
Getting started: Basics Outline: Connecting to cluster: ssh Connecting outside UCF firewall: VPN client Introduction to Linux Intoduction to vi text editor-- other options Basics of F90 programming Start for class project #1
I. Connecting to cluster: ssh MAC OSX-- Unix environment! a) open up a terminal window b) ssh -l student 132.170.176.230 c) password 2. Windows-- putty utility a) http://www.putty.org/ b) Download and install putty c) Use putty to ssh to cluster, IP address above
II. Connecting outside UCF firewall: VPN client 1. First go to the NOC page http://www.noc.ucf.edu/VPN/default.htm 2. Then log on to the NOC intranet with your PID and myucf password 3. Click on VPN link to download and install VPN client Then…. First open VPN client, and then log on to VPN server 2. Finally you can ssh to cluster as in preceding slide
III. Introduction to Linux Linux is an operating system similar to UNIX Graphical interfaces exist, but we will just use text-based After ssh to cluster… student@132.170.176.230's password: [student@odin student]$ ls 4. The ls command shows the contents of the directory group1 group2 group3 group4 group5 group6 rs.f [student@odin student]$ cd group1 [student@odin group1]$ ls [student@odin group1]$ Directory is empty! It has no files or subdirectories.
Creating a new directory… Let’s create a new directory for project #1 From your bash shell [student@odin group1]$mkdir proj1 [student@odin group1]$ ls proj1 [student@odin group1]$ cd proj1 [student@odin proj1]$ ls [student@odin proj1]$ Again new directory is empty! We will place source code for project #1 here.
Moving files around… copying Rather than clicking and dragging, we need the cp command to create duplicate files 2. In the student top directory, you will need rs.f for the first project 3. Copy this file to student/group1/proj1 in the following way: [student@odin proj1]$ cd ../../ [student@odin student]$ ls group1 group2 group3 group4 group5 group6 rs.f [student@odin student]$ cp rs.f group1/proj1 [student@odin proj1]$ cd group1/proj1 [student@odin proj1]$ ls rs.f [student@odin proj1]$ The subroutine rs.f is where you need it for your first project!
Moving files around… moving Like cp, the mv command is for manipulating files The mv command eliminates the original file however Uses…moving to a new directory [student@odin student]$ mv rs.f ../ [patrick@odin patrick]$ ls [patrick@odin patrick]$ cd ../ [patrick@odin patrick]$ ls proj1 rs.f [patrick@odin patrick]$ mv rs.f proj1 [patrick@odin patrick]$ cd proj1 [patrick@odin patrick]$ ls rs.f
Moving files around… moving Uses…renaming a file [student@odin proj1]$ mv rs.f rs1.f [student@odin proj1]$ ls rs1.f [student@odin proj1]$ mv rs1.f rs.f [student@odin proj1]$ ls rs.f In contrast, if we had used cp [student@odin proj1]$ cp rs.f rs1.f [student@odin proj1]$ ls rs1.f rs.f [student@odin proj1]$
Removing files… and being careful! [student@odin proj1]$ rm rs1.f rm: remove `rs1.f'?y [student@odin proj1]$ ls rs.f [student@odin proj1]$ If we didn’t want to be prompted… [student@odin proj1]$ rm -f rs1.f [student@odin proj1]$ ls rs.f [student@odin proj1]$ For removing directories, they must first be empty of any other files, then use the rmdir command
IV. Introduction to vi text editor-- other options The simple vi is easy to use and surprisingly powerful Some people hate it so we have other options Let’s start our new computer project with rs.f as the starting point… [student@odin proj1]$ cp rs.f prog1.f [student@odin proj1]$ ls prog1.f rs.f [student@odin proj1]$ vi prog1.f double precision function pythag(a,b) double precision a,b c c finds dsqrt(a**2+b**2) without overflow or destructive underflow Etc……
Command mode and insert mode The vi editor starts in the command mode Arrow keys move cursor around the file Insert mode accessed by typing “i” In the insert mode, text can be inserted into file Return to command mode with Esc Let’s insert a couple of lines into prog.f… Go to top of file prog.f, type “i” for insert Use “return” to get a blank line at top of file Enter program name and end statement: PROGRAM prog.f END PROGRAM prog.f 4. Return to command mode with Esc
Saving the file you edit, prog1.f… From the command mode, we need to write the changes to file… :w 2. Then to quit and go back to the bash shell :q 3. We could’ve written and quit in one command :wq 4. To quit without saving changes :q!
Compiling an F90 source code… Assuming we had a code to compile… which we don’t yet, we can compile and create an executable 2. The F90 compiling is invoked using… [student@odin proj1]$ ifort -o prog1 prog1.f [student@odin proj1]$ ls prog1 prog1.f 3. If we didn’t name the executable with the -o option, [student@odin proj1]$ ifort prog1.f [student@odin proj1]$ ls a.out prog1.f
To run the executable…. and redirecting output 1. Running the executable prog1 is done with [student@odin proj1]$ ./prog1 2. If code has output to the screen, you will see the output as it comes 3. Often it is good to redirect output to a file that can be viewed or analyzed later on. To do this, [student@odin proj1]$ ./proj1 > output 4. To view the output, we can type [student@odin proj1]$ vi output
V. Basics of F90 programming PROGRAM program-name IMPLICIT NONE [specification part] [execution part] [subprogram part] END PROGRAM program-name Define variables, constants, arrays The program code! Subroutines (e.g. matrix diagonalization)
Specification part-- variables type-specifier :: list * INTEGER : the variables in list can hold integers * REAL: the variables in list can hold real numbers * COMPLEX: the variables in list can hold complex numbers * LOGICAL: the variables in list can hold logical values (i.e., true or false) * CHARACTER: the variables in list can hold character strings Examples: INTEGER :: I, j, n, ntotal, naverage REAL :: Hamil, Q, Energy, Z CHARACTER(2) :: Element
Specification part-- variable arrays type-specifier, Dimension() :: list Examples: REAL, DIMENSION(10) :: a, b, c REAL, DIMENSION(10,10) :: H In this example, everything is declared as real variables. Each of a, b, and c are one-dimensional arrays of length 10. In contrast, H is a two-dimensional array which is 10x10. In other words, a, b, and c are like vectors, and H is a matrix!