Download
1 / 49
490 likes | 658 Views
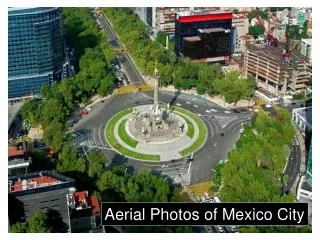
An Introduction to GIS using Aerial Photos of Nebraska. Marc Albrecht University of Nebraska at Kearney Department of Biology. How can you can get and use free aerial photos (and other data!) of Nebraska?. Terms. CALMIT = Center for Advanced Land Management Information Technologies

E N D
An Introduction to GIS using Aerial Photos of Nebraska Marc Albrecht University of Nebraska at Kearney Department of Biology
How can you can get and use free aerial photos (and other data!) of Nebraska?
Terms • CALMIT = Center for Advanced Land Management Information Technologies • COQ = Compressed Orthographic Quad • DOQ = Digital Orthographic Quadrangle • GIS = Geographic Information Systems • NRC = Natural Resources Commission • NRD = Natural Resource Districts
But right now - let’s just get some data • In the next hour or so I will try to show you how you can view some of the data being produced of the state and federal government concerning the land you use. • 1. Free viewer software • 2. Internet web sites containing data and pictures about Nebraska • 3. Along the way, introduce some terms and concepts that are helpful • 4. Let you know that UNK, UNL, NRD’s, and the NRC are willing to help you do more.
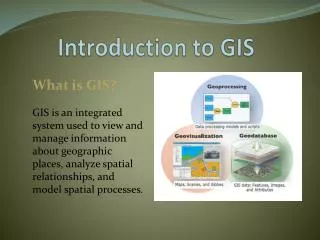
Part I: What is GIS? • An Introduction to Geographic Information Sytems • A method for holding, manipulating, and displaying spatial data • An information tool.
Why GIS? • Too much information • How to see large amount of information • Fast updating and addition information
Free Viewer: • This software lets you view data • Powerful software • Downloaded package includes manual.
What can you do with ArcExplorer? • There are many types of maps we could look at • In our case, we want see images, and maybe a few other types of map features • By the way - it ships as standard equipment with the Trimble AgGPS 170 field computer.
Other free viewers?. . one example • Yes, the US Geological Service has made another one available • address:mcmcweb.er.usgs.gov/viewers
So I have my viewer, now what? • Go to the NRC website: www.nrc. state.ne.us • Click on ‘Subjects A-Z’ • Then ‘D’.
The NRC Site • For those who may not know? NRC collects all types of data on land and agriculture • Example: ‘A’ listing of ‘Subjects A-Z’ includes crops.
On to the ‘D’ listings of NRC site • Either of these choices will take you to pages from which you can get aerial photos.
Click here for map layers such as soils, township/range, rivers • Click here for aerial photos (DOQ’s)
This is the map interface. Click any-where to begin zooming in!
Green: each click will take you 2x closer Blue: click on these, the ‘refresh’ button to show familiar boundaries Orange: When you see what you want click here then click on what you want again!
To repeat Orange: When you see what you want click here then click on the COQ you want again!
New View I have zoomed in and checked major streams and cities to help locate myself This is our Goal: COQ 451704 (handout maps)
Got it! • Which do you take? • First - metadata! • COQ’s are in UTM and NAD 83 projection • Now, which files? • ‘.COQ’ • ‘.hdr’
To see a DOQ in ArcExplorer • Download the desired COQ and its .hdr file to a premade folder • You can rename the files, from their number to something more meaningful, but both the name must be the same for the ?.coq and ?.hdr files • Use ‘coq2doq’ or ‘coq2doq1’ program (also from NRC site, or better my site! gis.unk.edu) to decompress the COQ • Change the resulting file’s extension from ‘.doq’ to ‘.bil’ • ‘Add theme’ or ‘+’ button in ArcExplorer! • Be sure to have ‘image feature’ type selected
But there are limitations to Word • Cannot zoom in and out and pan around easily • Cannot add other layers of information • Memory Intensive • No distance units inherent in image • ArcView and ArcExplorer DEMO!
Another type of map: Topo Maps • The Newest Topo Maps are available at http://csd.unl.edu • Then click ‘Digital Raster Graphics’ at the bottom of the page in the middle • Another interesting site overall! • Scanned at 300 dpi.
Now What? So you have a picture • The real power of GIS is its ability to hold, display, and analyze many layers of different types of information! • So now – add layers!! • Some examples…
NICCA: Special Topic Accessing data layers from the Nebraska Resource Commission Marc Albrecht UNK Dept. of Biology
What this presentation tries to do . . • To get the most out of this presentation you should be familiar with a GIS viewer application such as: • ArcView, ArcExplorer, or MapInfo, or a viewer from the USGS • Please see the other presentation, or contact me, for tips on this!
So I have my viewer, now what? • Go to the NRC website: www.nrc. state.ne.us • Click on ‘Subjects A-Z’ • Then ‘D’.
The NRC Site • For those who may not know? NRC collects all types of data on land and agriculture • Example: ‘A’ listing of ‘Subjects A-Z’ includes crops.
On to the ‘D’ listings of NRC site • Take this choice to take you to page from which you can get data layers.
Click here for map layers such as soils, township/range, rivers, roads, and more!! • Click here for aerial photos (DOQ’s)
Holy Cows! Here are all the data layers you can get – for free! • Just pick one and click ‘Next’! • By the way ‘TIGER’ layers include all roads and waterways.
The options here will vary with the data type you request. • Some layers are too large to download by NRD or county, they will be by USGS quad (handouts).
Whatever type of area you pick, you then need to name of the area from a list. • Holding down the shift key allows you to pick names in a row. • The ‘ctrl’ or ‘alt’ key allows you to pick several names that are not together. Which one depends on your computer and browser setup.
This box asks several questions about how you want the data formatted. • Vector Type: if you are downloading roads pick ‘lines’ if anything that would be in blocks (like soil types) pick ‘polygons’. • Export Type: Arc Export will give you a file in ‘x.E00’ format. This format can be imported into ArcExplorer, ArcView, MapInfo.
Export Type con’t: ‘Shape files’ are the native format for ArcView. • Projection: This could be a workshop on its own. The best option here is to see (find out!) what projection any data you already have is in. Get that one! I have selected UTM, same projection as DOQs. Any GPS locations you take must also be in (or converted to) the projection of all your maps. • Compression: This just makes your download faster. Most people will use ZIP – a common PC compression scheme. You do need freeware to decompress this.
Notice the last space on the form ‘Email’. This is the address that notification will be sent to when the file(s) is ready. • The NRC does not send you a file automatically – they only tell you the file you have requested is ready. You get it when you want! You have 7 days.
This page came up next because on the last page I selected UTM as my projection. • Some projections need additional parameters set • In this case ‘Units’, which is self-explanatory.
‘Zone’ refers to something special to UTM. Everywhere in Nebraska not in the panhandle (Zone 13) or near Omaha or east (Zone 15) will be in Zone 14. These are North/South slices used in this projection. • ‘NAD’ refers to which measurement of the Earth’s size will be used for the projection. The 1983 estimate is one of the most recent and is commonly used. Use this unless you have a reason not to.
The End!! • This is the end of the request form. • Notice a summary of all your choices are given, as well as your email, a job number is also given. • As it says, you will be told when the job is ready for you to download!
Special Note for GPS users • If you need to change the coordinate system for points you have collected with a GPS unit – I recommend CORPSCON. • If your points are in latitude/longitude and you need them in UTM so they will lay over your DOQ – use this program! • Free program from the CORPS of Engineers – and it CONverts coordinate systems and datums. • Does individual points or batch jobs.
Where to get information and help. • Univ. of Nebraska at Kearney • Marc Albrecht: albrechtm@unk.edu and http://gis.unk.edu • Steele Becker: beckers@unk.edu • Univ. of Nebraska CALMIT= www.calmit.unl.edu • Jim Lacy = jlacy1@un.edu • Rick Perk = rperk1@unl.edu • Marcus Tooze = mtooze1@unl.edu* • Nebraska Natural Resource Commission • Steve Rathje = rathje@nrcdec.nrc.state.ne.us* • Natural Resource Districts • Doug Steinke = steinke@nrcdec.nrc.state.ne.us