Download
1 / 15
150 likes | 349 Views
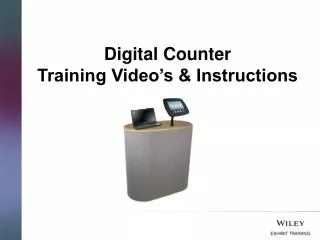
Digital Counter Training Video’s & Instructions. Contents :. Digital Counter Components Step 1: How to assemble the Digital Counter Step 2: How to attach the Bouncepad Flex to the digital counter Step 3: How to attach the iPad Cable to the Bouncepad Flex

E N D
Contents: Digital Counter Components • Step 1: How to assemble the Digital Counter • Step 2: How to attach the Bouncepad Flex to the digital counter • Step 3: How to attach the iPad Cable to the Bouncepad Flex • Step 4: How to lock iPad into the Bouncepad Flex • Step 5: How to attach the graphics to the Digital Counter Fully assembled Digital Counter How to pack up the Digital Counter
Digital Counter Components: The Digital Counter is comprised of two shipping cases which include the following components: Shipment Case 1 includes: Counter Base (A) Loop nylon wrap (B) Thermoformed Top (C) UK & Europe extension leads Wiley graphic wrap Shipment Case 2 includes: Bouncepad Flex iPad Cable & Plug Keys
Step 1: How to assemble the Digital Counter 1 • To attach the Tamber Wrap, place the base on the floor with the hook side facing upwards. • Then simply locate the wrap in the centre of one side and begin to attach the wrap. Continue to attach the wrap around the base until fully attached. 2
Step 1: How to assemble the Digital Counter 3 3. Once the wrap is fully attached make sure that the wrap is butted up against each other to make a seamless join. 4. To attach the top simply lower the top into place and make sure that the hook and loop is attached all the way around. 4
Step 2: How to attach the Bouncepad Flex to the Digital Counter • To attach the Bouncepad it is easier to have the top in place and open the back of the velcro with a small opening. • Place the Bouncepad on the counter top. 2 1
Step 2: How to attach the Bouncepad Flex to the Digital Counter • Align with the holes on the top of the counter and feed through the holes on the counter top. • Place the metal plate underneath the counter over the screws. 5. Attach the four wingnuts securely to the plate. 3 4 5
Step 3: How to attach the iPad Cable to the Bouncepad Flex • Feed the iPad cable through the flexible mounting arm from above. • Straighten the flexible mounting arm to help the cable slide through more easily. • Connect the cable to the plug/extension cable inside the Digital Counter. 1 2 3
Step 4: How to lock the iPad into the Bouncepad Flex • Unlock and remove the face of secure case. • Connect cable to tablet and place into secure case. • Lock the face of the secure case back into place, then place the cable end of the faceplate first, then squeeze the lock end while turning the key. 3 1 2
This video clip will demonstrate how to lock your tablet into the Bouncepad Flex, simply click on the image below:
Step 5: How to attach the graphics to the Digital Counter • Place the vinyl graphic over the velcro and simply locate the wrap in the centre of one side and begin to attach the wrap. Continue to attach the wrap around the base until fully attached. • The feet are raised enough so you can have an extension lead cable underneath the unit. 1 2
Fully Assembled Digital Counter: The Digital counter can be configured as follows: • 1 x Bouncepad Flex with Laptop or Lenovo (if content interactive is being used) 2. 2 x Bouncepad Flex Please ensure you book the appropriate tech equipment through your Exhibits contact.
This video clip will demonstrate how to remove the iPad from the Bouncepad Flex, simply click on the image below:
Step 5: How to attach the graphics to the Digital Counter • Place the vinyl graphic over the velcro and simply locate the wrap in the centre of one side and begin to attach the wrap. Continue to attach the wrap around the base until fully attached. • The feet are raised enough so you can have an extension lead cable underneath the unit. 1 2