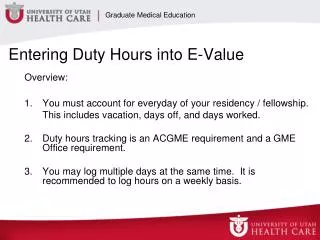
Comprehensive Guide for GME Program Coordinators: Data Management and ERAS Submission
This guide provides essential steps and best practices for Graduate Medical Education (GME) program coordinators in managing biographic data, exporting ERAS information, and preparing for data uploads into E*Value. It outlines crucial deadlines, fields to monitor, and formatting requirements for various entries, ensuring accuracy and compliance in records. Additionally, it advises on using filters for applicant data and maintaining proper formats for contact and certification information to streamline the new hire process.

Comprehensive Guide for GME Program Coordinators: Data Management and ERAS Submission
E N D
Presentation Transcript
PROGRAM COORDINATORS: • Biographic Data Link: Add Picture
Graduate Medical Education (GME): NOTE: Coordinators, do not change any Biographic Info, including “Status & Current Rank” in the gray box. Any issues with “prepost” category until Start Date?
e-Value Tabs Recap • Biographic Info: GME • Roles, Groups, Specialties: Coordinators use if granting someone another role or assigning to a group • Training & Education: GME • Exam Scores: GME, except for “In Training Exams” • Contact Info: GME & Coordinators • Miscellaneous: GME, unless you have program custom fields
Deadlines: • Not using ERAS: • Submit New Hire Spreadsheets by 12pm, day after match • Using ERAS: • Submit ERAS download to Breanna by 12pm, day after match Note: GME no longer uses the new hire PDF, only the excel spreadsheet.
E-Value Training ERAS Export Follow these steps to export your data and prepare it for upload into E*Value.
Filter for Applicants by “Will Start” Date First, for each applicant who matched within your program, make sure that the "Will Start" status field is populated:
Once the Will Start date is entered for all of your residents, you can filter for just those residents accepted to your program. From the Tools menu, click Filter/Sort:
From the Filter/Sort Dialogue box, highlight the Will Start item and click the Apply Filter button. Confirm that the number of records equals the number of applicants who matched to your program.
Export Data Once you confirm that the filter returned the results for all applicants matched to your program, select the Export option under the File menu, or click the Export icon shown below:
The Export Wizard dialogue box will open. Select applicant: Mark the "All applicants in recordset" option. Type of data to export: If necessary, select "Main Applicant Data." Select the fields to be included (see next slide) in the export by highlighting them in the Available fields list and using the > button to move them to the Fields to export list. Select your fields based on the templates below. Important: Please select ONLY the fields listed for the template. Selecting any additional fields will result in the file being returned. Similarly, please include ALL fields listed on the template and ensure they are listed in the order specified below (alphabetical) to prevent any processing delays.
Once you have added all of the fields for the template you are using, click the Next button. The Export Wizard will prompt you with the following: The Include field names on first row option should be checked. Field Delimiter: Select {tab} from the select box. Text Qualifier: Select {none} from the select box. Click the Browse button to select a location on your computer where the exported report should be saved. It is recommended that you select a location you are very familiar with, such as your Desktop. Important: Name the file in the following format: Institution, Program Name, Year - Extended (i.e. University of AI, Children's Pediatrics, 2011 - Extended). If the ERAS information is for the following year, indicate that accordingly (i.e. University of AI, Children's Pediatrics, 2012 - Extended). Change the Save as type to an Excel type (.xls) and click the Save button.
Click the Finish button. You will receive a confirmation that lists the location the file was saved to: Once you have exported your data, you will need to review the file and prepare it for uploading into E*Value, as explained in the next section.
Prepare File for E*ValueYour exported data needs to be reviewed for accuracy and possible format issues. Please use the guidance below to clean up the downloaded data. • Phone and Fax Numbers:All domestic numbers must be entered in the format • XXX-XXX-XXXX. International numbers must be in the format XX-XXX-XXX-XXXX. • Dates:All date fields should be in the format MM/DD/YYYY. • COMLEX Score Fields:The score fields for COMPEX data must be a number only; remove any text. • Contact Email:This can be changed to their institutional email before sending the file to E*Value. • Contact Pager:This can be changed to their institutional pager before sending the file to E*Value. Confirm that it is in the XXX-XXXX format. • Contact Zip:This should be in the basic 5-digit format. Do not include hyphens or the extended zip numbers. • Date Starting:This should be the first date they will be scheduled in the program, change if necessary. Confirm Date is in MM/DD/YYYY format. • ECFMG Certification Date:ERAS will only export the Month & Year, and the default is set to the first day of that month. Change the date accordingly before sending file to E*Value. Confirm Date is in MM/DD/YYYY format. • ECFMG Certification Number: After the ECFMG Certification Date column, add a column with the header "ECFMG Certification Number." This information is not tracked in ERAS, but is needed for E*Value. Populate the column for your residents. • SSN: Confirm format is XXX-XX-XXXX (with dashes); if this field is empty you can enter the number if known.
These fields are not tracked in ERAS, but they are needed to upload the information to E*Value. Add 3 columns with the headers Rank, Medical School Code, and ECFMG Certification Number to the end of your spreadsheet, in that order. Enter the following: Add 3 E*Value-specific fields to the end of the spreadsheet. • Rank: The PGY/Training level they will enter your program. • Medical School Code: Insert the official 5-digit medical school code. See attached spreadsheet for list of medical school codes. • ECFMG Certification Number: The actual ECFMG Certification number will not export from ERAS. Please add this number.
Submit File to GME After you have cleaned up the data and added the two additional columns of information, you are ready to submit the file to the GME office. Again, please make sure that the file is clearly labeled with the institution, program name, year and “Extended”. e.g. UofUtah, OccMed, 2012 - Extended Email the file as an attachment to breanna.stoll@hsc.utah.edu by 12pm, the day after the match. If you need assistance or have questions, please contact Nathan Tice at 1-8892 or nathan.tice@hsc.utah.edu