Download

1 / 22
220 likes | 680 Views
Transmitters Receivers and Speed Controllers Jeff Mori Mechatronics Instructor Eastern Westmoreland CTC Spektrum DX6i I cant find my Aileron ? Remember this controller is primarily designed to be used as an airplane and helicopter controller.

E N D
Transmitters Receivers and Speed Controllers Jeff Mori Mechatronics Instructor Eastern Westmoreland CTC
I cant find my Aileron ? • Remember this controller is primarily designed to be used as an airplane and helicopter controller. • The chart on the following slide should help translate the airplane vocabulary into robot speak. (may be worth printing for reference)
New Interface To enter the menu to program your DX6i controller you need to push down the roller on the right side and roll it to select the different options.
The SETUP List To Enter SETUP List • Press the ROLLER and hold while turning on the transmitter. When SETUP LIST appears on screen, release the roller. • Alternatively the setup list can be accessed from the main screen by pressing the roller to access the ADJUST LIST then scrolling through the ADJUST LIST by rolling the roller to highlight SETUP LIST; then press the roller and the SETUP LIST will appear. To Exit the SETUP LIST • Press and hold the roller for more than 3 seconds, then release the roller and the system will return to • the main screen. • Alternatively rotating the roller to highlight MAIN in the upper right corner then pressing the roller will return the system to the main screen. • Turning the transmitter off then back on will return the transmitter to the main screen.
No Helicopters • Approximately half of the users manual is written for helicopter mode. • I have yet to find a scenario where roboteers would need anything covered in these sections. • Make certain that your controller is set to airplane mode at all times. • If there is a picture of an airplane on • your controllers screen you are ok. • If there is a picture of a helicopter on your screen you need to enter the setup list and change the model type to Acro (picture of an airplane)
Selecting Airplane Mode • Press the ROLLER and hold while turning on the transmitter. When SETUP LIST appears on screen, release the roller. • MODEL TYPE appears on the lower section of the screen. • Rotate the roller to highlight MODEL TYPE. • Press the ROLLER to access the MODEL TYPE function. Make sure ACRO is highlighted on the screen.
Advanced Digital Trims • The DX6i employs digital trim levers on aileron, elevator, throttle, and rudder. The ADT (Advanced Digital Trim) feature is designed to automatically store the selected trim values for each model. • Visual trim positions are displayed on the main screen. • The trims feature dual speed scrolling. • Holding the trim lever for an extended time will cause the trim rate of change to increase.
Motor Reversing • To access Servo (motor) Reversing • Press the ROLLER and hold while turning on the transmitter. When SETUP LIST appears on screen release the roller. • You can also turn the transmitter on and press the scroll wheel. Scroll down to the setup list and press the scroll wheel to get to this screen. • MODEL TYPE appears on the lower section of the screen. • Rotate the ROLLER to the right until REVERSE is highlighted on screen. • Press the roller to access the reversing function. • Rotate the roller to highlight the desired channel then press the roller to select that channel. • With the desired channel selected rotate the roller to select N- normal or R reverse. • When the reverse direction is correct, press the roller to deselect the channel. • To return to the SETUP LIST rotate the roller and highlight LIST then press the roller.
Wing Tail Mix • The DX6i offers three different wing types to choose from: Normal, Dual aileron and Elevon (also called Delta mixing). In addition, V-Tail mixing is available from this screen. • This is important if want to use one joy stick to drive your bot. Arcade mode
Elevon Wing Type Selection(also known as Delta wing) • Elevon wing arrangements combine the function of ailerons(left motor) with the function of the elevator(right motor). • This will allow you to use the right joy stick to steer your robot like in an arcade (PAC MAN MODE) • Chanel 2 - aileron - right stick horizontal • Chanel 3 - elevator - right stick vertical
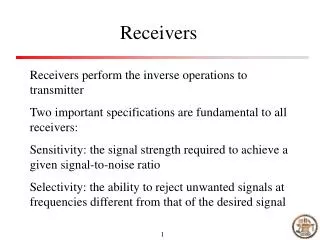
Receiver Power System Requirements • With all radio installations, it is vital the onboard power system provides adequate power without interruption to the receiver even when the system is fully loaded (Motors at maximum loads). • This becomes especially critical with robots that utilize multiple high torque/ high current motors. Inadequate power systems that are unable to provide the necessary minimum voltage to the receiver during loads have become the number-one cause of failures. • Some of the power system components that affect the ability to properly deliver adequate power include: the selected receiver battery pack (number of cells, capacity, cell type, state of charge), switch harness, battery leads, regulator (if used), power bus (if used). • While Spektrum’s receivers’ minimum operational voltage is 3.5 volts, it is highly recommended the system be tested per the guidelines below to a minimum acceptable voltage of 4.8 volts during testing. • This will provide head room to compensate for battery discharging or if the actual loads are greater than the test loads.
FAQ Q: Which do I turn on first, the transmitter or the receiver? A: Always, Always, Always, turn the robot on before turning on the DX6i Controller. This is different than what it says in the user’s guide. The reason you turn the robot on first is because the receiver if bound properly will automatically go in to failsafe mode when powered on since it will not find the DX6i (powered off) it is bound to. This will place all motors and or weapons in the off position. It is then safe to clear the area and power up the controller thus arming the robot and its weapons if present.
FAQ • Q: Sometimes the system takes longer to connect and sometimes it doesn’t connect at all. Why? • A: In order for the system to connect (after the receiver is bound) the receiver must receive a large number of continuous (one after the other) uninterrupted perfect packets from the transmitter in order to connect. This process is purposely critical of the environment ensuring that it’s safe to run when the system does connect. If the transmitter is too close to the receiver (less that 4 feet) or if the transmitter is located near metal objects (inside a metal robot, the top of a metal work bench, etc.) connection will take longer and in some cases connection will not occur as the system is receiving reflected 2.4GHz energy from itself and is interpreting this as unfriendly noise. Moving the system away from metal objects or moving the transmitter away from the receiver and powering the system up again will cause a connection to occur. This only happens during the initial connection. Once connected the system is locked, and should a loss of signal occur (fail-safe), the system connects immediately (4ms) when signal is regained.
FAQ Q: I’ve heard that the DSM system is less tolerant of low voltage. Is this correct? A: All DSM receivers have an operational voltage range of 3.5 to 9 volts. When using multiply high current draw motors with a single or inadequate battery/ power source, heavy momentary loads can cause the voltage to dip below this 3.5 volt threshold thus causing the entire system (motors and receiver) to brown out. When the voltage drops below the low voltage threshold (3.5 volts), the DSM receiver must reboot (go through the start up process of scanning the band and finding the transmitter) and this can take several seconds. • Note: Receivers manufactured after July of 2007 offer a quick connect feature that reconnect immediately when recovering from a low voltage “brown out.” • Please read the receiver power requirement on page 21 as this explains how to test for and prevent this occurrence.
FAQ Q: Sometimes my receiver loses its bind and won’t connect, requiring rebinding. What happens if the bind is lost in battle? A: The receiver will never lose its bind unless it’s instructed to. It’s important to understand that during the binding process the receiver not only learns the GUID (code) of the transmitter but the transmitter learns and stores the type of receiver that it’s bound to. If the trainer switch is pulled on the transmitter at any time and the transmitter is turned on, the transmitter looks for the binding protocol signal from a receiver. If no signal is present, the transmitter no longer has the correct information to connect to a specific receiver and in essence the transmitter has been “unbound” from the receiver. We’ve had several customers using transmitter stands or trays that unknowingly depress the bind button and the system is then turned on, losing the necessary information to allow the connection to take place. We’ve also had customers that didn’t fully understand the range test process and pull the trainer switch before turning on the transmitter, also causing the system to “lose its bind.” If the system fails to connect, one of the following has occurred: • The wrong model has been selected in the model memory (ModelMatch). • The transmitter is near conductive material (transmitter case, truck bed, etc.) and the reflected 2.4GHz energy is preventing the system from connecting. (See FAQ above) • The trainer switch was pulled and the radio was turned on unknowingly (or knowingly) previously, causing the transmitter to no longer recognize the receiver.
Need more info. http://www.youtube.com/results?search_query=dx6i&search_type=&aq=f This link will take you to You Tube where you can find numerous videos about setting up the DX6i. You tube is also an excellent research tool for speed controllers and other bots related videos. Keep in mind there is no clearing house so it is possible there could be incorrect information out there. Don’t rely on one source.
Speed Controllers • the electronic speed controller is a device that regulates the amount of power that goes to the electric motor. The Speed controller is plugged into and receives commands from the receiver. The electronic speed controller interprets signals from the receiver and works to provide variation in motor speed and direction and may act as a braking mechanism.
Two types of Speed Controllers • There are electronic speed controls for brushed and brushless motors. • They are not interchangeable. for brushed Motors for Brushless Motors
Lets go to the web • http://botsiqswpa.wetpaint.com/page/Parts+Shopping • Link to Wiki with list of speed controller manufactures and places to buy. • http://s1.zetaboards.com/SWPA_BotsIQ_Board/forum/528304/ • Link to Wiki with list of speed controller manufactures and places to buy.