Download
1 / 68
680 likes | 704 Views
This article discusses the importance of determining where to set the production rate in control structure design, as it determines the structure of the remaining inventory control system and may have economic implications. It explores different scenarios and strategies for setting the production rate, including optimizing it at the bottleneck. The article also covers case studies and emphasizes the need for careful consideration when deciding where to place the production rate manipulator.

E N D
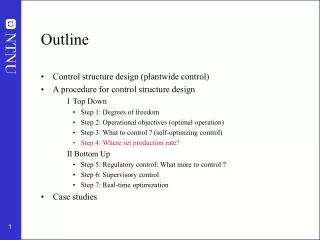
Outline • Control structure design (plantwide control) • A procedure for control structure design I Top Down • Step 1: Degrees of freedom • Step 2: Operational objectives (optimal operation) • Step 3: What to control ? (self-optimzing control) • Step 4: Where set production rate? II Bottom Up • Step 5: Regulatory control: What more to control ? • Step 6: Supervisory control • Step 7: Real-time optimization • Case studies
Step 4. Where set production rate? • Very important! • Determines structure of remaining inventory (level) control system • Set production rate at (dynamic) bottleneck • Link between Top-down and Bottom-up parts
Production rate set at inlet :Inventory control in direction of flow
Production rate set at outlet:Inventory control opposite flow
Where set the production rate? • Very important decision that determines the structure of the rest of the control system! • May also have important economic implications
Often optimal: Set production rate at bottleneck! • "A bottleneck is an extensive variable that prevents an increase in the overall feed rate to the plant" • If feed is cheap and available: Optimal to set production rate at bottleneck • If the flow for some time is not at its maximum through the bottleneck, then this loss can never be recovered.
Reactor-recycle process:Given feedrate with production rate set at inlet
Reactor-recycle process: Want to maximize feedrate: reach bottleneck in column Bottleneck: max. vapor rate in column
Reactor-recycle process with production rate set at inletWant to maximize feedrate: reach bottleneck in column Alt.1: Loss Bottleneck: max. vapor rate in column Vs FC Vmax V Vmax-Vs=Back-off = Loss
Reactor-recycle process with increased feedrate:Optimal: Set production rate at bottleneck Alt.2 “long loop” MAX
MAX Reactor-recycle process with increased feedrate:Optimal: Set production rate at bottleneck Alt.3: reconfigure
Reactor-recycle process:Given feedrate with production rate set at bottleneck Alt.3: reconfigure (permanently) F0s
Alt.4: Multivariable control (MPC) • Can reduce loss • BUT: Is generally placed on top of the regulatory control system (including level loops), so it still important where the production rate is set!
Conclusion production rate manipulator • Think carefully about where to place it! • Difficult to undo later
Outline • Control structure design (plantwide control) • A procedure for control structure design I Top Down • Step 1: Degrees of freedom • Step 2: Operational objectives (optimal operation) • Step 3: What to control ? (self-optimizing control) • Step 4: Where set production rate? II Bottom Up • Step 5: Regulatory control: What more to control ? • Step 6: Supervisory control • Step 7: Real-time optimization • Case studies
II. Bottom-up • Determine secondary controlled variables and structure (configuration) of control system (pairing) • A good control configuration is insensitive to parameter changes Step 5. REGULATORY CONTROL LAYER 5.1 Stabilization (including level control) 5.2 Local disturbance rejection (inner cascades) What more to control? (secondary variables) Step 6. SUPERVISORY CONTROL LAYER Decentralized or multivariable control (MPC)? Pairing? Step 7. OPTIMIZATION LAYER (RTO)
y1 = c y2 = ? Step 5. Regulatory control layer • Purpose: “Stabilize” the plant using local SISO PID controllers • Enable manual operation (by operators) • Main structural issues: • What more should we control? (secondary cv’s, y2) • Pairing with manipulated variables (mv’s u2)
Regulatory loops y1 y2s K u2 G y2 Key decision: Choice of y2 (controlled variable) Also important (since we almost always use single loops in the regulatory control layer): Choice of u2 (“pairing”)
Example: Distillation • Primary controlled variable: y1 = c = xD, xB (compositions top, bottom) • BUT: Delay in measurement of x + unreliable • Regulatory control: For “stabilization” need control of (y2): • Liquid level condenser (MD) • Liquid level reboiler (MB) • Pressure (p) • Holdup of light component in column (temperature profile) Unstable (Integrating) + No steady-state effect Disturbs (“destabilizes”) other loops Almost unstable (integrating) Ts TC T-loop in bottom
Cascade control distillation ys With flow loop + T-loop in top y XC Ts T TC Ls L FC z XC
y1 y2s K u2 G y2 Original DOF New DOF Degrees of freedom unchanged • No degrees of freedom lost by control of secondary (local) variables as setpoints become y2s replace inputs u2 as new degrees of freedom Cascade control:
Hierarchical control: Time scale separation • With a “reasonable” time scale separation between the layers (typically by a factor 5 or more in terms of closed-loop response time) we have the following advantages: • The stability and performance of the lower (faster) layer (involving y2) is not much influenced by the presence of the upper (slow) layers (involving y1) Reason: The frequency of the “disturbance” from the upper layer is well inside the bandwidth of the lower layers • With the lower (faster) layer in place, the stability and performance of the upper (slower) layers do not depend much on the specific controller settings used in the lower layers Reason: The lower layers only effect frequencies outside the bandwidth of the upper layers
Objectives regulatory control layer • Allow for manual operation • Simple decentralized (local) PID controllers that can be tuned on-line • Take care of “fast” control • Track setpoint changes from the layer above • Local disturbance rejection • Stabilization (mathematical sense) • Avoid “drift” (due to disturbances) so system stays in “linear region” • “stabilization” (practical sense) • Allow for “slow” control in layer above (supervisory control) • Make control problem easy as seen from layer above • Implications for selection of y2: • Control of y2 “stabilizes the plant” • y2 is easy to control (favorable dynamics)
1. “Control of y2 stabilizes the plant” A. “Mathematical stabilization” (e.g. reactor): • Unstable mode is “quickly” detected (state observability) in the measurement (y2) and is easily affected (state controllability) by the input (u2). • Tool for selecting input/output: Pole vectors • y2: Want large element in output pole vector: Instability easily detected relative to noise • u2: Want large element in input pole vector: Small input usage required for stabilization B. “Practical extended stabilization” (avoid “drift” due to disturbance sensitivity): • Intuitive: y2 located close to important disturbance • Or rather:Controllable range for y2 is large compared to sum of optimal variation and control error • More exact tool: Partial control analysis
Recall rule for selecting primary controlled variables c: Controlled variables c for which their controllable range is large compared to their sum of optimal variation and control error Restated for secondary controlled variables y2: Control variables y2for which their controllable range is large compared to their sum of optimal variation and control error controllable range = range y2 may reach by varying the inputs optimal variation: due to disturbances control error = implementation error n Want large Want small
What should we control (y2)?Rule: Maximize the scaled gain • General case: Maximize minimum singular value of scaled G • Scalar case: |Gs| = |G| / span • |G|: gain from independent variable (u2) to candidate controlled variable (y2) • IMPORTANT: The gain |G| should be evaluated at the (bandwidth) frequency of the layer above in the control hierarchy! • If the layer above is slow: OK with steady-state gain as used for selecting primary controlled variables (y1=c) • BUT: In general, gain can be very different • span (of y2) = optimal variation in y2 + control error for y2 • Note optimal variation: This is often the same as the optimal variation used for selecting primary controlled variables (c). • Exception: If we at the “fast” regulatory time scale have some yet unused “slower” inputs (u1) which are constant then we may want find a more suitable optimal variation for the fast time scale.
Minimize state drift by controlling y2 • Problem in some cases: “optimal variation” for y2 depends on overall control objectives which may change • Therefore: May want to “decouple” tasks of stabilization (y2) and optimal operation (y1) • One way of achieving this: Choose y2 such that “state drift” dw/dd is minimized • w = Wx – weighted average of all states • d – disturbances • Some tools developed: • Optimal measurement combination y2=Hy that minimizes state drift (Hori) – see Skogestad and Postlethwaite (Wiley, 2005) p. 418 • Distillation column application: Control average temperature column
2. “y2 is easy to control” (controllability) • Statics: Want large gain (from u2 to y2) • Main rule: y2 is easy to measure and located close to available manipulated variable u2 (“pairing”) • Dynamics: Want small effective delay(from u2 to y2) • “effective delay” includes • inverse response (RHP-zeros) • + high-order lags
Rules for selecting u2 (to be paired with y2) • Avoid using variable u2 that may saturate (especially in loops at the bottom of the control hieararchy) • Alternatively: Need to use “input resetting” in higher layer • Example: Stabilize reactor with bypass flow (e.g. if bypass may saturate, then reset in higher layer using cooling flow) • “Pair close”: The controllability, for example in terms a small effective delay from u2 to y2, should be good.
Effective delay and tunings • θ= effective delay • PI-tunings from “SIMC rule” • Use half rule to obtain first-order model • Effective delay θ = “True” delay + inverse response time constant + half of second time constant + all smaller time constants • Time constant τ1= original time constant + half of second time constant • NOTE: The first (largest) time constant is NOT important for controllability!
Summary: Rules for selecting y2 (and u2) Selection of y2 • Control of y2 “stabilizes” the plant • The (scaled) gain for y2 should be large • Measurement of y2 should be simple and reliable • For example, temperature or pressure • y2 should have good controllability • small effective delay • favorable dynamics for control • y2 should be located “close” to a manipulated input (u2) Selection of u2 (to be paired with y2): • Avoid using inputs u2 that may saturate • Should generally avoid failures, including saturation, in lower layers • “Pair close”! • The effective delay from u2 to y2 should be small
Example regulatory control: Distillation (see separate slides) • 5 dynamic DOFs (L,V,D,B,VT) • Overall objective: • Control compositions (xD and xB) • “Obvious” stabilizing loops: • Condenser level (M1) • Reboiler level (M2) • Pressure E.A. Wolff and S. Skogestad, ``Temperature cascade control of distillation columns'', Ind.Eng.Chem.Res., 35, 475-484, 1996.
Selecting measurements and inputs for stabilization: Pole vectors • Maximum gain rule is good for integrating (drifting) modes • For “fast” unstable modes (e.g. reactor): Pole vectors useful for determining which input (valve) and output (measurement) to use for stabilizing unstable modes • Assumes input usage (avoiding saturation) may be a problem • Compute pole vectors from eigenvectors of A-matrix
Control configuration elements • Control configuration. The restrictions imposed on the overall controller by decomposing it into a set of local controllers (subcontrollers, units, elements, blocks) with predetermined links and with a possibly predetermined design sequence where subcontrollers are designed locally. Some control configuration elements: • Cascade controllers • Decentralized controllers • Feedforward elements • Decoupling elements
Cascade control arises when the output from one controller is the input to another. This is broader than the conventional definition of cascade control which is that the output from one controller is the reference command (setpoint) to another. In addition, in cascade control, it is usually assumed that the inner loop K2 is much faster than the outer loop K1. • Feedforward elements link measured disturbances to manipulated inputs. • Decoupling elements link one set of manipulated inputs (“measurements”) with another set of manipulated inputs. They are used to improve the performance of decentralized control systems, and are often viewed as feedforward elements (although this is not correct when we view the control system as a whole) where the “measured disturbance” is the manipulated input computed by another decentralized controller.
Why simplified configurations? • Fundamental: Save on modelling effort • Other: • easy to understand • easy to tune and retune • insensitive to model uncertainty • possible to design for failure tolerance • fewer links • reduced computation load
Cascade control(conventional; with extra measurement) The reference r2 is an output from another controller General case (“parallel cascade”) Special common case (“series cascade”)
Series cascade • Disturbances arising within the secondary loop (before y2) are corrected by the secondary controller before they can influence the primary variable y1 • Phase lag existing in the secondary part of the process (G2) is reduced by the secondary loop. This improves the speed of response of the primary loop. • Gain variations in G2 are overcome within its own loop. Thus, use cascade control (with an extra secondary measurement y2) when: • The disturbance d2 is significant and G1 has an effective delay • The plant G2 is uncertain (varies) or n onlinear Design: • First design K2 (“fast loop”) to deal with d2 • Then design K1 to deal with d1
Tuning cascade y2 = T2 r2 + S2d2 • Use SIMC tuning rules • K2 is designed based on G2 (which has effective delay 2) • then y2 = T2 r2 + S2 d2 where S2¼ 0 and T2¼ 1 ¢ e-(2+c2)s • T2: gain = 1 and effective delay = 2+c2 • SIMC-rule: c2¸2 • Time scale separation: c2·c1/5 (approximately) • K1 is designed based on G1T2 • same as G1 but with an additional delay 2+c2
Exercise: Tuning cascade • (without cascade, i.e. no feedback from y2). Design a controller based on G1G2 • (with cascade) Design K2 and then K1