Download
1 / 22
220 likes | 345 Views
How to Use Photo Story 3 Training Module Design Plan. Maria Victoria Jauregui October 17, 2010 EDTC 3332.60. Needs Assessment:. The instructional/training problem or opportunity

E N D
How to Use Photo Story 3 Training Module Design Plan Maria Victoria Jauregui October 17, 2010 EDTC 3332.60
Needs Assessment: • The instructional/training problem or opportunity • The Leon Gardens Head Start teachers want and need to learn how to use Microsoft Photo Story 3 in order to create appealing presentations to implement along side with daily lessons.
Needs Assessment continued… • The analysis of the gap between what is available and what should be available • The teachers practice only basic technology using Lap-3 assessments and anecdotal notes. As a result, their lack of knowledge about new software programs hinders their ability to produce even more attractive lessons to their students.
Needs Assessment continued… • The recommended solution for filling the gap • Provide a Self-Paced Computer/Web-based Training Module in order to improve the teachers knowledge about how to adapt Photo Story Program in their classroom. A step-by-step process gives them the opportunity to create and design appealing presentations for their students and to integrate technology into their classroom.
Instructional Goal: • After completing this training, the Leon Gardens Head Start center teachers will be able to create their own multimedia presentations using Microsoft Photo Story 3.
Performance Objectives: After completing this training, learners will be able to: • Using Microsoft Photo Story 3 (CN), teachers will be able to create a basic digital story (B), that includes pictures, an audio narration, and a music background (CR). • Giving the pictures and a selection of music (CN), the learners will organize, edit, insert pictures plus a song into their photo story (B) with 100% accuracy (CR). • Using Microsoft Photo Story 3 (CN), the instructors will save and convert the digital movie into the appropriate format for viewing on the web (B) with 100% accuracy (CR).
Assessment of Learning Outcomes: • To evaluate teachers, I will rely on a quiz and hands-on assignment (sample digital story) to find out if the teacher understood how to use Photo Story 3 as the basics.
Learner Characteristics: • My target audience for this Web/Based Training Module are Pre-K teachers. They have college degree, with basic computer skills. They are mostly Hispanic females, 27 to 63 years of age. • My audience has the basic technology knowledge that is needed to successfully complete the program. • They all have great writing, reading, and communication skills. • In order to develop the best training possible special accommodations and additional information will be provided.
Learning Context: • The intended instructional setting for this training will be conducted in small groups of no more than ten participants. A computer lab will be available for those attending the training. • The computer lab consists of about ten computers with internet access and it is located at the old building of Clearwater Elementary School. • The Self Paced Computer/Web Based Training Module will be accessible from the Internet (from home or work).
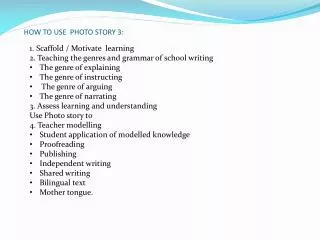
Instructional Strategies: • Introduction: (a) Overview of Training (b) Statement of Goal and Objectives (c) Get to know the audience and have them thinking about the Microsoft Photo Story 3 • Training goals and Objectives (a) Learn the basics of Microsoft Photo Story 3 and its features (b) Learn how to organize, edit, insert pictures plus a song into your photo story (c) Learn how to create digital stories • Complete tour on how to use Microsoft Photo Story 3 (a) How to upload, add, and edit pictures to your presentation (b) How to upload and add music to your creation (c) How to use Microsoft Photo Story 3 and its features (d) How to create a digital story
Instructional Strategies continue… • Time for practice: encourage teachers to get familiar with the program by using the Microsoft Photo 3. This will allow teachers to learn how to insert pictures, music, narration to this program in order to create appealing presentations or digital stories for individual or instructive purposes. (a) Learners will download Microsoft Photo Story Program. (b) These are the steps needed to do this training module. See the next frame
Steps to create a Photo Story • Go to Start menu • Select Photo Story 3 for Windows • Select-begin a new photo story • Click on “next” • Import and arrange pictures “click import” • Desktop folders open select “Pics” folder • Open folder by double clicking • Select picture 1 • Click “OK” at the bottom of the box • Repeat steps 7-9 (in step 8 you will click picture 2, 3, 4 and so forth) • When all pictures are selected you are ready for editing (if applicable) • In order to remove black borders just click on remove black borders • Look at before and after if you like it select “yes” and proceed to do this with all pictures. If you do not like it and want to change it in the before picture move cursor until you achieve the desired result • When black borders are removed click “OK” • Click “next” • Adding special effect and writing text on your photo
Steps continued… 17. For special effects click on drop menu and select (optional) 18. For text on picture-the note pad on the right has some features like Word ( you can change font size and style and alignment) all you have to do is type your text 19. Click on the next image not “next” at the bottom and do the same with the rest of the photos (text is optional and not all photos need it) 20. When you are finished with all the pictures click “next” at the bottom 21. Ready to customize motion, select picture on, then click customize motion 22. Check on the “Specify start and end position of motion” mover cursor and select where you want the photo to start and where you would like it finish 23. Then click on the “transition” tab and select “Cross Fade transition.” (As you get familiarized with this software you may choose a transition of your choice) 24. Click save and then close. Then do the same to the rest of the pictures 25. When you are ready to insert music, click “select music” 26. Select your music by clicking “open” at the bottom then music is inserted 27. Click “preview,” (when your done previewing) 28. Click “next” 29. You will select, “save your story for playback on your computer” 30. Click “next”
Steps continued… 31. Your story will be built, now you can click “view your story” 32. Click “exit” 33. If you have not saved the project (this allows you to make changes later) you will be prompted to save project. Click “yes” and “save” 34. You have completed your first photo story 35. Enjoy!
Instructional Strategies continued... • The teacher will create a digital story on his/her own, following all the sequential steps using Photo Story 3. The trainer will monitor them to check for understanding. • Wrap-up/Review • Assessment • Test • The teacher takes a ten question test. • The teacher will create a digital photo story without or minimal assistance from the trainer.
Instructional Resources: • The learner will need the following resources to complete a digital photo story: • A computer with internet access • Microsoft Photo Story 3 Program • Pictures of your choice • Personal music • Microphone for narration • Headphones to hear recorded narration • Pen or pencil and paper
Formative Evaluation: • The two strategies I intend to use to evaluate my design plan are small group evaluation and peer evaluation. • I will evaluate using a small group evaluation. By implementing a current instructional design plan in a small group setting it can help evaluate strengths and weaknesses. This provides an opportunity for modifications, if needed, before it is presented to more teachers. • I will also evaluate the Microsoft Photo Story 3 Program by using a peer evaluation, focusing on a cohort familiar with the program. They will attend the training in order to make sure it is easy to understand and straight to the point or if any changes need to be made.
Summary • The purpose of this design plan is to assist teachers to familiarize themselves using the Photo Story 3 Program. The instructional goal for this training is for teachers will also be given the opportunity to work with and to create their own photo story, providing them the chance to play with editing features. By completing the computer training module that I have created, all educators will accomplish this goal.