Download
1 / 23
230 likes | 334 Views
How to Use Photo Story 3 Training Module Design Plan. Alma N. Villarreal October 2010 EDTC 3332.60. Needs Assessment:. The instructional/training problem or opportunity

E N D
How to Use Photo Story 3Training Module Design Plan Alma N. Villarreal October 2010 EDTC 3332.60
Needs Assessment: • The instructional/training problem or opportunity • Teachers, with the concern on how to make their classes more attractive and fun, and get small children attention. • Children are growing up into a world surrounding with computer technology and teachers need to be aware on this changes.
Needs Assessment continued • The analysis of the gap between what is available and what should be available • Teachers with general computer skill instruction with the opportunity to introduce software programs in the lesson plan activities.
Needs Assessment continued • The recommended solution for filling the gap. • Teachers can have the opportunity to improve their teaching skills using more computer technology and create fun activities for small children. • Designing a web-based training on Photo Story3 and provide teachers the opportunity to learn more on computer technology using this easy to learn program.
Instructional Goal: • The goal is to help teachers develop their teaching more fun and stimulating using Photo Story 3. • After this training, teachers will be more confident introducing computer technology into their classroom activities.
Performance Objectives: • Using Photo Story3, teachers will be able to import pictures from a digital camera, web, or other source to create a digital story. • With the use of Photo Story3, learners will have the opportunity to add text or narrate the story, as well as add music to a digital story. • After their digital stories are complete, learners will save their projects and format them into the appropriate format for viewing on a web browser or playback on a Pocket PC, a Smartphone or a Media Center.
Learner Characteristics: • Pre-K teachers from my center are the intended audience for this web-based training. • Teachers need basic computer skills for this training. • Teachers want to plan how to get attention for small children and develop teaching more fun.
Learning Context: • The Instructional Setting • This web-based training will take place in one of the teachers’ classroom. We will use a computer with Internet access. • The training can be exposed after working time because is when children are not present in the center. • Teachers can access this web-based training at any time, in any computer with Internet service, and in their own pace.
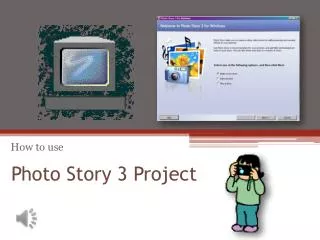
Instructional Strategies • Introduction • Photo Story 3 is a free program that can be download from the Internet. With this program, teachers can create digital lessons making teaching more fun and stimulating.
Instructional Strategies cont: • Objectives • The objective of this web-based training is to train teachers how to use Photo Story3. • They can be able to create a digital story using common resources and following the directions given by the trainer.
Instructional Strategies cont: • Goals • After this training, teachers will able to use Photo Story 3 to create other products than a digital story. They could be using Photo Story 3 to create a photo album, to teach science and history lessons, to develop basic math problems, and other lessons, as well. • Teachers will be more confident using computer technology and introduce new activities in their lesson plan.
Instructional Strategies cont: • Presentation of Information • The trainer will prove to the learners the advantage in how Photo Story 3 can contribute on teaching field. • Learners need the following steps to do this training module. (Next slide)
Steps for download Photo Story 3 and create a Digital Story. • Go to Microsoft .com Windows and download for free PhotoStory3. • Select on Begin a new Story. • Click on Next • Go to, Import and Arrange your Pictures page. • Select the pictures from your digital camera, the web, or a book, and then import them to Photo Story. • Drag your imported pictures in the order you wanted. • In this page, learners can edit and rotate pictures, remove red eyes, remove black borders, and adjust the pictures’ color. • On Edit Pictures, learners can rotate, crop, and add special effects to the pictures, as well. Click on Save Project. • Click Next and go to Add a Title to your Pictures. 10. On this page, learners can add a title or text; with the option to choose different font types, and align the content on different positions. Click on Save Project. 11. Click Next and go to Narrate your Pictures and Customize Motion. 12. On this page, learners can add notes to aid their memory as they are narrating the story (optional). • Learners can customize the motion and transition pictures in this page, as well. It is recommendable to select the Set Duration Automatically option to avoid adjusting the length of the motion manually on each slide. • The next step is to Add a Transition. • Learners can preview the narration clicking on the Preview button to see the develop of the digital story. Click on Save Project. • Click Next and go to Add Background Music.
Steps for download Photo Story 3 and create a Digital Story cont: 17. On this page, learners will be able to add music downloaded from the computer, or select on Create Music provided by Photo Story3. One or more piece of music can be added per story. 18. Learners have to select the pictures where they want to start and finish the music. 19. Click on Preview to see the complete show with music. Click on Save project . 20. Click on Next and go to Save your Story. • Learners can save the project to playback on the computer, to send it in an email, to playback on a Pocket PC, Smartphone, or on a Portable Media Center. • Now, go to Browse and save your project as a wmv file. Remember do not click on Save or Exit until save the project under this file. • Now click Next and see how the program is building your story. • On the next page, click on View your Story to see the final product. • When finish, click the Exit button. • Photo Story 3 creates a file .wp3. to save the changes on every page. Every time the button Save Project will be use, the project changes will be send to this file giving the learners the option to edit the project at any time. • Now, learners know how to create a digital story using Photo Story 3. Enjoy the show!
Instructional Strategies cont: • Learners will create a digital story using the materials provided by the instructor. • The instructor will assist learners on doubts and understanding on the training. • Learners will do practice activities to refresh their knowledge.
Instructional Strategies cont. • Assessment • An assessment consisting on 10 question quiz on Photo Story 3 operation will be apply to the learners.
Instructional Resources: • The learners will need the following resources to use Photo Story 3 and create a digital story. • Computer with Internet Access • Microsoft PhotoStory3 • Digital Camera • Photos • Basic computer knowledge • Microphone • Music • Headphones • Creativity
Formative Evaluation: • A small group of the audience will evaluate the training with an informal survey. This informal survey has the purpose to determine if the instructions in the Manual are clear and easy to understand. • A peer evaluator will observe the audience during the training. This evaluation is to determine if the learners are experiencing any challenges, or if the training design needs to be improved.
Summary • The objective of this web-based training is to demonstrate my coworkers how easy is the use of Photo Story 3, and the innumerable advantages teachers could have created activities with this software program. After this training, teachers will have the confidence to introduce more computer technology into their classrooms activities.