Download
1 / 15
150 likes | 154 Views
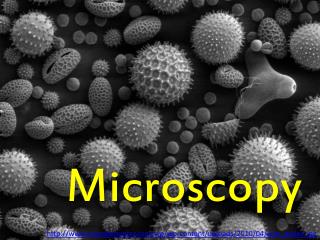
Microscopy. Microscopy. Microscope is used to view objects or specimens that are too small to be seen with just the human eye.

E N D
Microscopy • Microscope is used to view objects or specimens that are too small to be seen with just the human eye. • Microscopy is a technical field that involves the use of Microscopical components such as microscopes or microscope objectives to obtain greater detail of examined samples. • Definition-A microscope is a high precision optical instrument that uses a lens or a combination of lenses to produce highly magnified images of small specimens or objects especially when they are too small to be seen by the naked (unaided) eye. • A light source is used (either by mirrors or lamps) to make it easier to see the subject matter.
TERMS ANDDEFINITIONS • Principle • Microscopy is to get a magnified image, in which structures may be resolved which could not be resolved with the help of an unaided eye. • Magnification • It is the ratio of the size of an object seen under microscope to the actual size observed with unaided eye. • The total magnification of microscope is calculated by multiplying the magnifying power of the objective lens by that of eye piece. • Resolving power • It is the ability to differentiate two close points as separate. • The resolving power of human eye is 0.25 mm • The light microscope can separate dots that are 0.25µm apart. • The electron microscope can separate dots that are 0.5nm apart.
TERMS ANDDEFINITIONS • Limit of resolution • It is the minimum distance between two points to identify them separately. • It is calculated by Abbé equation. • Working distance • It is the distance between the objective and the objective slide. • The working distance decreases with increasing magnification.
TERMS ANDDEFINITIONS Numerical aperture(NA) The numerical aperture of a lens is the ratio of the diameter of the lens to its focal length. NA can be decreased by decreasing the amount of light that passes through a lens. Diameter of thelens
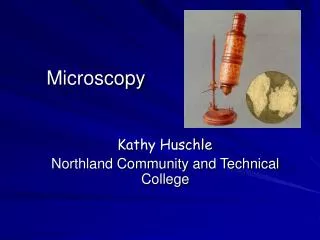
History of microscope • In 1590 F.H Janssen & Z.Janssen constructed the first simple compound light microscope -10x to 30x . • In 1665 Robert Hooke developed a first laboratory compound microscope. • Later, Kepler and Galileo developed a modern class room microscope. • In 1672 Anton Von Leeuwenhoek developed a first simple microscope with a magnification of 200x – 300x. • In 1674, Anton was the first to see and describe bacteria, yeast, plants, and life in a drop of water- He is called as Father of microscopy. • The term microscope was coined by Faber in 1623. • In the early 1930’s the first electron beam microscopes were developed which were a breakthrough in technology as they increased the magnification from about 1000x or so up to 250,000x or more.
Compound Microscope • Common type of microscope. • High power microscope- The magnification (power) 40x to 1000x. • Compound refers to the fact that in order to enlarge an image - a single light path passes through a series of lenses in a line where each lens magnifies the image over the previous one. • In the standard form – 2 lenses • an objective lens (closest to the object or specimen) • an eyepiece lens (closest to the observers’ eye) • Uses light to illuminate the specimen • The objective lens usually consists of three or four lenses. • The most used light method is trans-illumination. • At 400x much detail can be seen at the cellular level of biological specimens. • Applications: Learn about cells and microorganisms in both medical and science field.
Objective lenses • One of the most important parts of a compound microscope, as they are the lenses closest to the specimen. • A standard microscope has three, four, or five objective lenses that range in power from 4X to 100X. • Objectives vary in power from 1x to 160x in compound microscopes but the most common power range is from 4x to 100x. • Most compound microscopes have three or four (occasionally five) objectives usually of 4x, 10x, 40x, and 100x (oil immersion) which revolve on a nosepiece (turret) to give different magnifying powers.
Numerical Aperture • NA of a microscope objective is a measure of its ability to gather light • The more light (higher NA) the better the resolving power of the lens • Better resolution • The N.A. will be marked on the objective and the typical N.A. for the following are; • 4x=0.10, • 10x=0.25 • 40x=0.65 • 100x=1.25.
Ocular Lens or Eye piece • The eyepiece consists of a series of lenses mounted in a tube (barrel) at the upper end of the microscope. • Its basic function is to look at the focused, magnified image projected by the objective lens and magnify that image a second time before your eye looks at the image of the specimen. • The eyepieces are usually 10x but also come in 5x, 12.5x, 15x, and 20x. The “x” refers to the amount of magnification (power) that this lens adds as a multiplier to the magnification of the objective. • For special applications, eyepieces can have scales, pointers, crosshairs, markers, etc. on them. • The eyepoint is the location (or position) of the eye from the eyepiece which allows for the best possible viewing of the image.
Other parts • Diopter Adjustment: Useful as a means to change focus on one eyepiece so as to correct for any difference in vision between your two eyes. • Body tube (Head): The body tube connects the eyepiece to the objective lenses. • Arm: The arm connects the body tube to the base of the microscope. • Coarse adjustment: Brings the specimen into general focus. • Fine adjustment: Fine tunes the focus and increases the detail of the specimen. • Nosepiece: A rotating turret that houses the objective lenses. The viewer spins the nosepiece to select different objective lenses. • Specimen or slide: The specimen is the object being examined. Most specimens are mounted on slides, flat rectangles of thin glass.
Stage: The flat platform where the slide is placed. • Stage clips: Metal clips that hold the slide in place. • Stage height adjustment (Stage Control): These knobs move the stage left and right or up and down. • Aperture: The hole in the middle of the stage that allows light from the illuminator to reach the specimen. • On/off switch: This switch on the base of the microscope turns the illuminator off and on. • Illumination: The light source for a microscope. Illumination is the application of light onto an object or specimen in a microscope. • Diaphragm: Adjusts the amount of light that reaches the specimen. • Condenser: Gathers and focuses light from the illuminator onto the specimen being viewed. • Base: The base supports the microscope and it’s where illuminator is located.