Download
1 / 21
210 likes | 410 Views
Microscopy. What does the human eye see?. Prism. White Light. Indigo. Green. Orange. Violet. Blue. Yellow. Red. Ultraviolet. Infrared. Invisible. Invisible. Visible Spectrum or What your human eye can see.

E N D
What does the human eye see? Prism White Light Indigo Green Orange Violet Blue Yellow Red Ultraviolet Infrared Invisible Invisible Visible Spectrum or What your human eye can see
Light rays are part of the electromagnetic spectrum, and therefore they and other electromagnetic waves, are and move as waves of energy. Think of energy waves looking similar to the waves in the ocean with crests (top) and troughs (bottom). Waves of energy can be described as the distance from one wave crest or trough to another, for example: Length between crest to crest in meters OR Trough Trough Trough Length between trough to trough in meters
Gamma Rays 0.000000000010cm & 0.0000000010cm X Rays 0.00000010cm UV Rays 0.000010cm Visible Light 0.00010cm Infrared Rays 0.10cm Microwave Rays 1.0cm Radio Wave Rays 100.0cm & 1000.0cm Very High Energy The ElectromagneticSpectrum High Energy Visible Light is nothing more than energy. It is part of the electromagnetic spectrum which is made up of energy waves at different wave lengths or different energy levels; Low Energy Spectrum Very Low Energy
How your eye sees an object and why it gets bigger as it nears your eye?
How the lense system works As the image approaches the eye the lens thickens to adjust and make the image larger on the retina. As you age this elasticity of the lens is lost and older people need bifocals to compensate for the len’s inability to thicken for close viewing. Accommodation
Anatomy of the eye: Tears that protect the eye Gross external anatomy of the eye Looking through the pupil to the inside back of the eye
Once the light reaches the back of the eye it hits the retina. How do these light rays get translated into an image? Expanded image of the retina
The rods and the cones are stimulated by the energy waves of light and discharge an electric signal Optic Nerve Electric signals of the light being sent to the brain to be interpreted as an image. Light enters the eye through the cornea and passes to the retina
Let’s study the eye so that we can understand how vision physically happens. This will help us as we begin to study cells using instruments (like a microscope) that will enhance our ability to see objects that are too small to see with the naked eye. We will start with bacteria and then move on to the basic study of plant and animal cells. Now, let’s get ready to dissect an eye!
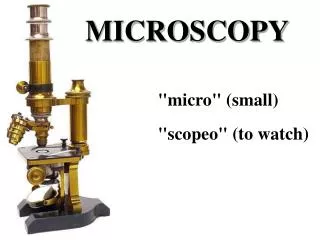
The History of Microscopes Microscopes range from Anton Von Leeuwenhoek’s original microscope that essentially was a magnifying glass that magnified images up to hundreds of times to the sophisticated light microscope like the scope in the middle that magnifies images from tens up to one to two thousand times and all the way to the Electron Microscope that can magnify images millions of times. Anton Von Leeuwenhoek’s microscope late 1600s Present light microscope Current scanning electron microscope
How does a magnifying Glass(A simple microscope) work? You actually don’t see the real object when you look through the glass; you see the virtual image, which is enlarged. Remember, the virtual image is not the real object.
How the Compound Light Microscope Works • Light leaves the light source • The light enters the condenser • and is directed to the specimen. • The light passes through the • specimen. Light is refracted by • different parts of the specimen. • 4. The image of the specimen passes • through the Objective lens then the • tube lens and then the eye lens. • 5. Your cornea and lens of your eye • focuses the image on the back of your • retina where you see an inverted, • virtual image that is magnified. 5. 4. 3. 2. 1. 5. Remember, you are not seeing the real object!
Procedure for Focusing the Microscope
1. Make sure the scanning lens (4X) objective (red) or low power (10X) objective lens (yellow) is in place on the nose piece. 2. Turn on the lamp and set the intensity of the light (use the variable switch on the base or the iris diaphragm lever located beneath the stage.) to 10. Open the diaphragm up until you see a circle of bright light coming through the opening in the stage. 3. While looking through the eye piece if you have a binocular scope, grasp the base of the eyepiece tubes (not the tubes themselves) with both hands and bring the two images of a white circle together into one image by pushing or pulling the eyepieces at their base closer or farther apart adjusting to the width of your eyes. 4. Looking from the side (not into the eyepieces) place a specimen (slide) on the stage, making sure that the clasping device has the slide securely in place. Then center the specimen as best as possible over the hole in the center of the stage using the stage positioning knobs (The X/Y control) either on top of the stage or underneath it while looking at the slide on the stage from the side. 5. Next, making sure that the low power or scanning lens is in place, rack up the stage using the coarse focusing knob (larger one) until the stage and specimen is as close to the objective lens as possible. 6. Now, while looking through the eyepiece(s) and using the large coarse focusing knob, slowly rack down the stage (and therefore the objects) until the specimen comes into view. 7. Try to use the coarse focusing knob to bring the specimen into focus as good as possible. 8. Now gently turn the fine focusing knob back and forth bringing the specimen into and out of focus until you have the specimen completely focused. 9.The last thing you need to do is, while observing the image of the specimen, slowly open or close the substage iris lever to make the image have as much contrast as possible within the image you are viewing. This will keep the specimen from appearing to have a washed out appearance and you not being able to see the specimen’s details.
Looking at the correct part of the specimen. This slide demonstrates what each larger objective would see if you didn’t center the object on the part of the specimen you want to look at each time you go to a higher power. 4X 10X 40X 100X Dr. Gluhm! Dr. Gluhm! I can’t find anything; it’s just a white circle! Somebody explain to me what happened. As you went from each lower power to the next higher power you didn’t center the specimen and this eventually caused your view to completely miss the specimen.
Looking at the correct part of the specimen that you want to see!This slide demonstrates how every time you go to a larger objective you are focusing on less and less of the specimen (A smaller and smaller area of the specimen). If you center the object on the part of the specimen you want to look at each time you go to a higher power, this is what you will see. 4X 100X 10X 40X
How to use the oil immersion objective for 1000 magnifications
First, if you are using a binocular scope, while looking through the eyepieces bring the two white circles together until they make one circle. This will make sure that the eyepieces are adjusted to the width of your particular eyes. • Place the slide on the stage and center the specimen over the hole in the stage. 1st look from the side then from front. • Open the diaphragm until enough light passes through the specimen, and you can easily see that the specimen is centered. • Put the low power (10X) yellow objective in place. • Rack up the stage using the coarse focusing knob until the stage, and the specimen, are as high (close) to the objective as possible. • While looking through the eyepiece(s) focus with the coarse focusing knob by gently moving the stage away from the objective while looking through the eyepiece (s). • Once the view of the specimen is focused as good as possible with the coarse focus, use the fine focus knob to bring it to its final best focus. • Now rotate the low power lens away, towards the oil lens, but not through the high dry (40X) lens. You should now have the objectives half way between clicking them in place. This will give you room to place a drop of immersion oil onto the slide. • While looking from the side of the stage at the slide, place a drop of immersion oil onto the center of the slide that is over the opening in the stage. • Now turn the nose piece so that the oil immersion lens (the 100X) is clicked into position over the specimen. • ØBe careful not to rotate the nosepiece around to the oil lens by going through the high dry (40X) lens because getting oil on this lens may damage it. • Looking through the eyepiece (s) gently rock only the fine focusing knob slightly back and forth until the object comes into fine focus. • ØNever use the coarse focusing knob to focus with when using the oil lens as it will move the objective too much and could break either the slide or the lens.
Caveats:Cautions to use when using the Oil Immersion Lens v 1. Always make sure that you don’t rotate the nosepiece through the high dry objective lens (40X) so that the immersion oil doesn’t get on that objective. v 2. Even though the oil immersion lens may be almost focused when you put it into place you still have to be cautious so that you don’t break the slide or the lens (1). • Par Focal lenses on microscopes means that if the low power objective is in focus • on your specimen the rest of the lenses higher up in magnifications will also be • approximately in focus v3. When you are finished with the observation rotate the oil objective away from the specimen and gently use a piece of lens paper to wipe off the oil that is left on the objective.