Download
1 / 20
200 likes | 217 Views
Isometric With Overhang. Lesson 2. Over hang. When the top of an item of furniture protrudes more than the sides, front or back, this is called the overhang. In isometric drawing the overhang hides part of the top rails etc. which in turn shortens the height of the drawing.

E N D
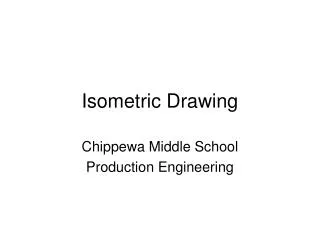
Isometric With Overhang Lesson 2 J. Byrne 2013
Over hang • When the top of an item of furniture protrudes more than the sides, front or back, this is called the overhang. • In isometric drawing the overhang hides part of the top rails etc. which in turn shortens the height of the drawing. • The rest of the drawing remains un affected. • A rail that measures 70mm in Elevation will be less in Isometric J. Byrne 2013
Top rail on a Table ELEVATION ISOMETRIC J. Byrne 2013
Starting an Isometric • Table Top overhangs by 40mm all around • Black line is overall size • Red line is stepped in the distance of the overhang in this case 40mm all around. • Blue line is the outside of your legs. • This measurement never changes J. Byrne 2013
Starting an Isometric • Dotted line shows overall size • Note legs should not touch this line • Top most rails appear narrower • Red line represents 40mm all around overhang • Measure from where you can see Eg. The bottom to the underneath part of the top rail • This measurement never changes J. Byrne 2013
Different Overhangs • When there is the same size overhang at the front and sides the front corner will always be on the original line of the box. • If there is a difference then the leg or carcase side will not be on the original line of the box. J. Byrne 2013
Full picture J. Byrne 2013
Chamfer on a top • Draw a line on the edge of the top the same as you would on a solid piece of wood. • Next draw a line on the top surface of the top the same as you would on a solid piece of wood. J. Byrne 2013
Chamfer on a top • Rub out the original corner lines • Same as you would plane the corners on a solid piece of wood. • Join up the corners and drawing is finished J. Byrne 2013
Moulding on a top • Repeat steps as before then draw a freehand curved line on the edge of the top. J. Byrne 2013
Tapering a leg • Draw a line on the leg to mark the taper the same as you would on a solid piece of wood. • Draw a second line on the leg to mark the taper on the other side the same as you would on a solid piece of wood. J. Byrne 2013
Tapering a leg • Draw in the finished lines. J. Byrne 2013
Tapering a leg • Draw in the size of the taper at the bottom of the leg and bring the lines up to were the taper starts. J. Byrne 2013
Leg tapered on four sides • Draw in the size of the taper at the bottom of the leg and bring the lines up to were the taper starts. J. Byrne 2013
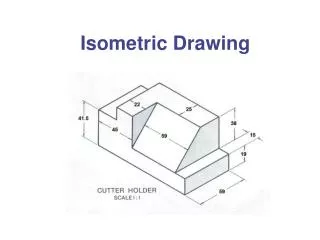
Draw in overall sizes of orthographic and produce Isometric box to same sizes J. Byrne 2013
Draw in Top J. Byrne 2013
Draw in Over Hang • 40 mm over hang all around J. Byrne 2013
Draw in two outer corners of legs • Check back with Elevation and End View to check lengths & widths J. Byrne 2013
Draw in Legs • Legs are 50mm x 50mm J. Byrne 2013
Draw in Rail • Measure from bottom to underneath the rail • Rail is 80mm J. Byrne 2013