Download

1 / 53
530 likes | 666 Views
Stave Assembly (module mounting and stave 250). Ian Wilmut (RAL). Martin Gibson. Martin has been developing the module mounting system at RAL for the last three years – everything we have so far comes from his input. Martin died on Tuesday 20 th August from Oesophageal cancer

E N D
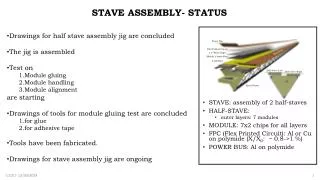
Stave Assembly (module mounting and stave 250) Ian Wilmut (RAL)
Martin Gibson • Martin has been developing the module mounting system at RAL for the last three years – everything we have so far comes from his input. • Martin died on Tuesday 20th August from Oesophageal cancer • Module mounting activities will continue at RAL picking up where Martin left off. • We hope we can continue to do as good a job as he always did • We are all very sad about this – and are only now really appreciating just how much he knew, and just what we have lost. • We have all struggled to find words to express our sadness, all I can say is “Martin we miss you”
I will talk about • Recap on how the module mounting works • Hopefully very quick • Stave 250 • Where we stand today • What we had to do to get here • How module mounting is going without Martin • Glue patterns and cupped sensors changing shape • Plans for stave 250 (in the context of module mountuing) • Plans for the longer term • 130nm modules • Pixel disk module mounting • Problems we have encountered
Module mounting process • I have discussed this lots of times before… • Last upgrade week (https://indico.cern.ch/getFile.py/access?contribId=73&sessionId=12&resId=1&materialId=slides&confId=233533) • Upgrade week before that (videos) (https://indico.cern.ch/conferenceDisplay.py?confId=158040) 10:10 on Wednesday • Probably the week before that as well • Rather than re-cap the whole process in minute detail here is a “cartoon” explanation of what is happening.
We have a stage with a camera that can move in x and y Y stage X stage In plan view
As the X axis of the stage isn’t very straight we have laser line to correct things Y stage X stage LASER
Into this we insert a stave in a frame (eachstave stays in the frame for the whole build) Y stage X stage LASER
The frame has a series of fecucials that can be found and a co-ordinate system placed with Y stage X stage LASER
We can now survey the stave and understand where it is in the frame using feducials or pads on the bus Y stage X stage LASER Note: we don’t yet know enough about bus tapes and accumulation of errors to understand what the criterion for QA of bus or bus to stave will be – so for now we will just collect as much data as we can.
We can then park the camera out of the way Y stage X stage LASER
The module can then be picked up on to a vacuum chuck Close up side view of 1 module
The chuck is rotationally compliant in the X and Y axis. Close up side view of 1 module
The compliance is used to orientate the module to match the local stave shape with small feet which reference the surface Close up side view of 1 module
The chuck is part of a larger bridge which has lead screws to move the module in the X and Y axis and provides rotation in Z
We can then place the bridge over the frame (key into the table) Y stage X stage LASER
Move the camera to where the 1st corner of the sensor should be Y stage X stage LASER
Move the module so the feducial is in the centre of the field of view (in the right place) Y stage X stage LASER
Rotate the module into the correct place Move the camera to where the 2nd module feducial should be Y stage X stage LASER
Park the camera and remove the bridge Y stage X stage LASER
Apply the glue to the stave & reinstate the bridge Y stage X stage LASER
Stave 250 summary Stave 250 (DC-DC) Module mounting • Received broken • Repaired • Retested • Installed in frame • Test connected to infrastructure • Ready for mounting (just as soon as we are happy with the glue) • 5 flat test plates to “flat” stave • 3 psudo bowed modules to “flat” stave • 2 real bowed sensors to stave • Lots of “removed” test pieces where we didn’t let the glue set.
Stave 250 repair • Stave 250 was built in the US between Brookhaven and LBL • It was packed and shipped from LBL • When it was received at RAL it had been “smashed” on one end • We have instigated a repair by flooding the core with epoxy (West G-flex 650) • The core was then thermally imaged and cycled top see if any damage was evident.
We drilled holes along the end… 1 2 3 4 5 6 789 10 11 12
Filling of extra holes Small amount of surface flue where the masking allowed a little build up Smaller crack on rear completely filled
It was set up at QMUL and thermally imaged with warm water Graham Beck, QMUL 1st August 2013
Thermal Cycling (first 5 cycles – next 5 are similar): - about 45 mins/cycle- Red line is thermocouple taped to End of Stave region (CFRP) Then thermally cycled Graham Beck, QMUL for WP3/5, 29 April 2013
10cm interval IR - 3D images (damaged side, before cycling) Graham Beck, QMUL 1st August 2013
Before/After IR of damaged end Water bath and ambient are slightly different temperature before and after (try harder in future!) Maximum T rise of surface above ambient ~ 10 degrees (above pipe) - This is constant within a degree along stave length (0.5C asymmetry due to water cooling along length) and wrt before/after cycling. Graham Beck, QMUL 1st August 2013
Stave 250 • We concluded it was well enough repaired to consider attaching modules. • We can’t be certain that its thermal performance has been reduced, but we consider its performance to be adequate for real modules • We also found a number of faults with the stave that were addressed through this process, • some have been fixed • Holes • “shorts” • some have been accommodated • Non straight closeout • Offset HV lines • some we think we can live with • Non flat core • Non flat EOS
Lessons learned on stave production • The edges are not straight • If this is always going to be the case we need to change the handling tooling • Glue filets are a problem (see image) • We need to pack more robustly • Glue used to attach power bus seems to have fibres in it that lower open circuit resistances. • We still have off shaped we don’t understand Bad Good
Challenges • Up until 2 months ago only Martin had ever glued modules at RAL • We thought what we needed to do was to extend Martins work mounting hogged modules to mounting cupped ones… • In doing this we have learned a lot about 4445 and glue patterns. • Most unexpectedly we have discovered that modules made with dramatically bowed sensors change shape when attached to the module mounting tooling.
Original glue pattern • Glue pattern intended to push air towards perimeter of module • Used to date with film of 75 or 150 microns • Stavelet modules all use this pattern with glue layers of ~100µm
Flat “sensor” to flat stave • Pattern was altered to allow for more space in the middle to allow for cupped sensor • Worked well with flat plate • This is a 50µm glue layer
With psudo bowed sensors it also seemed to work OK • 2 layers of film stacked to simulate module surface • 2 layers of film for this test
And a failed electrical • Seen through a clear stave (sheet of plexiglass/Perspex) • Looks quite good here • But this was • Placed with vacuum & left for 1 hour • Vac released and inspected • Looked very bad • Jig replaced with no vac for 1 hour • Re-inspected and looked like this • So we are now wondering what effect the vaccum has on the module shape
Sensor shape • One specific challenge is that the module change shape when attached to the vac chuck.
250 Plans • We will not mount any electrical modules until we have placed 3 failed electricals in a row with good coverage • We will ten place one “mechanical grade” module with a FZ1 sensor to a stavelet • Only then start with modules on stave 250
Longer term plans • Stave 250 & module mounting • Use stave 250 as a proving ground for the process & collect data on method of all modules • At the end of 250 formulate improvements to system • Iterate design for 130 stave (4 module bridges) • Post 130 stavelets build enough bridges for full stave • Pixels • We are starting to look at extending this system for pixel disks – very provisional • We are starting to produce full drawing sets for the kit we presently have, and also the future iterations
Detector epoxy S Canfer, STFC 12/9/13
Status • A low modulus adhesive is required to bond detectors • An epoxy has been formulated at RAL • Low viscosity • Very low Tg (approx -40°C) • Very low stiffness at ambient temperature • Low tear strength above Tg (potential for reworking) • Cure currently 50°C for 24 hrs, should be possible to reduce this temperature