Download
1 / 56
560 likes | 710 Views
Welcome to Online OHS . All your OH&S needs in one easy to follow database system. What is Online OHS?. In much the same way as MYOB looks after your financial record keeping, Online OHS is your system that looks after your Policies, Procedures and Employees . Online OHS Features

E N D
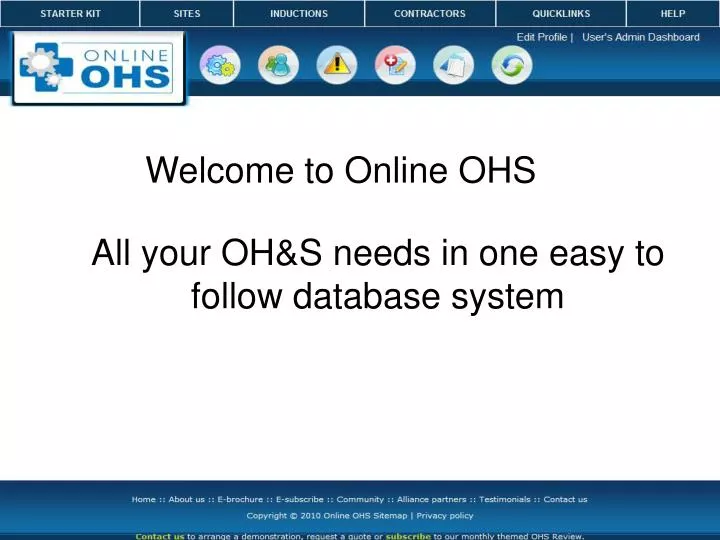
Welcome to Online OHS All your OH&S needs in one easy to follow database system
In much the same way as MYOB looks after your financial record keeping,Online OHS is your system that looks after your Policies, Procedures and Employees
Online OHS Features • Employee Management System • Risk Management for the control of hazards • Contractor Management System • A Safe Work Method Builder • Site Manager for multiple location management • Detailed reports for Accident Management • Plant and Equipment Management System • Environmental Management Program features
The Program is based on these 6 Categories and will help you with compliance to 4801A/S The top toolbar is for quick and easy access
After selecting the next button the starter kit wizard works its way through 8 steps The starter kit has been designed to make implementation of the system easy Enter the data and then select the next button
The top toolbar is for quick and easy access The system comes with its own admin area so you can have total control of who accesses which areas. Permission levels can be set for different levels of access just select the employees button
You can assign a permission level of top toolbar only, this is where the user once logged into the system will only be able to select the sites button at the top Admin accessibility, this user can go anywhere in the system Add /edit/ delete etc enables the user anywhere in the system except admin View Only, used mainly when submitting for a tender
You can gain access to a site 2 ways 1. Via the drop down menu at the top 2. Via the quick link at the top of every page ttttttttttttttttt
The site register has been designed so it is easy to use for all employee levels Just scroll down to the site in the register and select the view icon
Just click the icon to bring up the relevant sites information All information relating to a site is kept in one easy to access area
Just click the icon to bring up the relevant sites register All information relating to a site is kept in one easy to access area The program shows only the Guildford Road emergency documents as that is what was selected
tttttttttttttttttttttttttttttttttttttttttttttttttttttttttttttttttttttttttttttttttttttttttttttttttttttttttttttttttttttttttttt You can even upload your current documents into the registers and in any format. Each register has a “View” section where by clicking on the magnifying glass you can view the details of this item in more detail Every entry into the system is placed into an easy to access register. These registers are where the employees can access any document quickly and easily, you don’t need to be OH&S consultant to use this program
tttttttttttttttttttttttttttttttttttttttttttttttttttttttttttttttttttttttttttttttttttttttttttttttttttttttttttttttttttttttttttt Once a Site and a activity has been entered into the program (during the initial wizard process) a Safe Work Method is developed automatically
The activity and site we just entered The information we entered relating to this activity has now started to be formatted into a Safe Work Method You can build a procedure using the procedure builder and even copy the safe work method so you don’t have to write it out again and again
Work your way through the fields to build the procedure steps
The procedure built is automatically inserted into the Safe Work Method
The Safe Work Method also has a log for to show continual improvement
Once completed, the program develops the information into a PDF document complete with your company logo and details Foreseeable hazards and PPE assess using the Risk Management process will be seen here
The program also has a plant and equipment management section A site An activity Qualifications Training A maintenance schedule
The maintenance date turns to red when it is due and will automatically email the person/s responsible for the maintenance. It will also keep a log of all maintenance undertaken to show true compliance. You can upload the user manual of the equipment You can view the details of the equipment The equipment entered into the program is then placed into a register
Allocate a review date. When the review date is due it will automatically email alert the person responsible Upload the MSDS for easy reference You can view the details of the chemical All chemicals entered are entered into the system and a chemical risk assessment is undertaken. Once entered the chemicals are kept in the chemical register for easy access
To log a hazard is easy The Program comes complete with an easy to follow Risk Management Process that will help you identify , assess, control and review risks
Logging the Hazard Adding a hazard is easy, and all hazard that involve an activity will go not only into the hazard register but also into the Safe Work Methods Foreseeable hazards for the activity chosen The hazard identified is entered here You can even upload a picture of the hazard
The hazard logged is highlighted in “Red” and will automatically email alert person/s allocated in the admin section Step 2. The hazard is assessed Assess the hazard by selecting the “Red Cross” in the hazard register
Step 2. Assessing the Hazard Select the person responsible for the control measure an email alert is sent, and a due date is logged Assess the risk by using the risk matrix Enter or chose a hazard type
The assessed hazard is now shown in orange To control the hazard select the red x next to the logged hazard
A control measure is implemented before the due date or an alert will inform upper management Work your way down the control measures until a suitable control measure is found
Add your own list of PPE here All PPE selected for this hazard will automatically go into the safe work method that relates to the activity or site chosen
Foreseeable hazards and PPE assess using the Risk Management process will be seen here
Once the hazard has been controlled the register turns green. An email will auto alert the person responsible when the review date is due.
Contractor Management System • The Contractor Completes an Online Form to confirm they have the appropriate: • Qualifications to complete the assigned tasks • Safe Work Methods • Insurances • Training for Employees • Emergency systems
To add a contractor select here A contractors details is highlighted in red when they have been initially sent the contractor email. It turns automatically to Orange when the contractor has completed the forms and sent it back ( it will also alert you that it has been sent back) Once you have received the compliance form back select view to verify the contractors details, the register will turn green
This email is automatically produced and sent to the contractor for completion The contractor selects the induction link and completes the induction (that has been built inside the system) and then completes the contractor compliance form
The question box expands so the contractor can enter their expiry dates and upload their documents of their workers compensation, public liability etc. The program will alert you via email when these have expired
Businesses now should identify the environmental aspects of their activities, products and services that the business can control or have influence over in order to target those that have or could have a significant impact on the environment. • By introducing a Environmental Management System into their business they can not only have an impact on the environment but also enhance their business. • In the Online OHS System you are taken through the Environmental Management Systems ( EMS) five key principles, they are: • Policy and Commitment • Planning • Implementation and Operation • Measurement and Evaluation • Review and Improvement Environmental Manager
The end result is a PDF document that can be printed, emailed or displayed. Complete with your company logo. All policies built will also automatically go into the environmental register. • Businesses now should identify the environmental aspects of their activities, products and services that the business can control or have influence over in order to target those that have or could have a significant impact on the environment. • By introducing a Environmental Management System into their business they can not only have an impact on the environment but also enhance their business. • An Environmental Management System ( EMS) has five key principles, they are: • Policy and Commitment • Planning • Implementation and Operation • Measurement and Evaluation • Review and Improvement Environmental Manager
The Program also has an Emergency Procedure Builder which takes you through the process of: - Identifying the Scenario tt - Allocate responsibilities - Developing a policy for the scenario - Building a procedure for the scenario - Identifying alerting systems - Identifying Emergency equipment - Allocating evacuation drill and review dates
Select a Site tt Add an Emergency Scenario Develop a Policy
tt Add a emergency procedure using the procedure builder Add alerting systems
tt Add emergency equipment needed All equipment entered here will also go into the emergency equipment register. Maintenance Schedules can be assigned, and a email alert will automatically tell you when the maintenance is due
Create a PDF Document with your logo The Emergency scenario The Policy Statement The Responsibilities The Emergency Equipment Needed The Alerting Systems The Emergency Procedure
Employee Management Once the initial setup has been completed, employees are then allocated to a position.
To add a new employee select here tt In the employee register you can set permission levels, assign induction or view inductions undertaken
You can relate employees to a site and position as well as assigning user names and passwords. The employees email is also entered so they may receive email alerts if assigned tt