Download
1 / 20
200 likes | 233 Views
Learn about microscope parts, usage techniques, and lab protocols in this comprehensive guide. Discover how to observe samples like human cheek cells, bacteria, and pond water effectively. Follow precise instructions for microscope care, slide preparation, and observation methods. Complete lab assignments and record observations with accuracy for a successful learning experience.

E N D
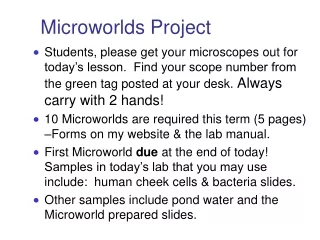
Microworlds Project • Students, please get your microscopes out for today’s lesson. Find your scope number from the green tag posted at your desk. Always carry with 2 hands! • 10 Microworlds are required this term (5 pages) –Forms on my website & the lab manual. • First Microworld due at the end of today! Samples in today’s lab that you may use include: human cheek cells & bacteria slides. • Other samples include pond water and the Microworld prepared slides.
Microscope Care • Always carry with 2 hands & keep scopes away from edges of tables. • Do not force knobs (100X & 40X will break the slides! Do not use course focus w/ 100x & 40x!) • Only use lens paper & lens cleanerfor cleaning. • Handle cords appropriately!! • Put away as listed oncabinet door.
Microscope Parts Eyepiece (ocular lens) Body Tube Revolving nosepiece Arm Objective Lenses Stage Stage/slide holder Coarse Focus Condenser & Iris Diaphragm Fine Focus Light (lamp) Base Animation: Starr Ch 4 How a Microscope Works
Using the Microscope • (JV, walk students thru microscope) • Put the stage all the way DOWN • Place a Slide on the Microscope • Rotate to the lowest (shortest) objective power (it should be stored this way) • Look into the Eyepiece • Use the Coarse Focus
Using High Power • Start focusing using lowest power! • Switch to the next higher objective • Do NOTuse the Coarse Focus Knob • Use ONLY the Fine Focus Knob to bring the slide into focus!
Oil Immersion • Focus on low power (4X objective), focus on 10X, focus on 40X • If using 100x, move to half-way between 40X and 100X (oil immersion) • Add a very small amount of oil (less than 1 drop) • Click 100X objective into place • Do NOT move back to 40X, you’ll get oil on it!
Oil Immersion • Move the 100X lens to front. • CLEAN lens with lens paper. • CLEAN lens only w/ lens cleaner solution & lens paper! Kimwipes are not lens paper • CLEAN slide with Kimwipe or papertowel • NEVER use coarse focus with this lens!!
Oil Immersion • Oil has a similar refractive index as glass • Keeps light rays from bending going through sample • Increases resolution
Lab 2 • You will be working thru the lab & recording your observations. • Parts & use of a microscope (I will only hold you for knowing the 13 parts listed in this powerpoint not the 22 in the manual). • Examining a slid of an “e” • Studying the Depth of focus
Estimating Organism Size • How would you determine the actual size of this organism? • Be quick and dirty, it is longer than wide (always use the long side)
Estimating Organism Size • How would you determine the actual size of this organism?
Making a wet-mount slide Get these materials: • A clean slide • A coverslip • A sample • 1-2 drops of water
Lower a coverslip onto the slide starting at a 45 angle By adding the coverslip at a 45 degree angle any bubbles should move up the coverslip and not become trapped underneath it. e
Observing Cells • Staining Human Cheek Cells • Add stain before adding coverslip or • Stain cell by adding stain and “pulling” under cover slip with a paper towel • Disposal: Put slide and cover slip in bleach, treat as a biohazard. • Other slides either wash & put away or add to the bleach container. Coverslips are put in the broken glass container.
OBSERVATIONS • DRAW WHAT YOU ACTUALLY SEE, not what you think it looks like. • Make it actual size
Warnings! • CLEAN off oil immersion lens AND the 40x objective when you’re finished w/ lens paper. • Put away the microscope properly as listed on the cabinet. Clean up & return all items, wash glassware. • Discard trash appropriately (if contaminated in bleach, if glass with the broken glass, otherwise in the trash). • Avoid long black “organisms” that move when you blink (your eyelash). Avoid slow-moving circular “cells” with thick black borders (RBC in your eye). • Do not force the microscope & only use coarse focus on low power!