Fusion Portable Word Processor: Enhance Your Writing Experience with Innovative Features
420 likes | 540 Views
The Fusion is a versatile portable word processor designed to assist writers of all ages and abilities. With 16 password-protected student workspaces and a large LCD display, it offers essential tools such as text-to-speech, word prediction, spell check, and math facts. The built-in keyboard instruction program includes 120 lessons to improve typing skills. Additional features include iScore for tracking typing performance and split-screen capabilities for vocabulary development. Ideal for educational environments, the Fusion aims to empower efficient writing.

Fusion Portable Word Processor: Enhance Your Writing Experience with Innovative Features
E N D
Presentation Transcript
The Writer FusionPortable Word Processor By C.A.S.E. Assistive Technology Team Tricia Sharkey, MA CCC-SLP/L Paula Costello, MS OTRL
Description: What is the Fusion? • The Fusion is a portable word processor and keyboarding instructional tool with many features that are helpful to writers. • Each Fusion has 16 password protected student workspaces with a large LCD display and adjustable font. • The Fusion offers text to speech, word prediction, math facts, thesaurus, spell check • Keyboard instruction program with 120 lessons on keyboarding • iScore feature provides students and teachers with grade level scores based on number of words and sentences typed • Split screen capabilities can assist with vocabulary development • Does not have switch access • USB port • Infrared receiver for file transfer
Out of the Box… • Fusion • Case • Headphones • Operation Guide with “Hot Sheet” • IR Receiver • AC Adaptor
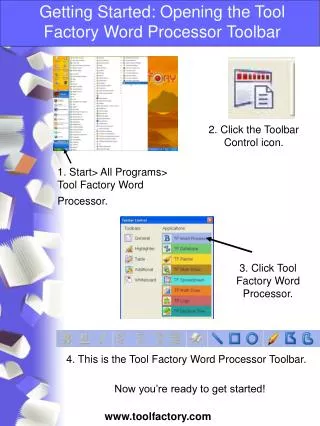
Let’s get started… 1. Select ON/OFF key in the upper right hand corner 2. You might be asked to set the time/date 3. Create a personal desktop • Select ‘N’ and a “new student” box will appear • Type student name, then type teacher name and press ENTER • The Fusion will assign the student a work group/personal desktop (F1, F2, F3, etc.) • To access your work group, select the F key assigned to the student
SHHHH!!!! Creating a password- • Open the Student Desktop • Select MENU • Use right arrow to highlight SETUP • Use down arrow to highlight PASSWORD, select ENTER • Enter new password and retype
Before handing the Fusion to your student, take time to consider… • Positioning • Support • Can the student see the keyboard? • Is there a glare on the LCD from classroom lighting? • Should the device be positioned on an angle or non slip surface?
Using the Fusion to Write • Creating, Deleting and Accessing Files • Editor Keys • Text to Speech • File sending • Device Features (spell check, thesaurus, score, split screen, word prediction, cut-copy-paste, writing checklists, keyboard instruction program)
Creating, Deleting and Accessing Files • In the desktop, FILES, FOLDERS and PROGRAMS are listed. FILES are located to the left FOLDERS are in the middle PROGRAMS are to the right
TIP: • To create a new File, select N • To create a new Folder, select F • To see menu options, select MENU
Creating a new File • Once you are in the desktop, you will need to create a new File. To do this…. • Select “N” and the Fusion will ask you to name your new File. • Type the File name and press ENTER • A blank screen will appear, the Fusion is now ready for you to type
Assignment: • Write a paragraph about what you did over your three day weekend. • Create a “test” file-just one or two sentences
Exiting you File • To exit your file, • Press ESC key • Your file will automatically save
Opening a File • To Open a File • Go to your desktop • Use the arrow keys to highlight desired File • Select ENTER
Deleting a File • To Delete a File • Highlight the name of the File • Select the “Del” key in the lower right corner of the device • Respond to the warning for certainty
Editor Keys • Refer to the “Editor Keys” guide in the Operation Guide • Arrow left moves cursor one character back • Arrow right moves cursor one character forward • Ctrl-left moves the cursor one word back • Ctrl-right moves the cursor one word forward • Arrow up/dn moves the cursor one line up/down • Page up/dn moves the cursor one page up/down • Home moves the cursor to start of line • End moves the cursor to end of line
Ctrl-Home moves the cursor to beginning of text • Ctrl-End moves the cursor to end of text • Shift-Ctrl-Home highlights all text to the left of cursor • Shift-Crtl-End highlights all text to the right of cursor • Backspace erase character to left of cursor • Delete erase character to right of cursor • Ctrl-C copy selected text to clipboard • Ctrl-X cut selected text to clipboard • Ctrl-V paste clipboard to text at cursor
Text to Speech • If your Fusion has the Text-to-Speech feature (TTS) feature, you will need to plug in headphones, ear buds or an external speaker to use. • To use, type a sentence and select SPEAK • Prior to using, you will need to select how you would like the program to speak
Selecting the Fusion to SPEAK • 1. Open your Student Desktop • 2. Open your File • 3. Select MENU • 4. Use the right arrow to highlight SPEECH • 5. Use the up/down arrows to select the desired setting: • Auto sentence • Word • Letter
File sending • To send a File directly to your computer using the Infrared feature, you will need the Fusion Infrared receiver • 1. Plug in the receiver into your computer’s USB port • 2. Open a new document using a word processing program on you computer • 3. Open the document that you are going to send on you Fusion • 4. Place the Infrared window (located on the top middle of your Fusion) next to the Infrared Receiver • 5. Select and SEND (top row, next to ON/OFF) key on your Fusion
Device Features • While in your File, many features and programs are available. • These features are listed in blue on the top row of the keys on your keyboard
Device Features : Spell Check • 1. Open your File and input text • 2. Select Spell Check button on top row • 3. Words spelled incorrectly will be highlighted • 4. Fusion will offer a list of possible words to choose from on the bottom of the screen • Use arrow to highlight correct spelling and press ENTER, or • Press ESC once to correct your own spelling
5. To skip to the next word, select the Spell Check again • 6. If your Fusion has text-to-speech, spelling corrections can be heard as they are highlighted • 7. Press ESC to exit
Device Features: Thesaurus • 1. Open your File and input text. • 2. Select a word by placing your cursor within it. • 3. Select the Thesaurus key. • 4. If there are synonyms available, they will be listed at the bottom of the screen. • 5. Use the arrow keys to find the word you would like to use, select ENTER. • 6. Select the Thesaurus key multiple times to see other options. • 7. If your Fusion has TTS, synonyms can be heard as they are highlighted. • 8. Press ESC to exit.
Device Features: iScore writing program • iScore is a writing program that assists students in finding rough grade and readability levels for their compositions. • As students become more elaborate in their writing, the iScore increases. This provides instant feedback to motivate students to improve their writing skills.
1. Open your File and input text. • 2. Press the Score button (on top row). • 3. The iScore will generate totals for the number of words, sentences and words per sentence within the File. In addition, an iScore will be provided. • 4. This program also provides students with suggestions for improving their writing. • 5. Press ESC to exit the Score program.
Device Features: Split Screen • The purpose of the Split Screen program is to increase a learner’s vocabulary skills. • Teachers can add the words that the learner is required to use within his essay. • Once the word is used, it is checked off on the list. • There are two ways to add vocabulary to the split screen programs: • Using the Fusion OR • Using your Computer
Split Screen: Using the Fusion • 1. Open a text document and select the Split Screen Button. • 2. A box will appear, type the target words to be present in your split screen and press ENTER • 3. When finished typing words, select ESC. • 4. To hide the word list, select ESC again • 5. To increase the Split Screen list, press the Split Screen button to move the cursor, then select the INS key (bottom row near the space bar). • 6. To delete words from your Split Screen, select Split Screen to open your list. • 7. Use the up/down arrows to highlight the word you would like to delete and press DEL. • 8. Select Y if you want to delete, N if you do not.
Split Screen: Using your Computer • 1. On your computer, open a word processing program. Word Pad is the preferred program, however, if you do not have this program, be sure to save your document as a .txt file. • 2. Create your list. Be sure to begin the list with the following: ***<vocab>*** • 3. Save the .txt file to a thumb drive. • 4. Insert the thumb drive into the Fusion, and open your student desktop. • 5. Select the MENU button and use the up/down arrows to highlight Load file from CF. Select ENTER • 6. Choose the desired List file using the up/down arrow keys and press ENTER. • 7. To view the list, Open the file an select Split Screen
NOTE: • Before creating your list on your computer, you can insert a sentence s/a “Be sure to put each of these words into your document.” This sentence must appear before the ***<vocab>***
Device Features: Word Storm Word Prediction • Word Storm has many features that other word prediction programs do not have. It learns new vocabulary, corrects phonetic misspellings, auto spaces, auto capitalizes and reads back to the student (information obtained from the Fusion Operation Guide). • To Set up the features of your word prediction, open a document and select MENU. Use the right arrow to highlight PREDICT, and select ENTER. Use the down arrow to select PREDICTIONS SETUP and ENTER.
Word Storm Word Prediction, cont. • 1. Once in a student desktop, open a document. • 2. Select the Predict key and arrow down to the word prediction. • 3. Predicted words will appear on the bottom of the screen once the student begins to type a word. • 4. To select the desired word, choose the number listed next to that word. • 5. To exit Word Storm, select ESC.
To add new words to the prediction list: • 1. Turn on the Fusion, the Current Student window should appear. • 2. Select Ctrl/Alt P, and enter super password. • 3. The words, “Global Data” should be highlighted, select the ENTER key. • 4. There should be a file named “phonetic” highlight it and select ENTER. • 5. Type in the misspelled word, the equals sign, and the correctly spelled word. Make sure that you leave a space on either side of the equals sign. • 6. Next, we need to indicate when WordStorm will present the correct spelling. Type the misspelled word, and add a |(to get this symbol, press shift and \ button simultaneously). For example, type, “hu|rd= heard.” • 7. Select the ESC key twice to return to Super User mode
Passcodes • 1. alpha • 2. bravo • 3. charlie • 4. delta • 5. epsilon • 6. foxtrot • 7. george • 8. hello • 9. india • 10. john • 11. kelly • 12. lima • 13. monkey • 14. nitro • 15. oxford • 16. pico
Device Features: Cut-Copy-Paste • 1. Simultaneously press and hold the SHIFT key and the right and left arrow keys to highlight your text. • 2. Select the MENU button. • 3. While in the EDIT menu, use the up/down arrows to highlight cut, copy or paste. • 4. Select ENTER • 5. Position cursor to paste.
Device Features: Writing Checklists • The Advanced Keyboard Technologies has created an accessory to the Fusion called the Good Writing Checklists. • These checklists provide components to a variety of different types of written compositions and these checklists assist students in becoming more responsible for correcting their own work.
To open the Fusion Writing Checklist: • 1. Open your student desktop. • 2. Open a File. • 3. Select the MENU button. • 4. Use the right arrow to highlight the Setup key. • 5. Be sure that the Select Writing Checklist is highlighted and press ENTER. OR- In place of steps 4 and 5, select Alt+C. • 6. Use the right and left arrows to select the writing checklist you wish to use. • 7. Once this checklist is present in the “Select Writing Checklist” box, you can exit the menu by selecting ESC. This checklist will not appear on you Fusion document until you send it to your computer. • 8. If you do not want a checklist on your document, follow the same steps and select <None>.
Checklist available: • Good writing checklist • Multi-paragraph Essay • NC-Narrative Checklist • NC_Nonfiction Checklist • Perfect Paragraph • Persuasive Essay • Response to Literature • Six Trait Writing • Writing Prompts
Note: • You may wish to create your own checklist specific to a student’s needs. • See Fusion Smart Sheets and/or Operation Guide for instructions on creating your own checklist.
Device Features: Perfect Form-keyboarding instruction program • Perfect Form is a keyboard instruction program offered directly on the Fusion. There are 120 mastery-based lessons, teaching such lessons as home row finger placement and proper shift key use. • To see a student’s score, select the SCORE key while within the lesson. • To open Perfect Form: • 1. Open you Student desktop • 2. Select MENU • 3. Use the right arrow to highlight APPS • 4. Use the down arrow to highlight Perfect Form and press ENTER
Assignment: “What I did over the 3 day weekend” • IEP objective: Using a portable word processor the learner will write a one-paragraph story. It will include: • 1. a topic sentence • 2. supporting sentences • 3. ending sentence that supports the theme • 4. accurate spelling
Fusion Resources: • www.myinfinitec.org • www.casedupage.com (go to support services, then assistive technology team) • The Writer Learning Systems, PO Box 186 Pasa Robles, CA 93447-186, 1-800-797-7121, www.writerlearning.com
Presentation references: • The Infinitec website (www.myinfintec.org) • Infinitec “Smart sheets” • Fusion Operation Hot Sheets