Download
1 / 22
260 likes | 516 Views
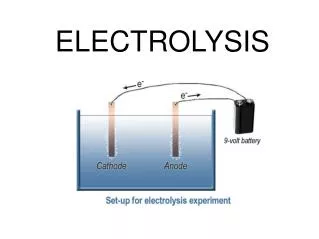
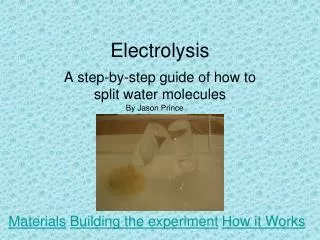
Electrolysis. By Jason Prince. A step-by-step guide of how to split water molecules. Materials. Building the experiment. How it Works. Materials. 4 ½”x1’x6 ¾ ” plastic tub (approximate) 2 2 ½”(height)x 2 ½”(mouth diameter) funnels (exact measurements) 2 6-volt lantern batteries

E N D
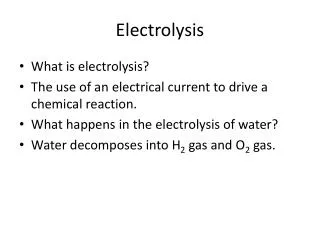
Electrolysis By Jason Prince A step-by-step guide of how to split water molecules Materials Building the experiment How it Works
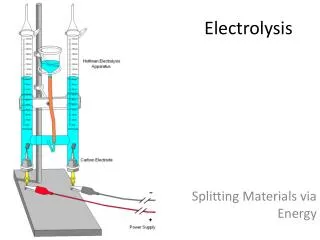
Materials • 4 ½”x1’x6 ¾ ” plastic tub (approximate) • 2 2 ½”(height)x 2 ½”(mouth diameter) funnels (exact measurements) • 2 6-volt lantern batteries • 2 Electric clips • 2 Foil triangles 1 ½” x 1 ½” x 1 ½” • 2 Thin glass* containers, no longer than 4” • ¼ cup Washing Soda, detergent section • Build the Experiment Back to Opening To Building the Experiment To How it Works Cautions *Read How it Works-Answers to find out why only glass works
Tub Back to Materials Next Materials
Funnels Previous Materials Back to Materials Next Materials
Batteries (and wires, don’t connect) Previous Materials Back to Materials Next Materials
Electric Clips (and wires, connect) Previous Materials Back to Materials Next Materials
Foil Previous Materials Back to Materials Next Materials
Glass Container Previous Materials Back to Materials Next Materials
Washing Soda Previous Materials Back to Materials Next material
You Are Ready You now have all the materials, so you are ready to build the experiment! Previous materials Materials
1: Read Cautions 2: Gather materials 3: Make all battery connections 4: Make gas collectors 5: Put gas collectors under funnels 6: Pour ¼ cup washing soda into tub 7: Mark tub three inches above bottom 8: Add water 9: Fill the glass containers with water and then, upside down and NO GAS IN THEM (see Cautions and How it Works-Answers), put them over the funnels 10: Connect the batteries 11: Observe 12: Put the gases into action 13: See how it works Building The Experiment Back to Opening Back to Materials To How it Works
Battery Connections Using wires, connect batteries in a parallel circuit. Do not connect one of the electrical clip wires. Make sure to curl the ends of the wires around the battery contacts. White: Electrical clip Green/Black: battery hookup + + _ _ To electrical clip Back to Building The Experiment Next step
Make gas generators Now you will make a component called a gas generator. It is simple: stick the aluminum foil in the electrical clip as shown. Previous step Back to Building the Experiment Next step
Put gas collectors under funnels Now you have to slide the gas collectors under the funnels and tape the funnels down. This might be a little tricky. Tape at the arrows in figure one (this is what it looks like after the other one is installed). Figure two shows what it should look like when finished. Figure one Figure two Previous step Back to Building the Experiment Next step
Add Water Fill tub up to line with water, being careful not to disturb containers. Previous step Back to Building the Experiment Next step
Turn it On Keeping it straight, as in figure one, put the wire from the last electrical clip in the other contact of the same battery as the other electrical clip, as in figure two. The straight end allows you to easily disconnect this wire, turning it into the switch. To electrical clip, is switch + + _ _ To electrical clip Figure two Figure one Previous step Back to Building The Experiment Next step
Observe If done right, bubbles should appear in the glass container immediately. The time to fill up the glass container on the negative side (hydrogen) varies from five minutes to an hour. To fill up the glass container on the negative side (oxygen) takes twice as long. Find out why in How it Works-Answers. Also, you will notice that the clip and aluminum foil will dissolve. Here’s why. Ready! The first bubbles Making progress… The finished result Hydrogen Oxygen Previous step Back to Building the Experiment Next step
The Flammability of Hydrogen! Keeping it upside down, pull the glass container on the negative side out of the water. Hold it in one hand, still upside down, and move a lit match underneath it. It will make a pop, and you might see a flame shoot out underneath it, proving this is hydrogen. Do the same with the other container, except instead of a lit match, find something that will glow but does not have a flame. Previous step Back to Building the Experiment To How it Works
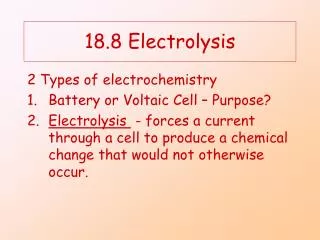
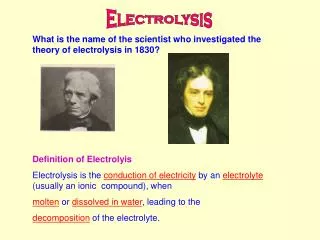
How it works If you have any questions, this section will tell you about how electrolysis works. If you would like to see how it works scientifically, look at The Science. If you would like to see the answers to some things you saw before, go to Answers. If one of these does not answer your question, try the other page. Back to Opening Back to Materials Back to Building the Experiment
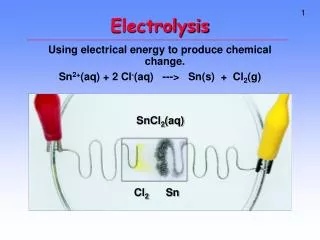
The Science This is how electrolysis works. In this electrolysis experiment, the electricity [with a little help of sodium carbonate (washing soda)] hits the water molecules, and makes the individual atoms fall away from each other. On the terminals, the gases gather. As soon as they are light enough to lift off, they do. The bubbles then rise up the funnels, and into the container to be collected. Scientists are currently using the hydrogen made from humongous electrolysis experiments to act as an alternative source of fuel. For more information, go to the Wikipedia Encyclopedia Back to How it Works To Answers
How it Works-Answers Materials, Glass Container-Q: Why does only glass work for a container? A: Being the smallest atom there is, hydrogen atoms will go in between the atoms and molecules of all other materials. This also explains why, if you leave the experiment around out of use, the bubbles of hydrogen on the inside of the funnel will move to the outside. Building the Experiment, No Gas-Q: Why can’t there be any gas in the container? A: Reason one: Hydrogen reacts strongly with several elements, including oxygen. When it touches one of these elements in perfect amounts, it explodes violently. That is how water is made. Hydrogen and oxygen meet in perfect amounts=Water, electricity (if contained), powerful explosion (if not done specially) Reason two: other gases make the oxygen and hydrogen impure. Observe-Q: Why does it take twice as long to fill up the oxygen as the hydrogen? A: On every water molecule, there is one oxygen atom and two hydrogen atoms, thus making oxygen fill up at half the speed of hydrogen. This also explains the “perfect amounts” in reason one of “Why can’t there be any gas in the container?” The perfect amount is a ratio of two parts hydrogen and one part oxygen, which is impossible to exist outside the glass container with a cap on. Observe #2-Q: Why do the clip and aluminum foil dissolve? A: They dissolve because, as the hydrogen and oxygen bubbles leave the terminals, they take a few molecules from it with them. Most fall off the bubbles, making a brown, suspended powder in the water. But if it stays on the bubble, they come up the funnels and stick to the sides of the glass containers. So, after continuous use, you might see a black substance form on the inside of the glass containers. The Science How it Works
Cautions This is extremely important! Do not place caps on glass containers that are on negative side! If oxygen gets in, they will explode promptly! (does not apply to positive side-oxygen) The best thing to do to keep the hydrogen in the glass container is just leave them upside down and avoid handling them. Return to: Materials Building the Experiment