Download
1 / 10
0 likes | 17 Views
This user manual serves as general guidance for UbiBot Smart Air Quality Sensor. Some features, which are marked with asterisk, are available only for specific versions. Please refer to the related instructions according to the version you purchased. By using this user manual, it will be easy for the user to operate the device. Download now!

E N D
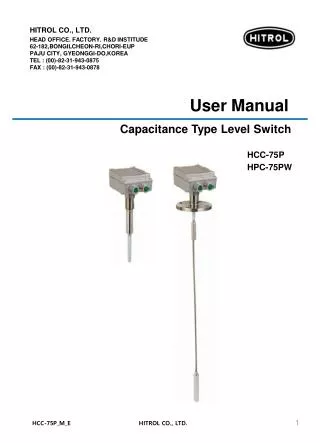
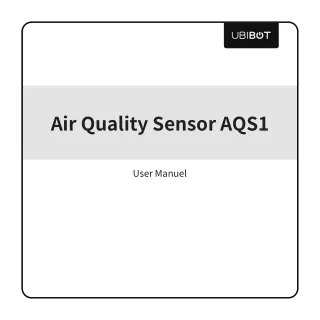
Air Quality Sensor AQS1 User Manuel
This user manual serves as a general guidance for all types of UBIBOT® Smart Air Quality Sensor. Some features, which are purchased. PACKAGE LIST marked with asterisk, are available only for specific versions. Please refer to related instructions according to the version you User Manual External antenna 2 1 3 User manual Device Note: The 4-prong data cable included with the device supports data transfer. Using other kinds of data cables to connect the PC tool may not work. INTRODUCTION 1. Basic Features Introduction Breathing Light Indicator Light Configuration Button Micro SIM card* Slot Type-C Port 12V Input RS485 A RS485 B 5V Output GND 1
2. Device Operations Setup Mode Press the configuration button for about 3 seconds until the indicator enter the setup mode. Under the power-on state, press the Configuration button once, the green If the red light is on, the data sending failure; if the red light is not on, the ously for 15 minutes) Double-click the Configuration button to turn voice prompts off or on. At light flashes red and green alternately and then release the button to Manual Data Synchronization light starts flashing at this time to connect to the network and send data. data sending success. (After power on, the green light will flash continu- Switch On/Off Voice Guide the same time, update the data collected by the device. Under the power-on state, press and hold the configuration button for restore the factory state. Breathing lamp can light up 4 colors: green, yellow, orange and red. Each The working status of the breathing lamp (always on, off, breathing, Reset to Default Settings about 15s until the red indicator lights up, then release the button to Breathing Light color indicates a corresponding value range of the data collected by AQS1. blinking) can be set through the platform. DEVICE SETUP OPTIONS Option 1: Using Mobile App Download the App from www.ubibot.com/setup, or search for 'Ubibot' on the AppStore or Google Play. We recommend you try to use the PC Tools in case the App setup fails, because the failure may be due to mobile phone incompatibility. The PC Tools is much easier to operate and suitable for both Mac and Windows. Option 2: Using PC Tools Download the tool from www.ubibot.com/setup. This Tool is a desktop app for device setup. It is also helpful in checking setup failure reasons, MAC address, and offline charts. You can also use it to export offline data stored in the device internal memory. 2
SETUP USING THE APP FOR WiFi CONNECTION Launch the App and log in. On the home page, tap "+" to start adding your device. Then please follow the setup for step by step guidance. in-app instructions to complete the setup. You can also view the demonstration video at www.ubibot.com/- New Device Via our app and web console (http://console.ubibot.com), you are able to view the readings as well as config- videos at www.ubibot.com/setup. SETUP USING THE APP FOR MOBILE NETWORK * Before you set up the device on mobile data, please check the APN information of the SIM card used for the UbiBot device. An APN (Access Point Name) provides the details your device needs to connect to mobile data through your network operator. APN details differ by network and you will need to get these from your network operator. With the device off, insert the SIM card as indicated in the picture. Launch the app and log in. Tap the "+" to start seng up the device. Please follow the in-app instructions to complete the setup process. Please note, the setup will fail if you don't have data allowance. ure your device, such as create alert rules, set data syncinterval, etc. You can find and watch the demonstration Micro SIM card* Slot Micro SIM 3
SETUP USING PC TOOLS STEP 1. Launch the App and log in. With the device switched on, use the Type-C USB cable provided to product ID and enter the device page. STEP 2. Click "Network" on the left menu bar. There, you are able to set up the device on WiFi for all the to continue. connect your device to the computer. The PC Tools will automatically scan and recognize the network models. For the SIM or Ethernet cable setup, please click on the corresponding button RS485 COMMUNICATION The RS485 communication function can be set through the platform. When it is turned on, the sensor will collect data every will be uploaded via RS485 after each data collection. The default is off. For more details, please contact your local distributor or online document. 4
DEVICE SPECIFICATIONS WiFi 2.4GHz, channel 1-13 Supports Micro SIM card (15 x 12 x 0.8mm)* Supports RS485 communication Flame resistant ABS Type-C (5V/2A), DC 12-24V/1A SIM Built-in memory: 300,000 sending data Optimal working conditions: -20 to 50℃, 5-95%RH φ128mm x 40mm Temperature Range: -20℃ ~ 60℃ Accuracy: 0.3℃ Range: 10% ~ 90% RH Accuracy: 3% RH Range: 26~126 kPa Humidity Atmospheric Pressure PM1.0/2.5/10 Range: 0~500 μg/m3 Accuracy: 10 μg/m3@0~100 μg/m3, 10%@100~500 μg/m3 Range: 0~65000 ppb TVOC eCO2 Range: 400~65000 ppm CO2 Range: 0~10000 ppm (400‒2000 higher-accuracy measurement range) Accuracy: 30 ppm ① After the device is powered on, the TVOC sensor needs 1 hour of self-calibration to measure accurately. ② The PM sensor needs 35-40 seconds for a single data acquisition, and the CO2 sensor needs 15 seconds. 5
FAQ 1. Device network configuration failure reasons ① Please check whether the WiFi account password is correct; ② Please check whether the router is working properly and the network connection is normal; ③ Please make sure the device has entered the WiFi configuration mode; ④ Please check whether the WiFi band is 2.4GHz and the channel is between 1~13; ⑤ Please check the WiFi channel width is set to 20MHz or auto mode; ⑥ WiFi security type: LD1 supports OPEN, WEP and WPA/WPA2-personal; ⑦ Poor signal strength, please check the WiFi or cell phone data traffic signal strength. 2. Reasons for failure to send device data ① Check whether the external power supply of the device is properly connected; ② Check whether the router is working properly; ③ If using the mobile data traffic provided by the SIM card* inside the device, you need to check whether the SIM card* is activated; if the SIM card* is activated, check whether the power supply of the device is normal; also check whether the amount of the mobile data traffic provided by the device SIM card* is sufficient for the data transfer. 3. Can the device be used in a network-free environment? The device can still work without a network, if you need to check the historical data, you can refer to the following methods: ① After monitoring in no network working environment, you can take it back to the previously configured WiFi environment or insert the SIM card and press the configuration button once to upload the data automatically; ② In the case of no network, connect to the computer through the USB cable, and export the data through the PC tool. 6
4. Deviation in temperature values after first configuration of equipment? ① The device has been configured for too long and the CPU working temperature is high; ② The device sends data too frequently, resulting in a temperature higher than 0.2~0.3℃; ③ Turn on the TVOC sensor or PM, CO2 and other sensors to collect too often will produce a certain tempera- ture rise. 5. Only part of the data is displayed on the platform after the equipment has been successfully connected to the network? Different sensors require different acquisition times. You need to click the Configuration button to upload manually, or wait for automatic uploading before all data is displayed. For more frequently asked questions, please visit www.ubibot.com and go to the "Community and Documen- tation" page. 6. The difference between CO2 and eCO2. Carbon dioxide (chemical formula CO2) is a chemical compound made up of molecules that each have one carbon atom covalently double bonded to two oxygen atoms. It is found in the gas state at room temperature, and as the source of available carbon in the carbon cycle. Equivalent CO2 (eCO2), also known as Global Warming Potential weighted greenhouse gas emissions (GWP), is a unit, that allows emissions of greenhouse gases of different strengths to be added together. eCO2 is estimat- ed concentration of carbon dioxide calculated from known TVOC concentration. TECHNOCAL SUPPORT The UbiBot team is glad to hear your voice of our profucts and services. For any questions or suggestions, please feel free to create a ticket in the UbiBot app. Our customer services representatives respond within 24 hours and often in less than an hour. You can also contact the local distribu- tors in your contry for localized service. Please go to our website to view their contacts. 7
PRODUCT MAINTENANCE INSTRUCTIONS Please always follow the instructions contained in this manual. Always mount the device on a stable surface. Keep away from acidic, oxidising, flammable or explosive substances. When handling the device, avoid using excessive force and never use sharp instruments to try and open it. WARRANTY INFORMATION 1. The warranty period for this product is one year from the date of purchase. The buyer is required to submit a valid proof of purchase. During the warranty period, free repair will be provided for any failure caused by the quality of the product under normal use. The mailing cost of the returned product is the responsibility of the sender (one way). 2. The following cases are not covered by the warranty: ① The product is out of warranty; ② product failure or damage caused by incorrect or improper operation not in accordance with the product use instructions, configuration instructions, and product maintenance instructions; ③ accidental or man-made damage to the product, such as exceeding the temperature and humidity range of the equipment, water-caused damage, including natural water, such as water vapor, etc., fall, abnormal physical force, deformation, cable breakage, etc.; ④ damage due to natural wear and tear, consumption and aging, etc. (including shells, cables, etc.); ⑤ failure or damage caused by unauthorized dismantling of the product without permission; ⑥ failure or damage caused by force majeure, such as earthquake, fire, lightning strike, tsunami, etc.; ⑦ other non-product design, technology, manufacturing, quality and other issues caused by the failure or damage. 8