Download
1 / 19
190 likes | 344 Views
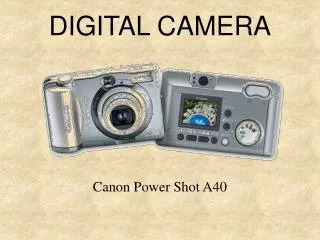
Vivitar DVR 410 Digital Video Camera . User Guide and Trouble-shooting Information. General Information. A classroom set of 20 cameras are available for teacher and student use. Capable of taking video, but recommend using for still digital photos .

E N D
VivitarDVR 410 Digital Video Camera User Guide and Trouble-shooting Information
General Information • A classroom set of 20 cameras are available for teacher and student use. • Capable of taking video, but recommend using for still digital photos. • To keep the cameras working optimally, it is important that everyone take good care of them and that there is accountability for their use. • Please take time at the beginning and end of class to monitor distribution and collection of the cameras.
Signing Cameras In and Out • Each camera is numbered. Students should write their name next to the camera number they are taking. • Remind students to return the cameras to the same numbered slot as the camera upon return. • ADD PICTURE OF SIGN OUT SHEET HERE
Preparing the Camera for Use – Installing Batteries Insert the batteries into cameras: 1. Slide the battery cover on the front of the camera in a downward direction to open the cover. 2. Insert the batteries with the correct polarity (positive pole/negative pole) as appears in the battery compartment. 3. Replace and slide the battery cover up to close.
Button Functions • Menu - open menus of Camera mode, Video mode, and Playback mode . • Right and Left button - zoom in and out in camera mode and of the photos in playback mode. • Up and Down button - go to previous or next photos/videos in playback mode or when in Menu mode use to select the submenu option. • OK/Shutter - take photo/start or stop to record video clips or play and pause videos in Playback mode. • Mode - shift between Camera, Video, and Playback modes.
Starting the Digital Video Camera • Press the Power button on the side of the camera to power on the camera. • The LCD will light up. • Video mode will appear by default. • Change camera mode to take still digital pictures.
Changing the Camera Mode There are 3 camera mode options – video, camera, and playback. • Press the Mode button to change options - the icon of the selected mode will appear on the LCD. • Picture mode shows a yellow camera at the top left of the screen.
Camera Mode - Taking Photos 1. Line up desired object with the LCD screen. 2. Press the rightbutton to zoom in and the left button to zoom out from the object. 3. Press the OK/Shutter button to capture and save your photo to the memory card. 1 3
Camera Mode – View Photos • Press the Mode button to change options - the icon of the selected mode will appear on the LCD. • Playback (view) mode shows a yellow triangle at the top left of the screen.
Transfer Pictures to the Computer 1. Push built-in USB connector out using button on side (USB comes out of the top) or lift it out of the side (there are two different versions of the camera). 2. Connect the USB port to the computer. 3. A pop-up box will open, but “x” out of it. 4. Go to desktop and double click on “My Computer”. 5. Go to Removable disk F: 6. Click on the DCIM folder. 7. Next, click on 100DSCIM folder. 8. Highlight picture files and right click “Send to” U/: drive. • ADD AN ACTUAL PICTURE HERE??
Delete or Format You can delete unwanted files or format the SD memory card inserted in the camera from the Playback mode. 1. In the Playback mode, search and select the AVI video or JPEG photo file you wish to delete by pressing the Up or Down buttons. 2. Press the Menu button. 3. The DELETE MENU will appear with 4 options: • EXIT – select Exit to close the menu • FORMAT - Format the SD memory card inserted in your camera • DELETE ALL- delete all files from the SD memory card in your camera. • DELETE ONE - delete the current file you selected. 4. Press the Up/Down button to select your choice. 5. Press the OK/Shutter button. 6. Confirmation screen will appear with “Yes” or “No” options. 7. Press the Up/Down button to select the option to wish to perform. 8. Select “Yes”, to either delete the photo(s) or format the card. Select „No‟ to cancel without deleting. 9. Press the OK/Shutter button to execute the command.
Playback Mode In this mode you can view, playback, delete and/or format the images that you captured with your camera with the SD memory card inserted. 1. Press the Mode button to set the camera to the Playback mode. 2. The last picture taken or video captured will appear on the LCD screen. 3. In this mode, you can view all the photos and play the video files taken with the camera and saved to the memory card.
Video Mode - Shooting Videos 1. Turn on your Digital Video Camera. 2. The first mode to appear is the Video mode. 3. The amount of recording time available for the resolution selected will appear on the LCD screen. 4. Compose your object with the LCD screen. 5. Press the OK/Shutter button to start shooting your video. The built-in microphone enables you to record your video with sound. 6. The elapsed time will begin to appear on the bottom right corner of the LCD screen. 7. Press the OK/Shutter button again to stop shooting and save your video as an AVI video file on the memory card. 8. The amount of time that you can capture videos depends on the size of the SD memory card inserted and the video resolution selected.
Capture settings - 3 photo capture options • Select the SINGLE option to capture single shots, • CONT option to take 3 continuous shots, and • SELF option to set the camera to the 10 second self-timer option to include yourself in the photo. In all instances, clicking the Shutter button will capture the photo(s). 1. Press the Menu button in the Camera mode. 2. Press the Up or Down button to select the CAPTURE option 3. Press the OK/Shutter button to open the submenu options. SINGLE, CONT or SELF 4. Press the Up or Down button to select the option you wish to choose. 5. Press the OK button to confirm and save the capture setting. 6. Press the Shutter button to capture the photo(s).
Speaker Setting You can choose to turn the camera`s speaker on or off. 1. Press the Menu button in the Video mode. 2. Press the Up or Down button to select the SPEAKER option. 3. Press the OK/Shutter button to open the submenu options. ON, OFF 4. Press the Up or Down button to select the option you wish to choose. 5. Press the OK button to confirm and save the speaker status on or off.
Language You can select the language in which the camera menus will display. 1. Press the Menu button in the Video mode. 2. Press the Up or Down button to select the LANGUAGE option 3. Press the OK/Shutter button to open the language submenu options. English, French, Portuguese, Spanish, German and Italian 4. Press the Up or Down button to select the option you wish to choose. 5. Press the OK button to confirm and save the language selected. 6. All the camera messages and menus will not be displayed in the language selected.
Troubleshooting Camera does not Power on. 1. The Batteries are inserted in the wrong direction. 2. The Batteries have insufficient power to power on. Camera does not take pictures. 1. The Memory is full. 2. The Memory card is not formatted correctly. ★Reload the batteries in the correct direction. ★Replace the batteries. ★Download the images to your computer and then delete all the images on the SD Card. ★Insert a new memory card. ★Format the memory card again or use a new card.